The demand for a guide on "How to quickly deploy ClawdBot (now rebranded as MoltBot)" has been skyrocketing.
We all know this Bot is a powerhouse, but many users get stuck at square one: How do I configure the server environment? How do I handle the API? What do I do if I see error logs?
Don't panic. This article is the definitive "hand-holding" tutorial. We will utilize the robust AtlasCloud API to break down this complex deployment into a few "foolproof" steps. Whether you are a seasoned developer or a complete beginner, follow this guide, and you’ll be up and running in no time.
Prerequisites
To get started, you will need three things:
- A Telegram Account
- An API Key
- A VPS (Virtual Private Server)
01 The Platform: Telegram
ClawdBot supports a wide array of platforms including WhatsApp, Slack, Discord, Signal, and Matrix. However, our #1 Recommendation is Telegram.
- Native Support: Telegram was built with Bots in mind. Its API is mature, offering perfect support for Markdown (code highlighting), buttons, and interactive menus.
- Simple Configuration: No complex developer portal applications required. Just chat with "BotFather" to get a Token in seconds.
- Superior UX: Instant synchronization across mobile and desktop, powerful search, and free unlimited history.
- Context Window: The chat interface is clean, mimicking a conversation with a real human.
02 The Brain: Atlas Cloud API
ClawdBot is essentially a "shell"—it handles messaging but doesn't "think." You need to connect it to a cloud-based AI model.
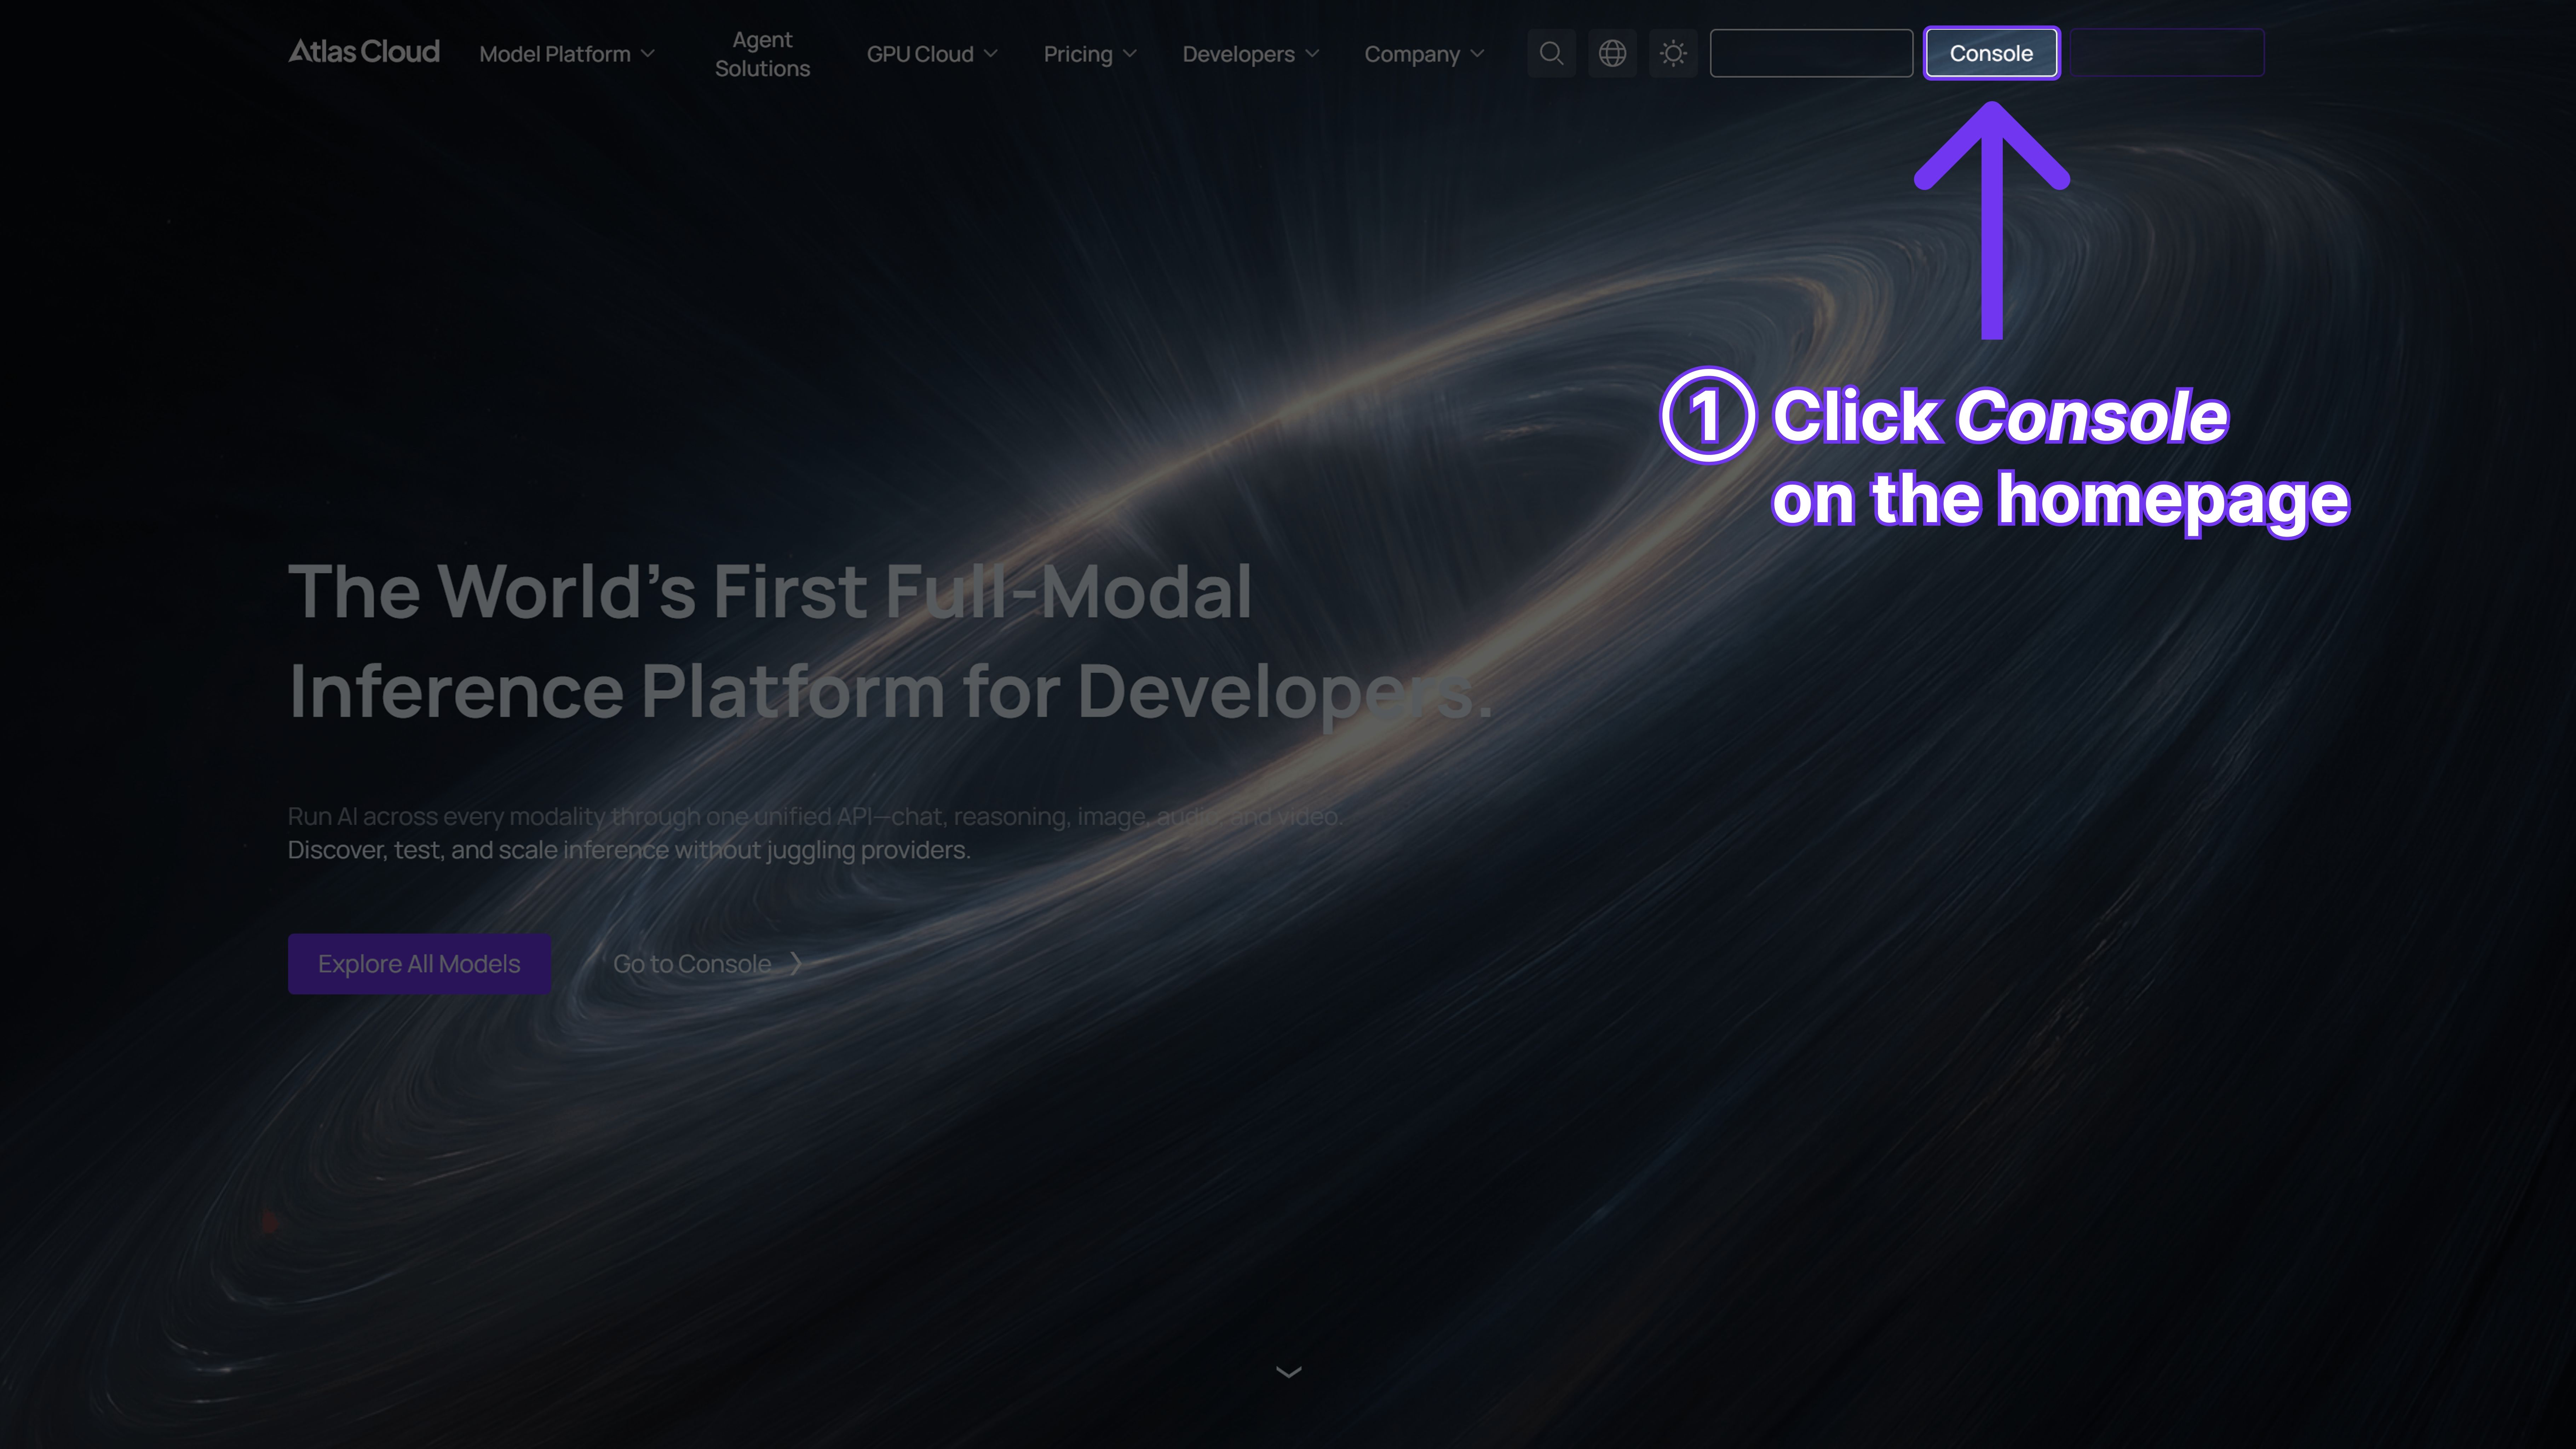
Instead of registering separate accounts and binding credit cards at OpenAI, Anthropic, or DeepSeek, we recommend Atlas Cloud (atlascloud.com). Atlas Cloud aggregates top-tier models like DeepSeek, Zhipu GLM, and MiniMax into a single interface. Plus, with DeepSeek v4 on the horizon, having an aggregator allows you to switch models instantly without changing your code.
Want to know more about DeepSeek v4? Check this blog.
Guidance: get API Key
Create an API key in your console and copy it for later use.
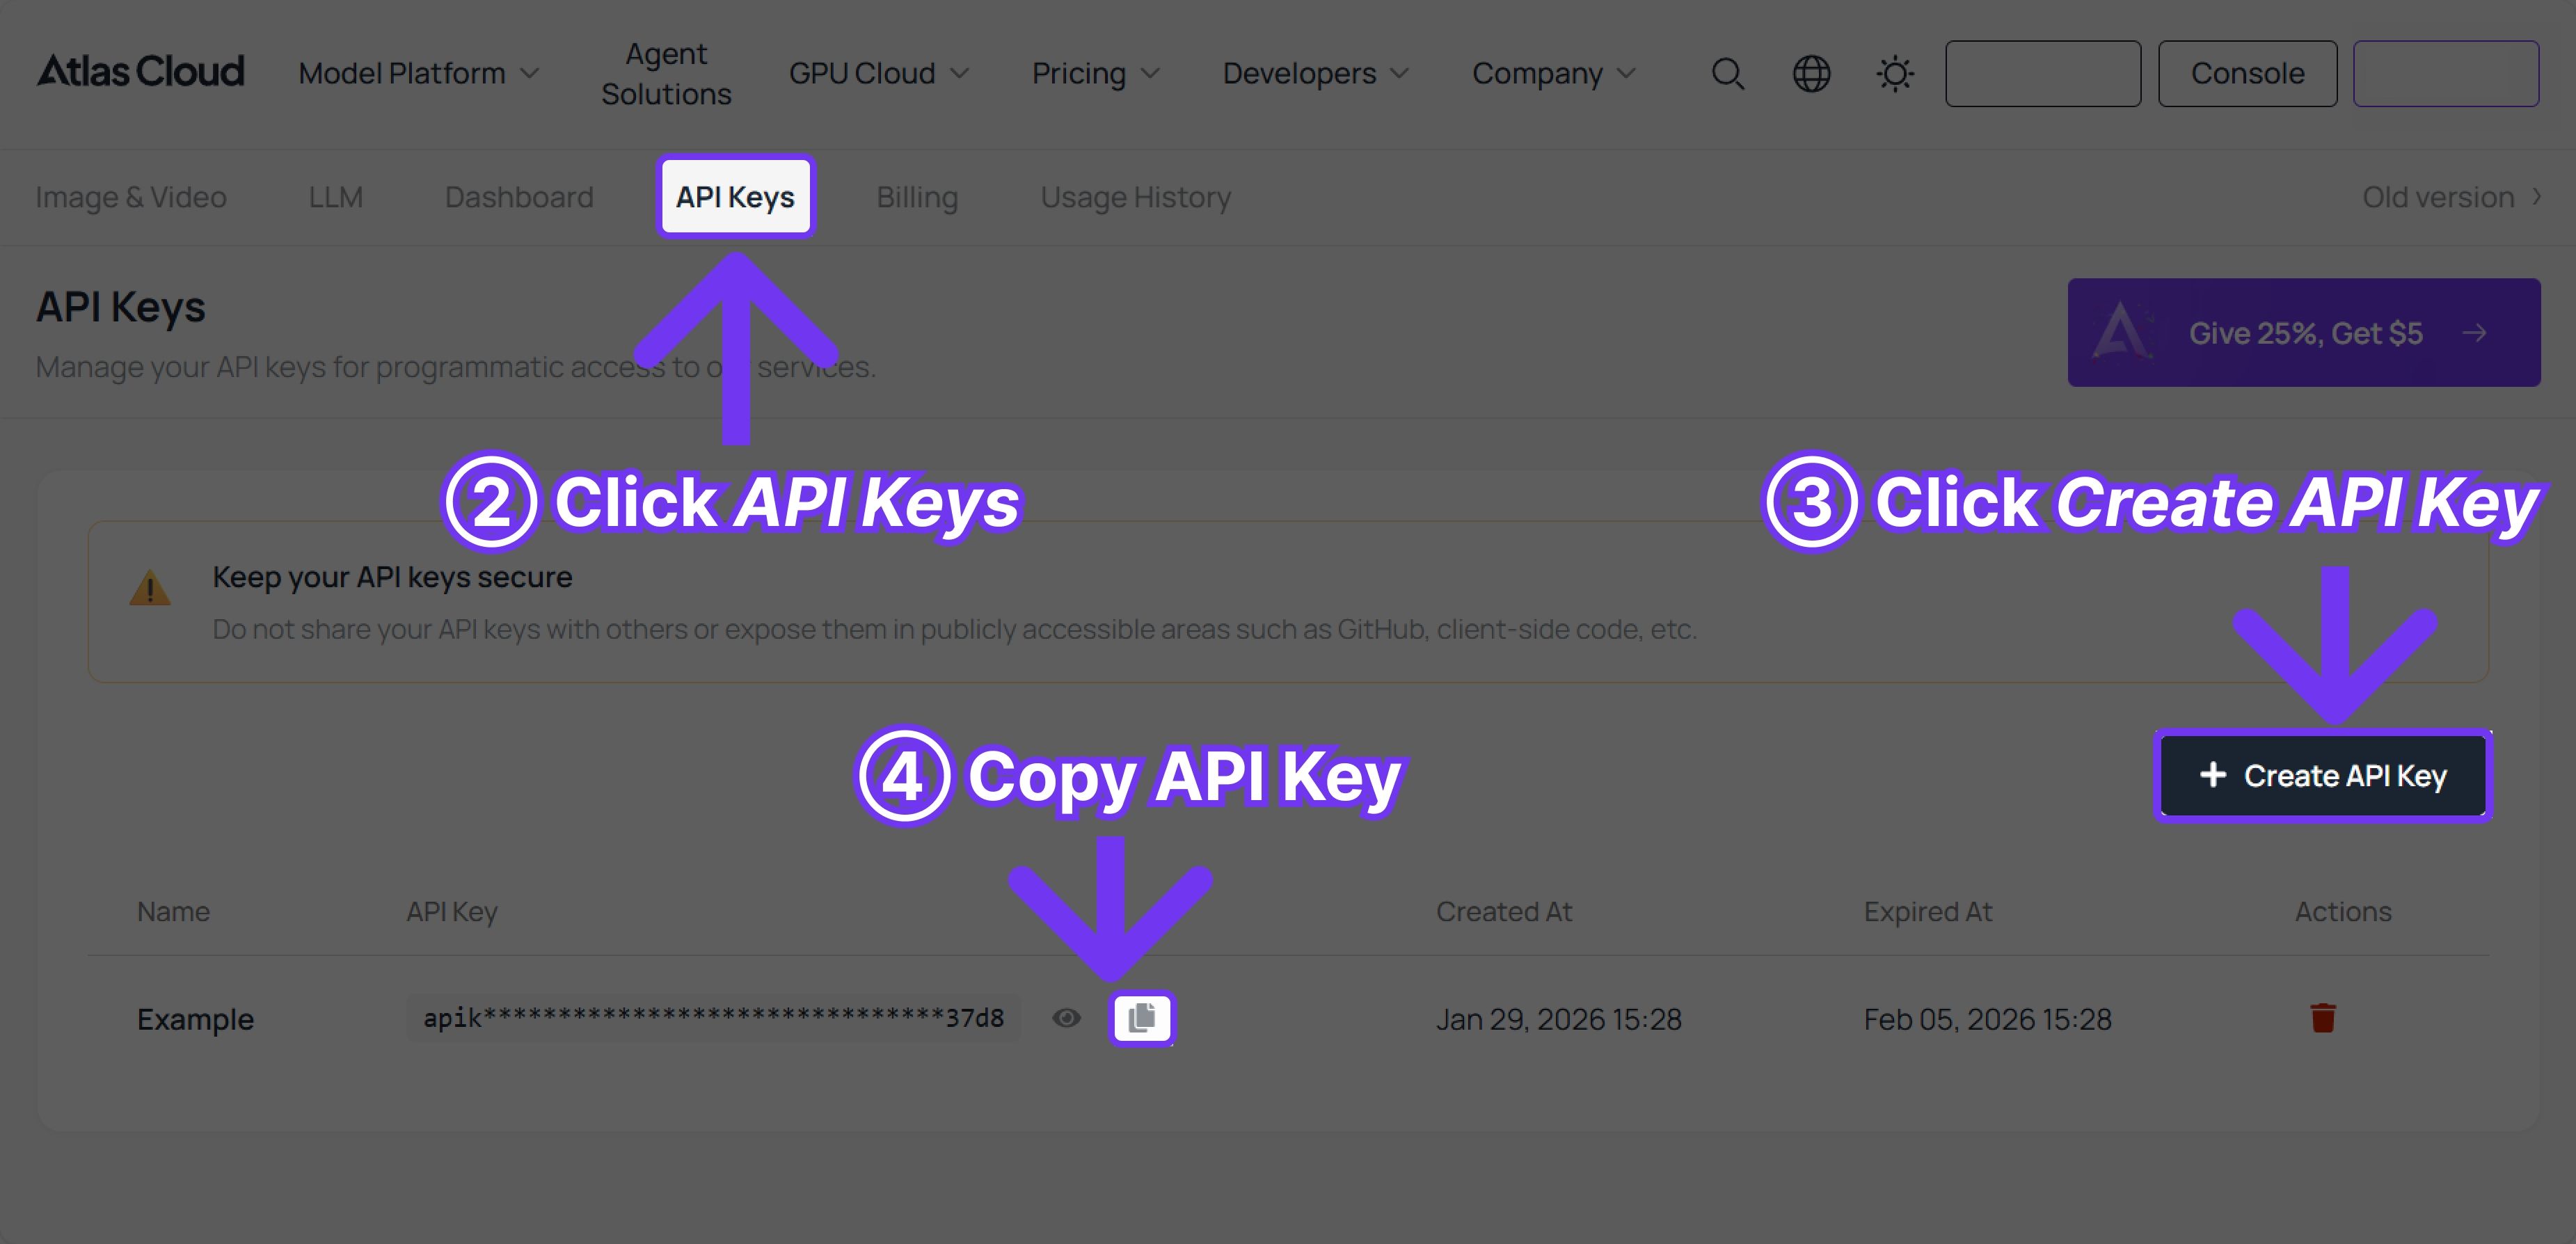
💡 Bonus: You get $1 in free credits just for registering. To put that in perspective, that covers 32 image generations on Nano Banana!
03 The Server: VPS
ClawdBot is software that must run 24/7 to listen for your messages. It also requires a stable network to handshake with both Telegram and the AI API.
For this, a Cloud VPS is the only reliable solution.
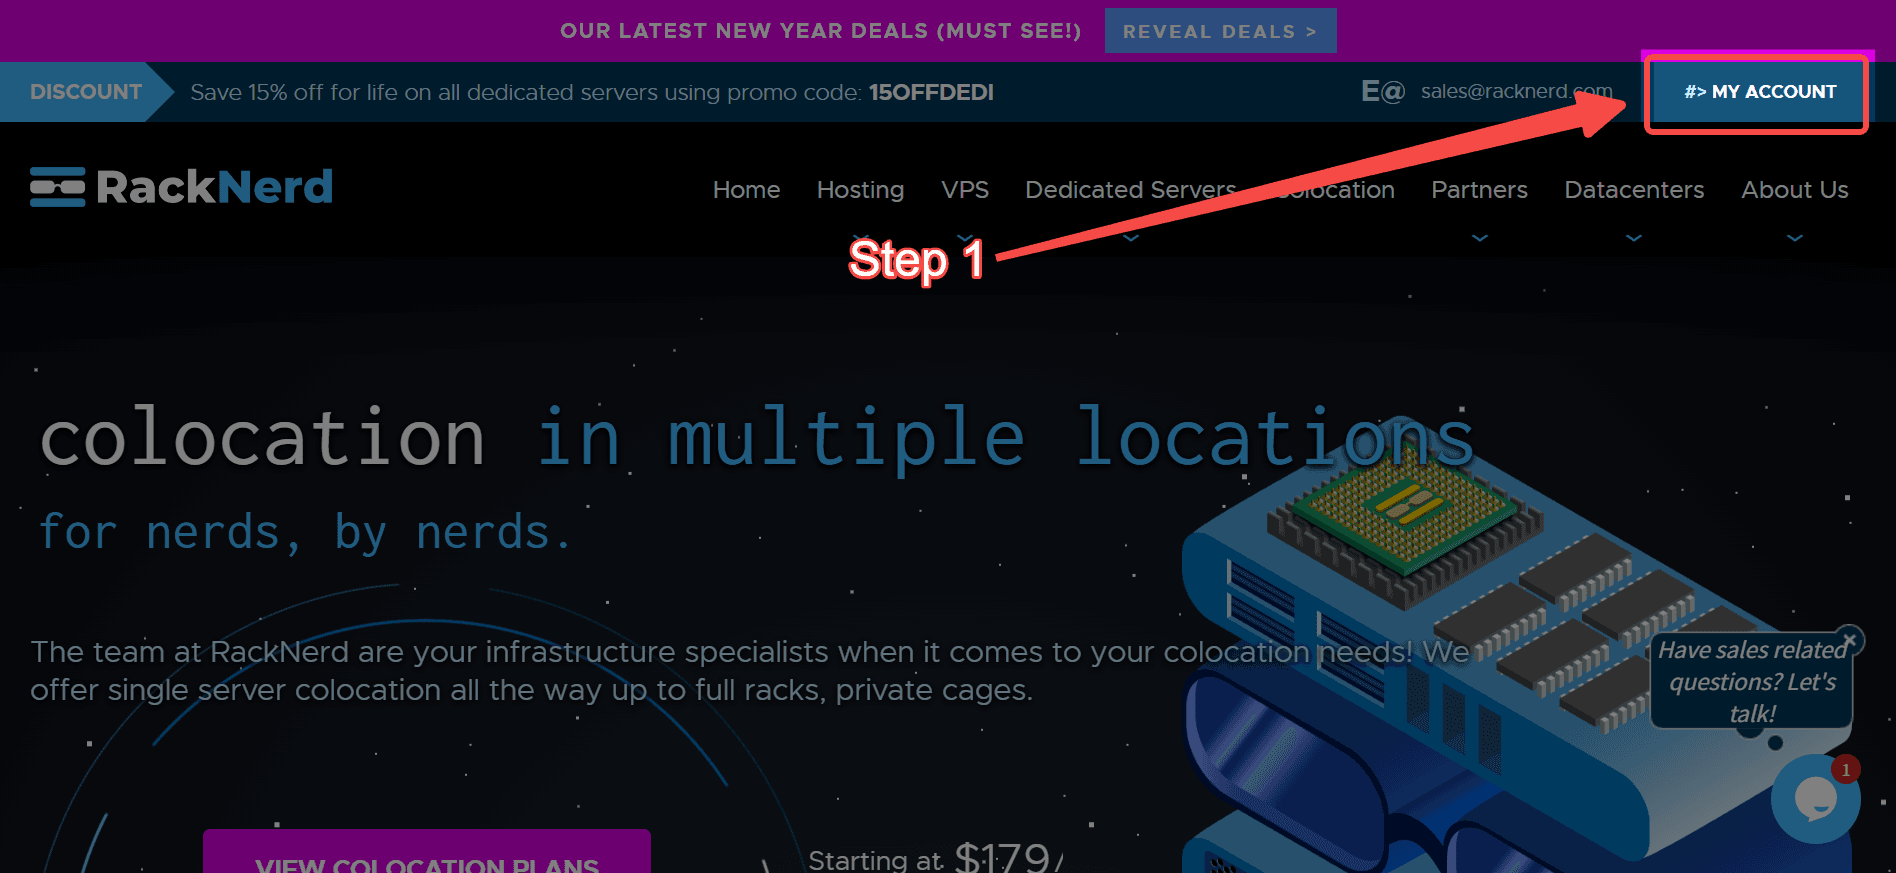
- Recommendation: RackNerd – Cost-effective and reliable.
Quick Purchase Guide:
-
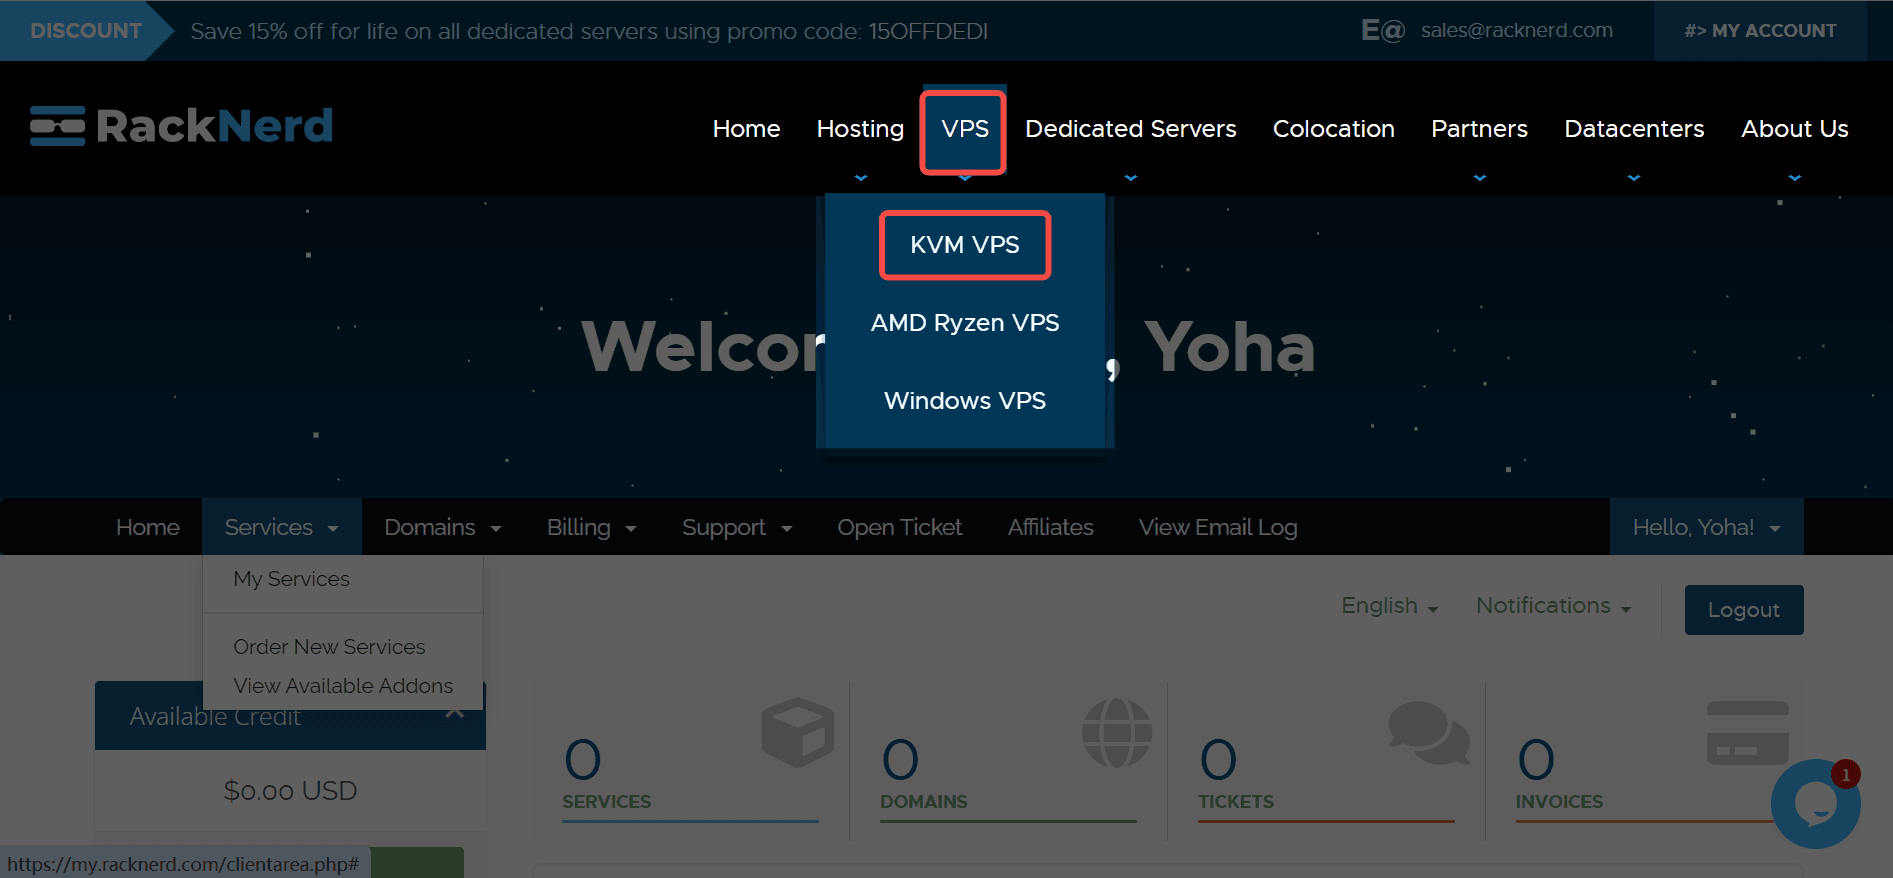
Go to the RackNerd website.
-
Click VPS - KVM VPS
-
Pro Tip: Ignore the standard pricing. Click the Pink/Red Banner at the top (usually "Black Friday" or "Special Deals").
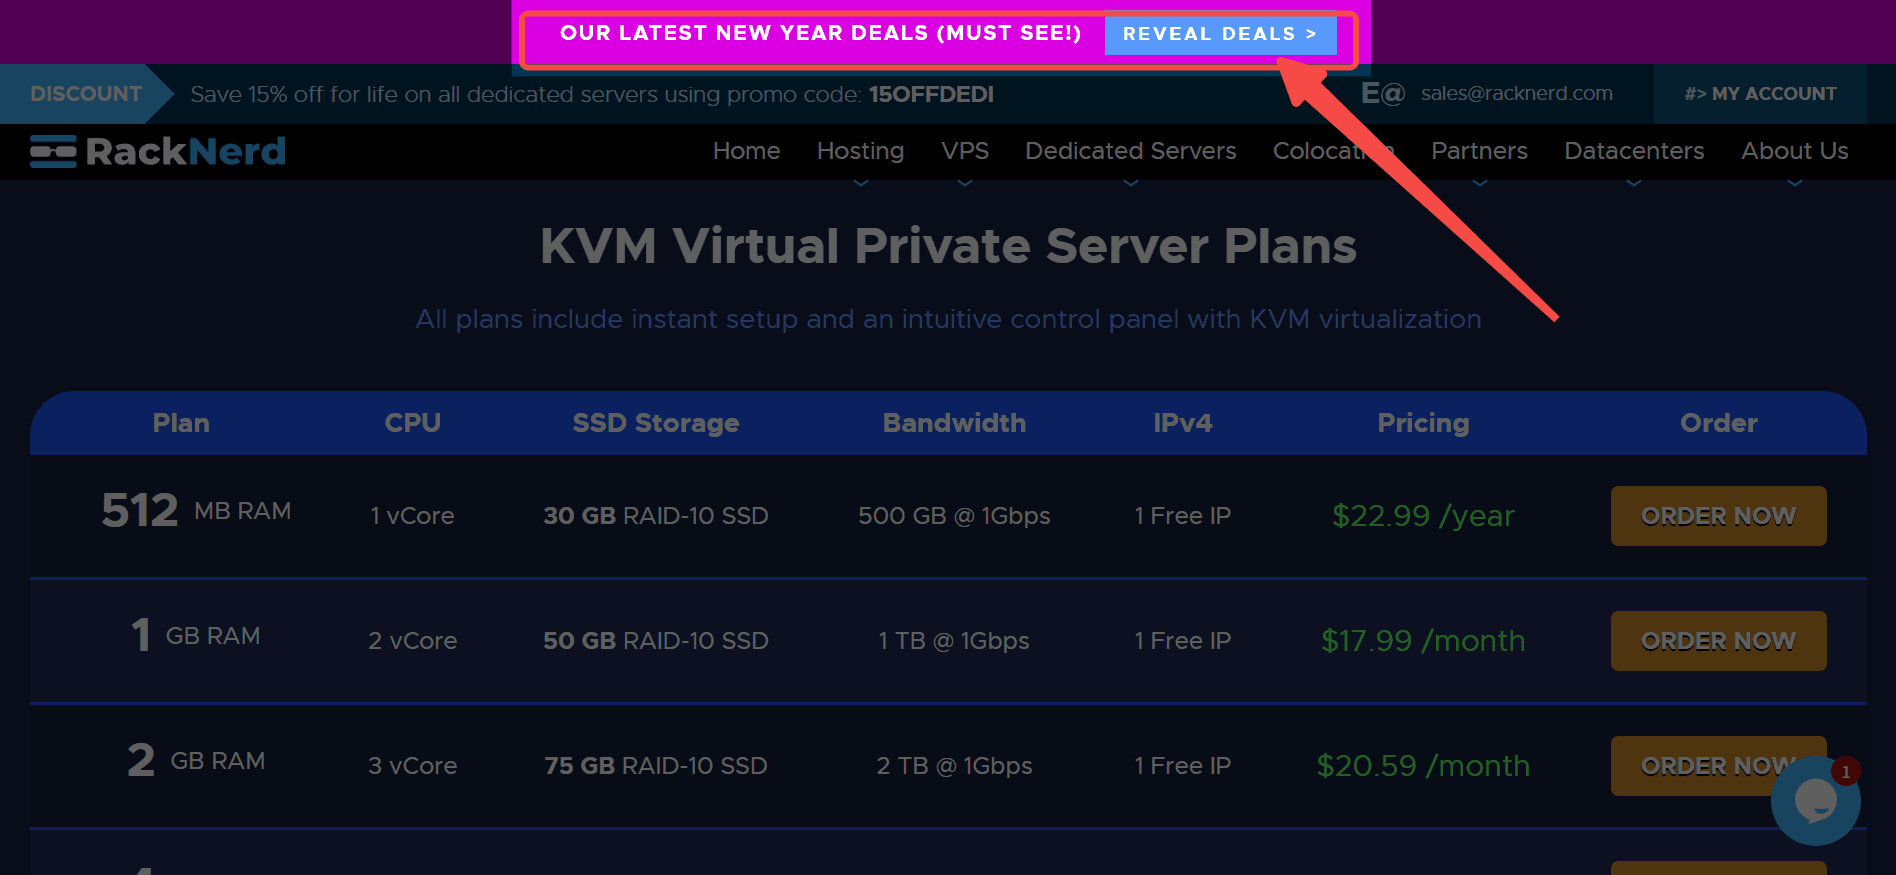
-
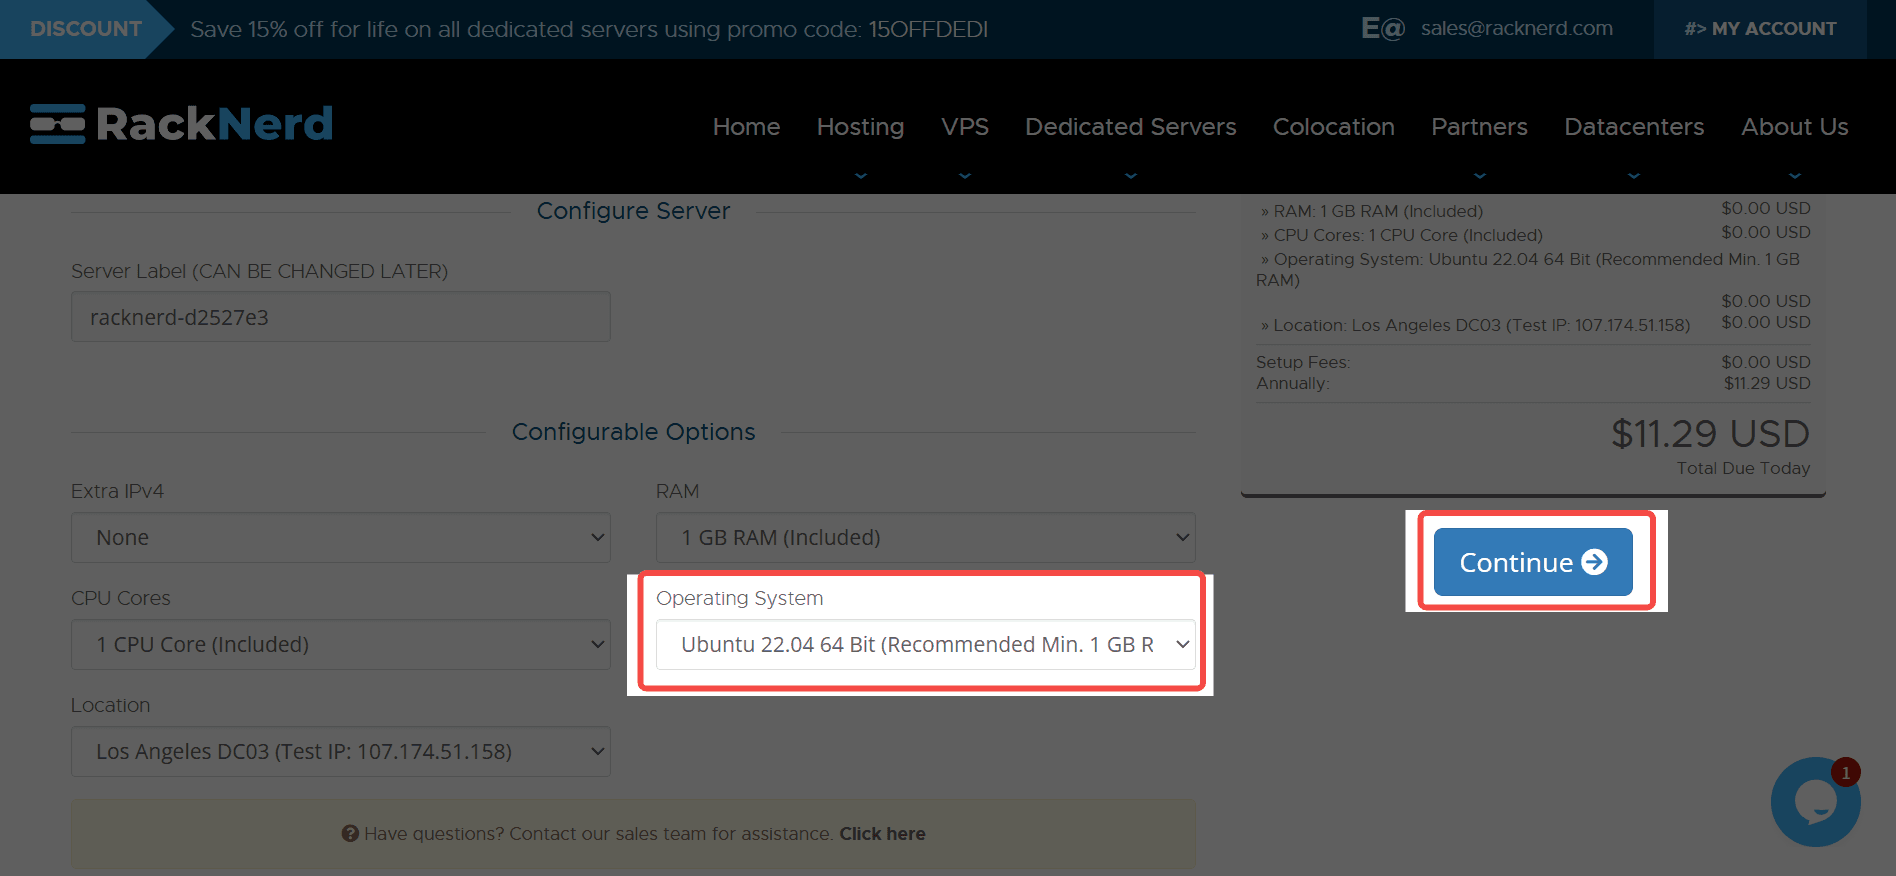
Select the 1 GB KVM VPS.
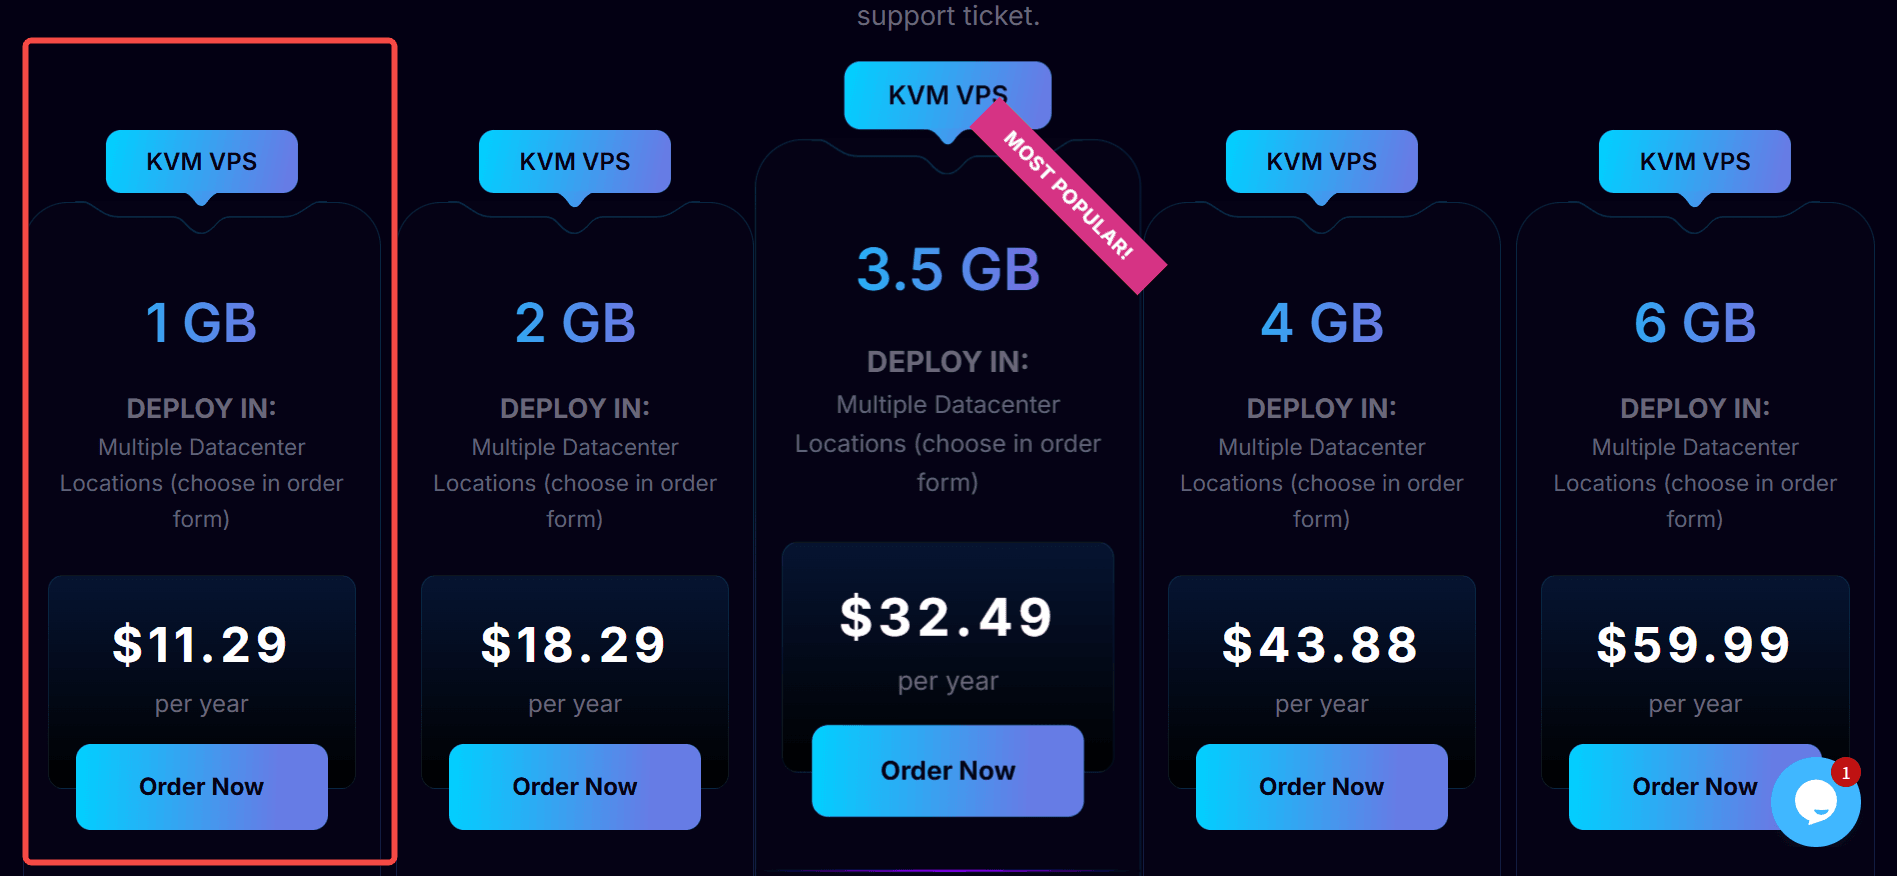
-
OS Selection: Change the Operating System to Ubuntu 22.04.
-
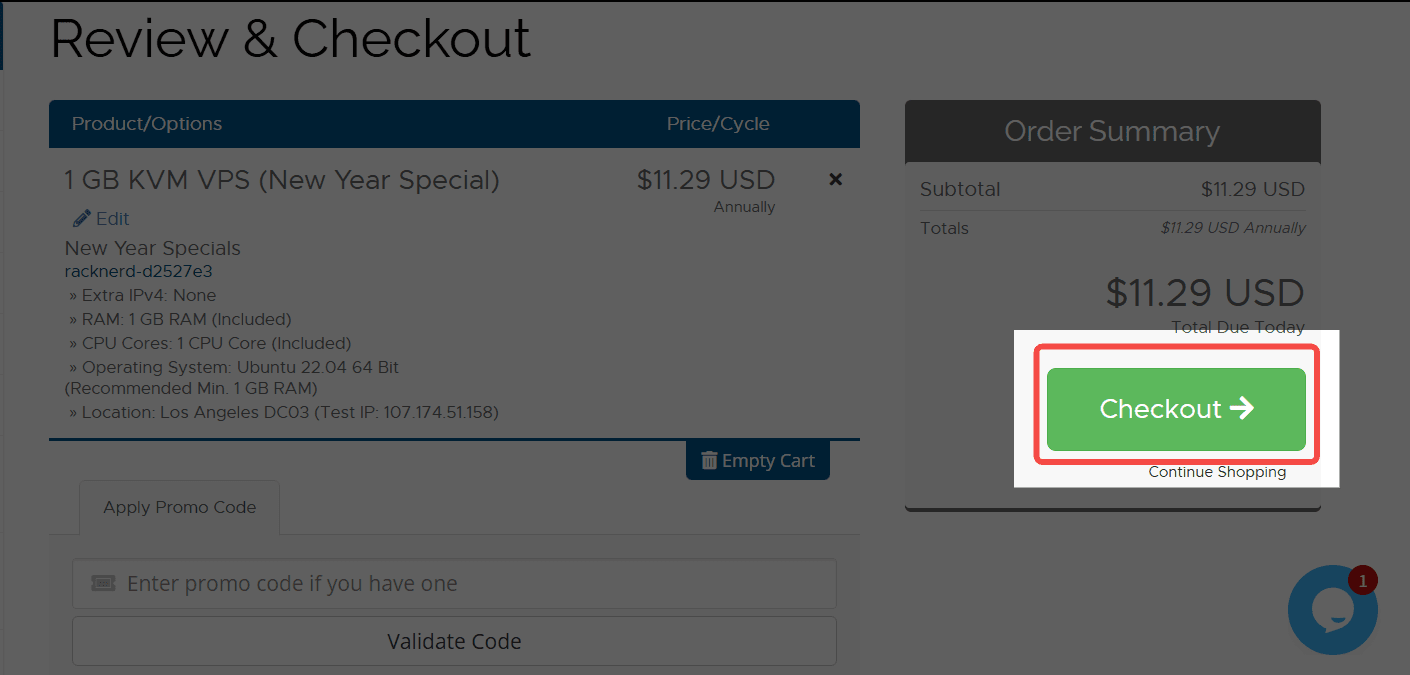
Click Continue -> Checkout.
-
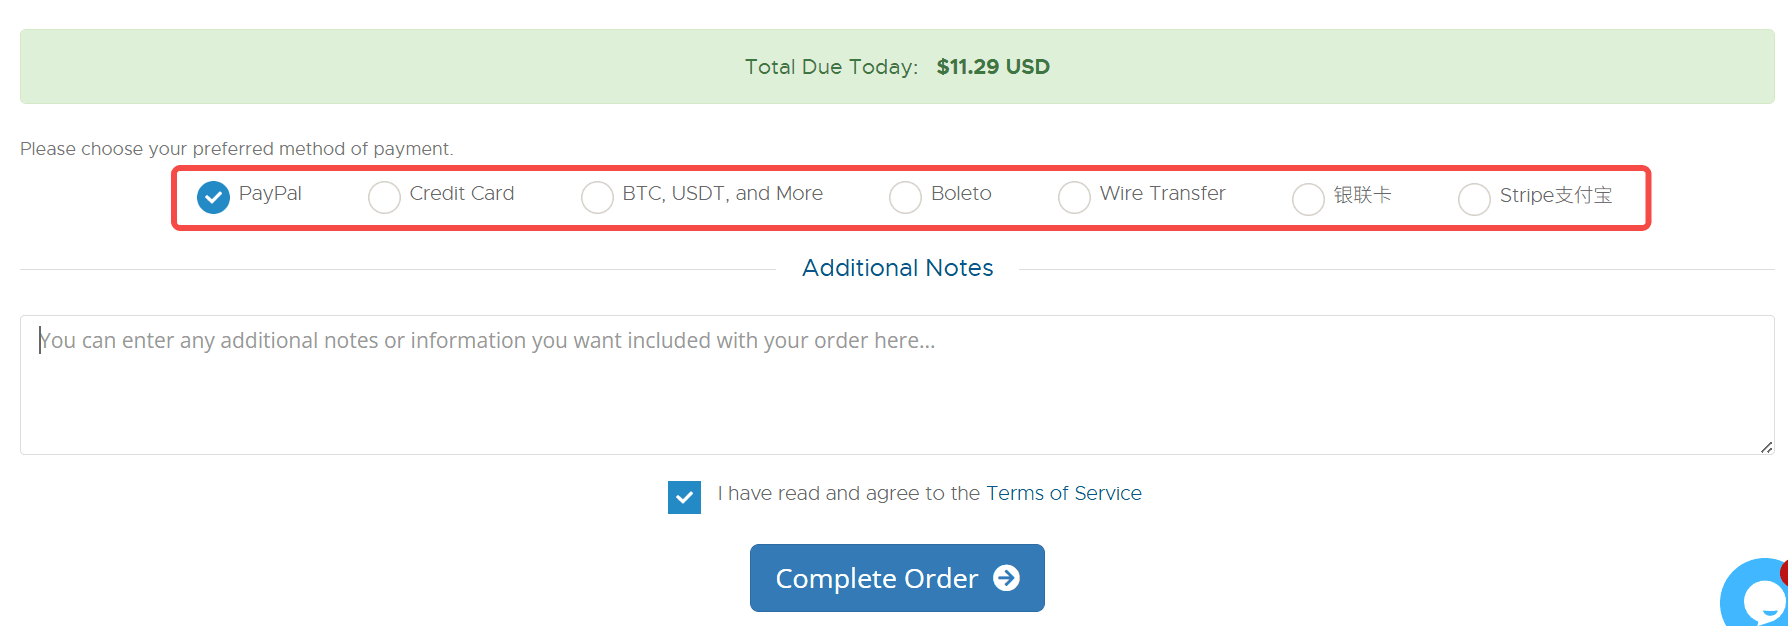
Pay via Credit Card, PayPal, or other ways.
-
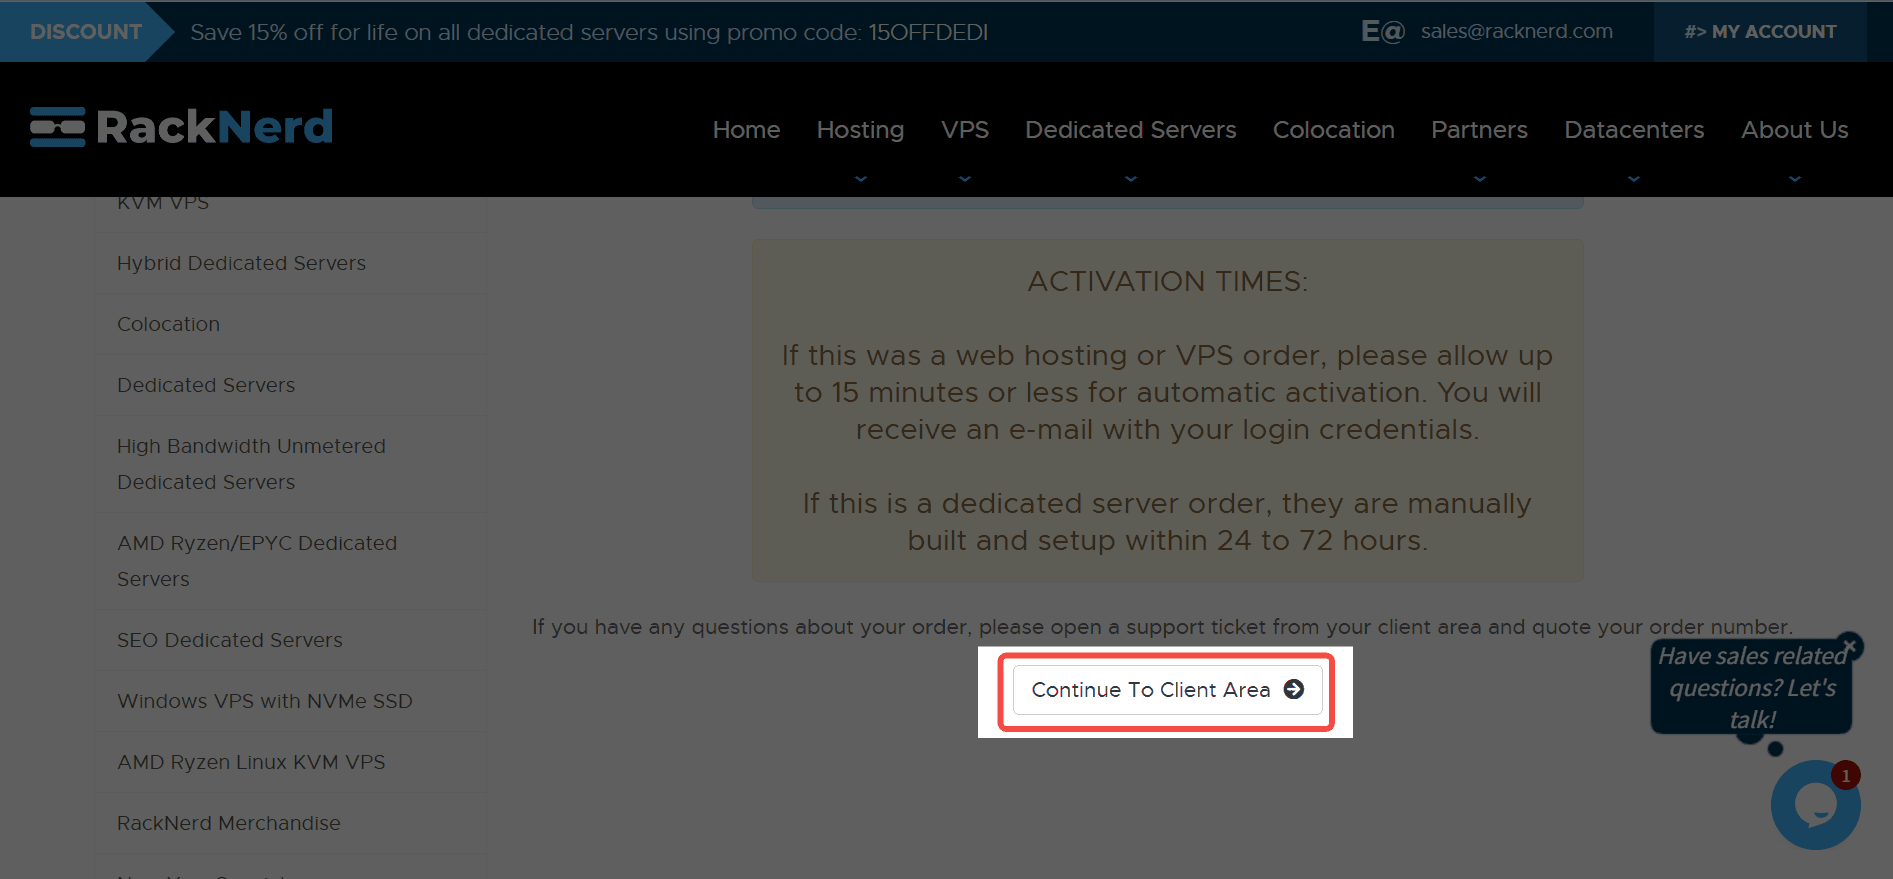
Once paid, wait 10-15 minutes. While we wait for the confirmation email, let's head over to Telegram to get your Bot Token.
Step 1: Create Your Bot on Telegram
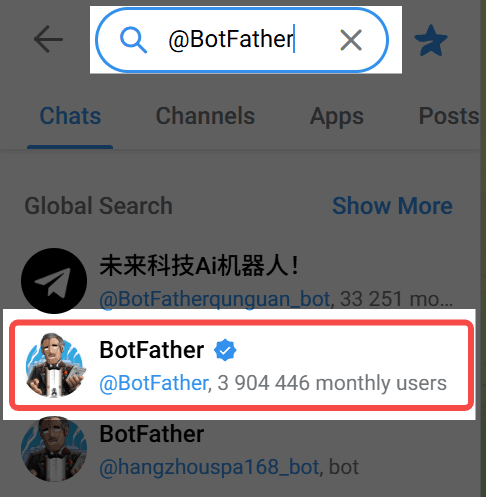
1. Open Telegram and search for @BotFather.
2. Send the command:
.text1/newbot3. Name: Give your bot a display name (e.g., "Clawie").
4. Username: Create a unique ID ending in
(e.g.,text1_bot).text1my_new_clawie_bot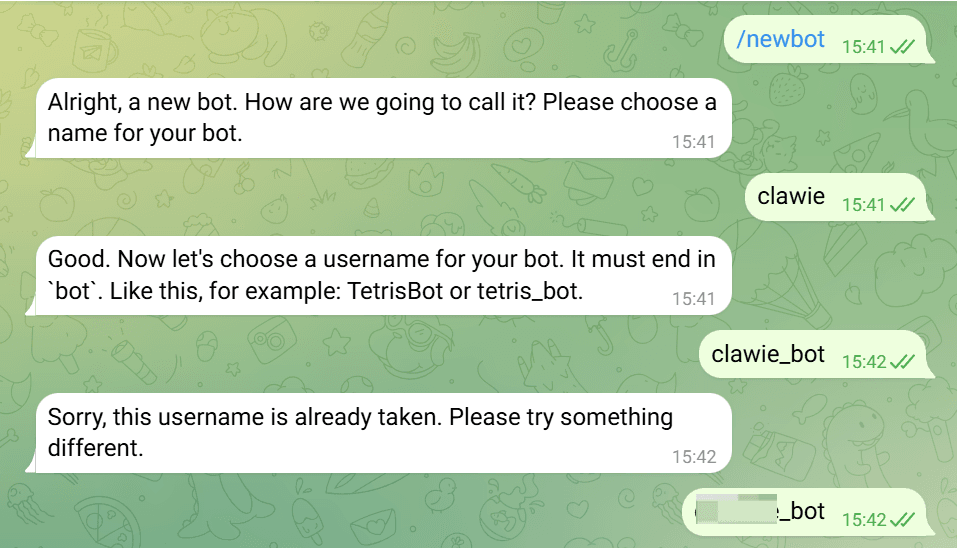
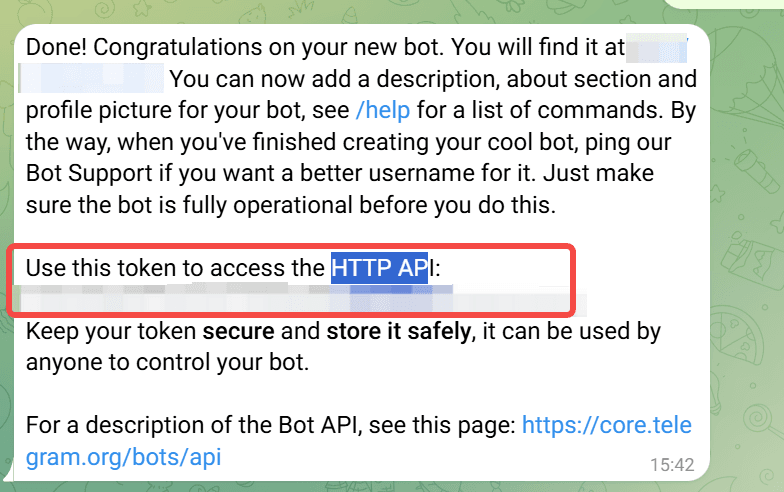
5. Save the Token: BotFather will reply with a long API Token (red box in the screenshot). Copy this. Do not share it.
Step 2: Connect to Your VPS
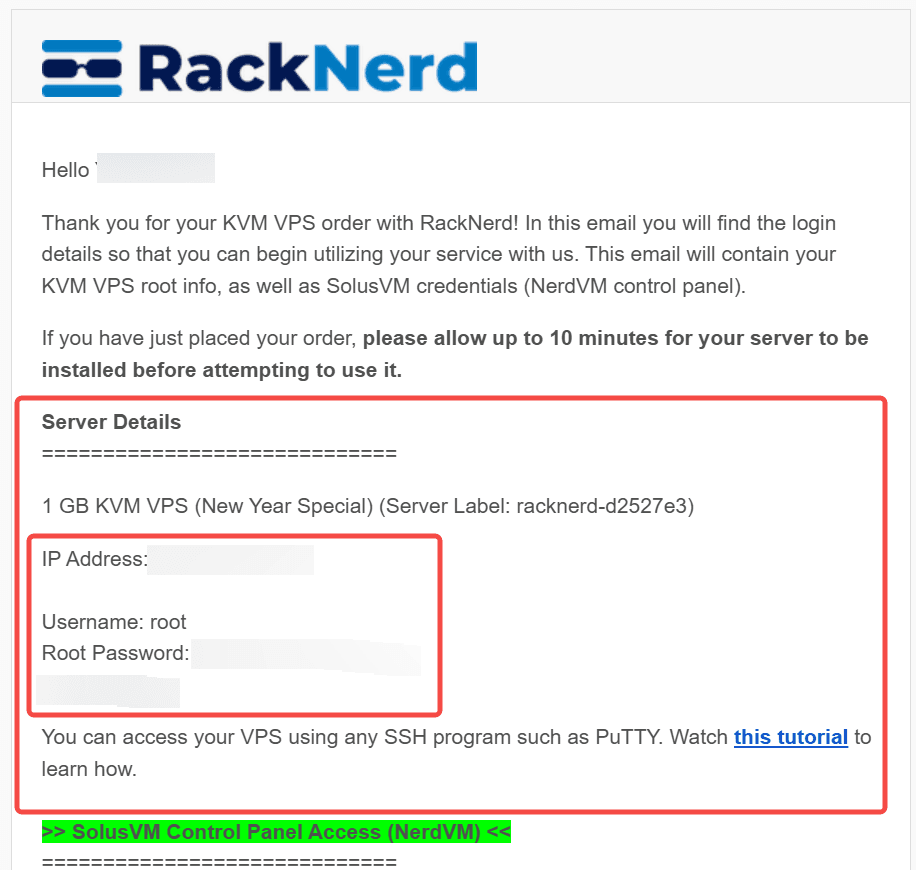
1.Gather Credentials from Email: Open the email from RackNerd and find:
Main IP Address: (e.g., 192.168.1.1)
Root Password: (A complex string of characters)
Username: root
2.Login via Terminal
Windows: Press Win + R, type cmd, hit Enter.
Mac: Press Cmd + Space, search Terminal, hit Enter.
3. Type the following command (replace with your actual IP):
plaintext1ssh [email protected]4. Fingerprint: Type
and hit Enter.text1yes5. Password: Copy your password from the email.
CRITICAL: When you paste the password into the terminal, it will remain blank. No asterisks, no cursor movement. This is a Linux security feature. Just paste it and hit Enter.
If you see root@racknerd:~#, you are in.

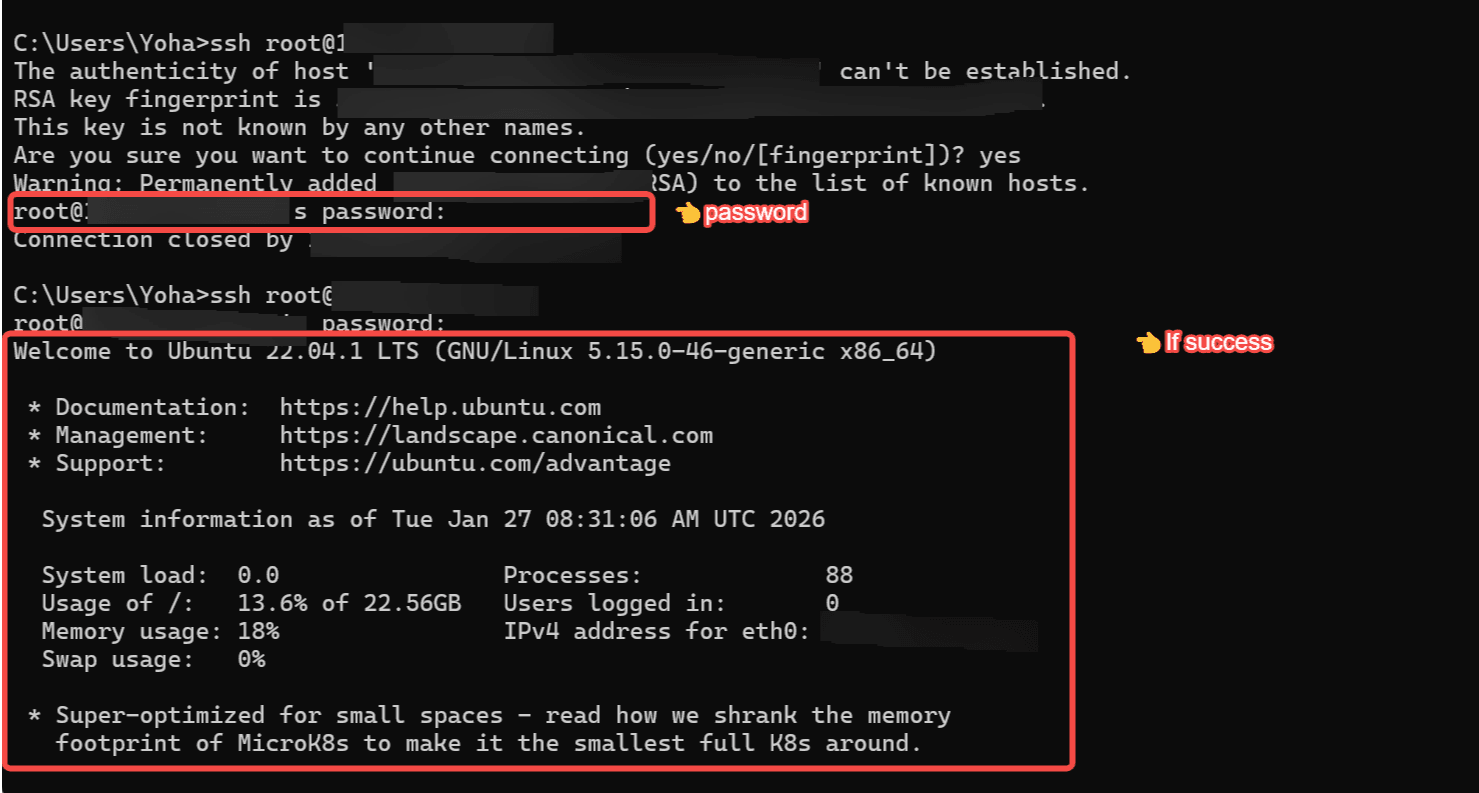
Note: If the connection times out, wait a minute and try again.
Step 3: Installation
Copy and paste the following commands into your terminal window and hit Enter:
plaintext1apt update && apt upgrade -y 2apt install curl git sudo -y 3curl -fsSL https://clawd.bot/install.sh | bash
Troubleshooting during installation:
- Pink/Purple Screen (Daemons): If a pink screen pops up asking to restart services, just press Enter.
- Selection Menu: If you need to select an option and the button is grey, press Tab to highlight it red, then press Enter.text
1<Ok>
Step 4: Configuration
plaintext1cd ~/.clawdbot 2clawdbot onboard
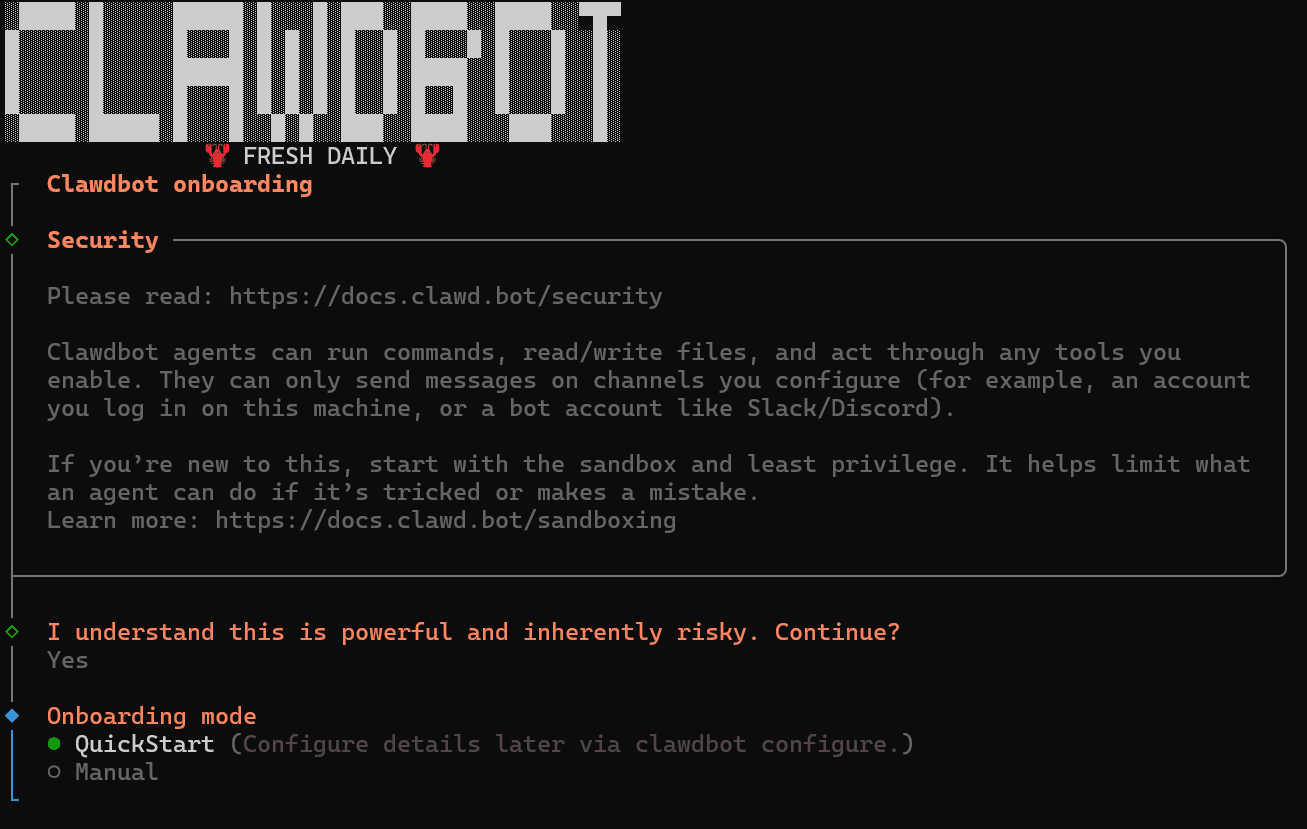
Follow the interactive prompts:
- QuickStart: Select Yes.
- AI Provider: Select OpenAI.
- Why? Atlas Cloud uses an OpenAI-compatible format.
- Auth Method: Select OpenAI API Key.
- API Key: Paste your Atlas Cloud API Key.
- Model: Select Enter model manually.
- Delete the default text and type: deepseek-ai/deepseek-v3.2
- Platform: Select Telegram.
- Token: Paste your Telegram Bot Token.
Finalizing Setup:
- Storage: Select session-memory (or Redis if you are an advanced user).
- Other Models: Select No for other provider prompts.
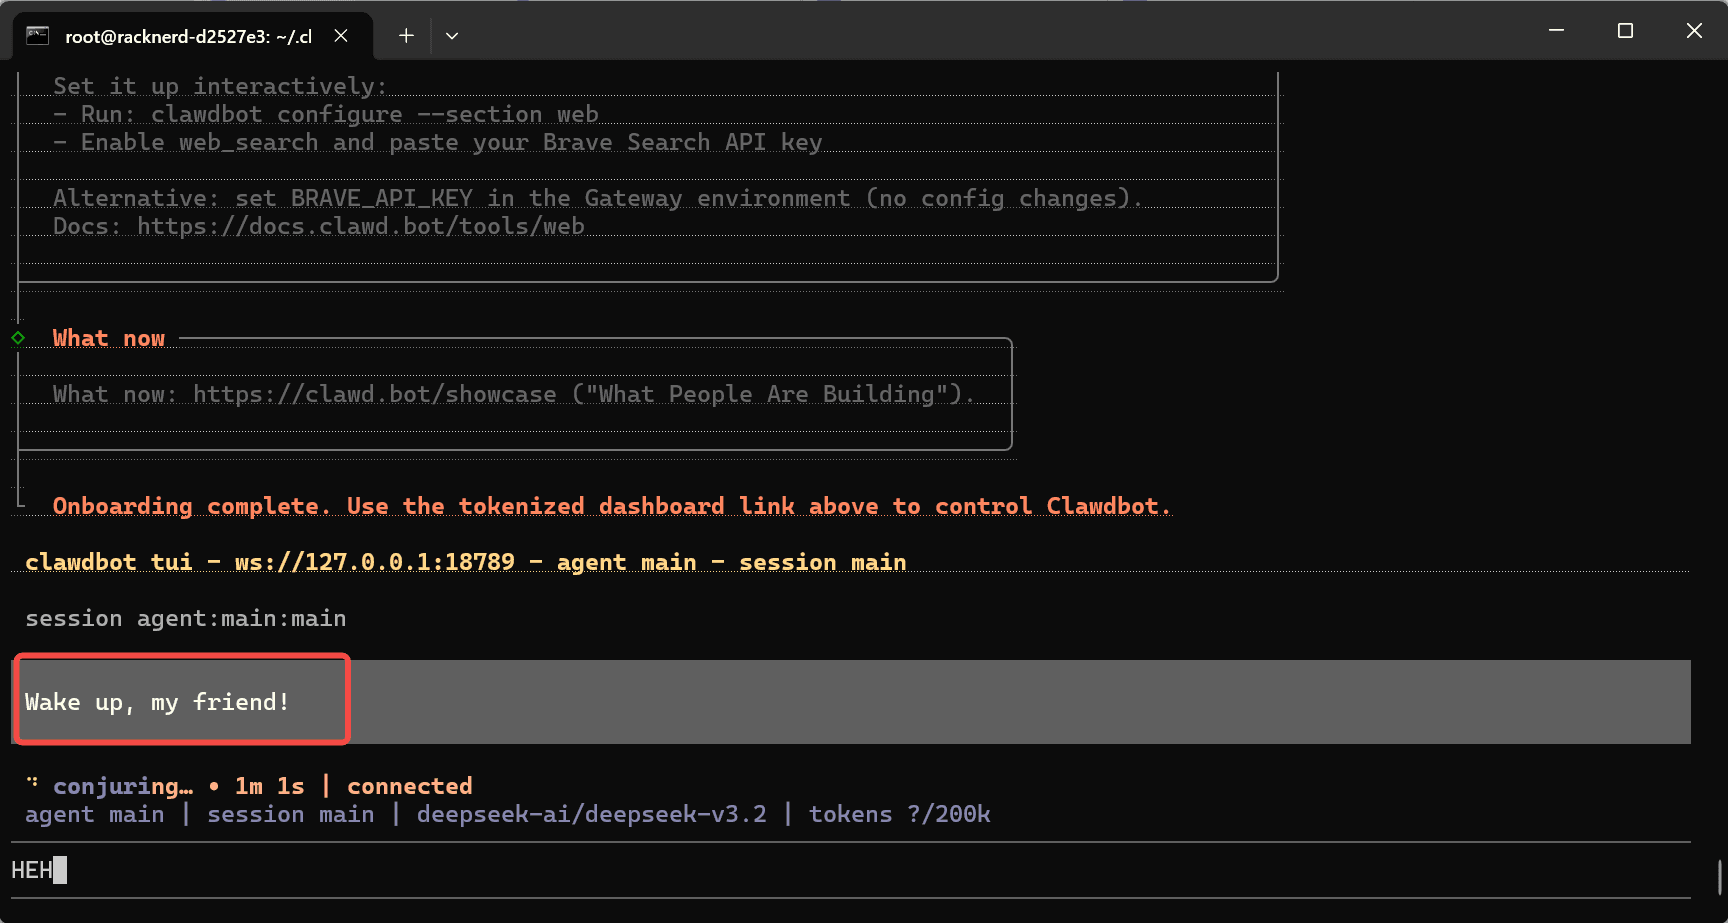
Once finished, the console should say: "Wake up, my friend!"
Step 5: Start and Pair
-
Telegram: Go to your bot and type /start.
-
Get Code: The bot will reply with a Pairing Code.
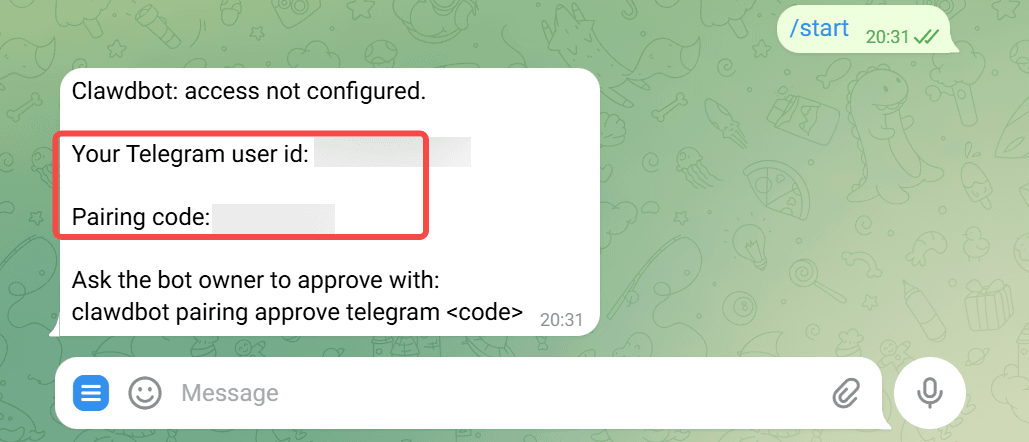
-
VPS Terminal: Run the following command (replace XXXXX with the code):
1pnpm start pairing approve telegram XXXXXXXX
Step 6: Web Dashboard
To manage your bot visually, you need to tunnel into the server.
- Open a new terminal window on your local computer (not the VPS one).
- Run this command (replace vps_ip with your server IP):
plaintext1ssh -L 18789:127.0.0.1:18789 root@vps_ip
3. Enter your VPS password.
4. Open your web browser and go to this website.
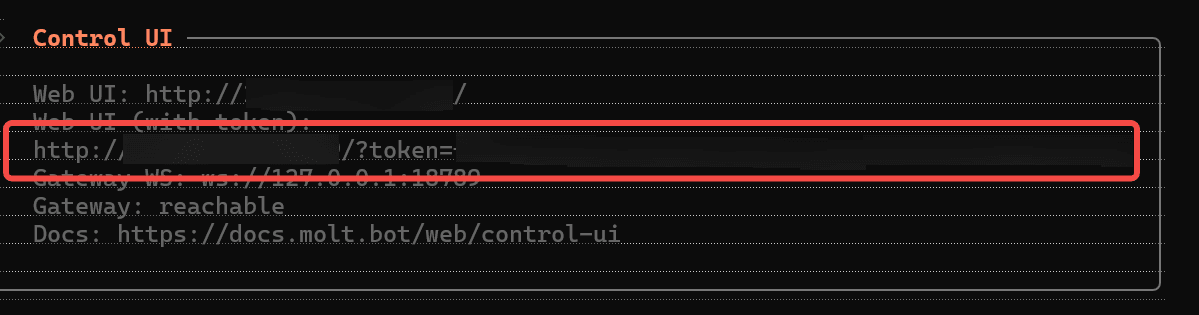
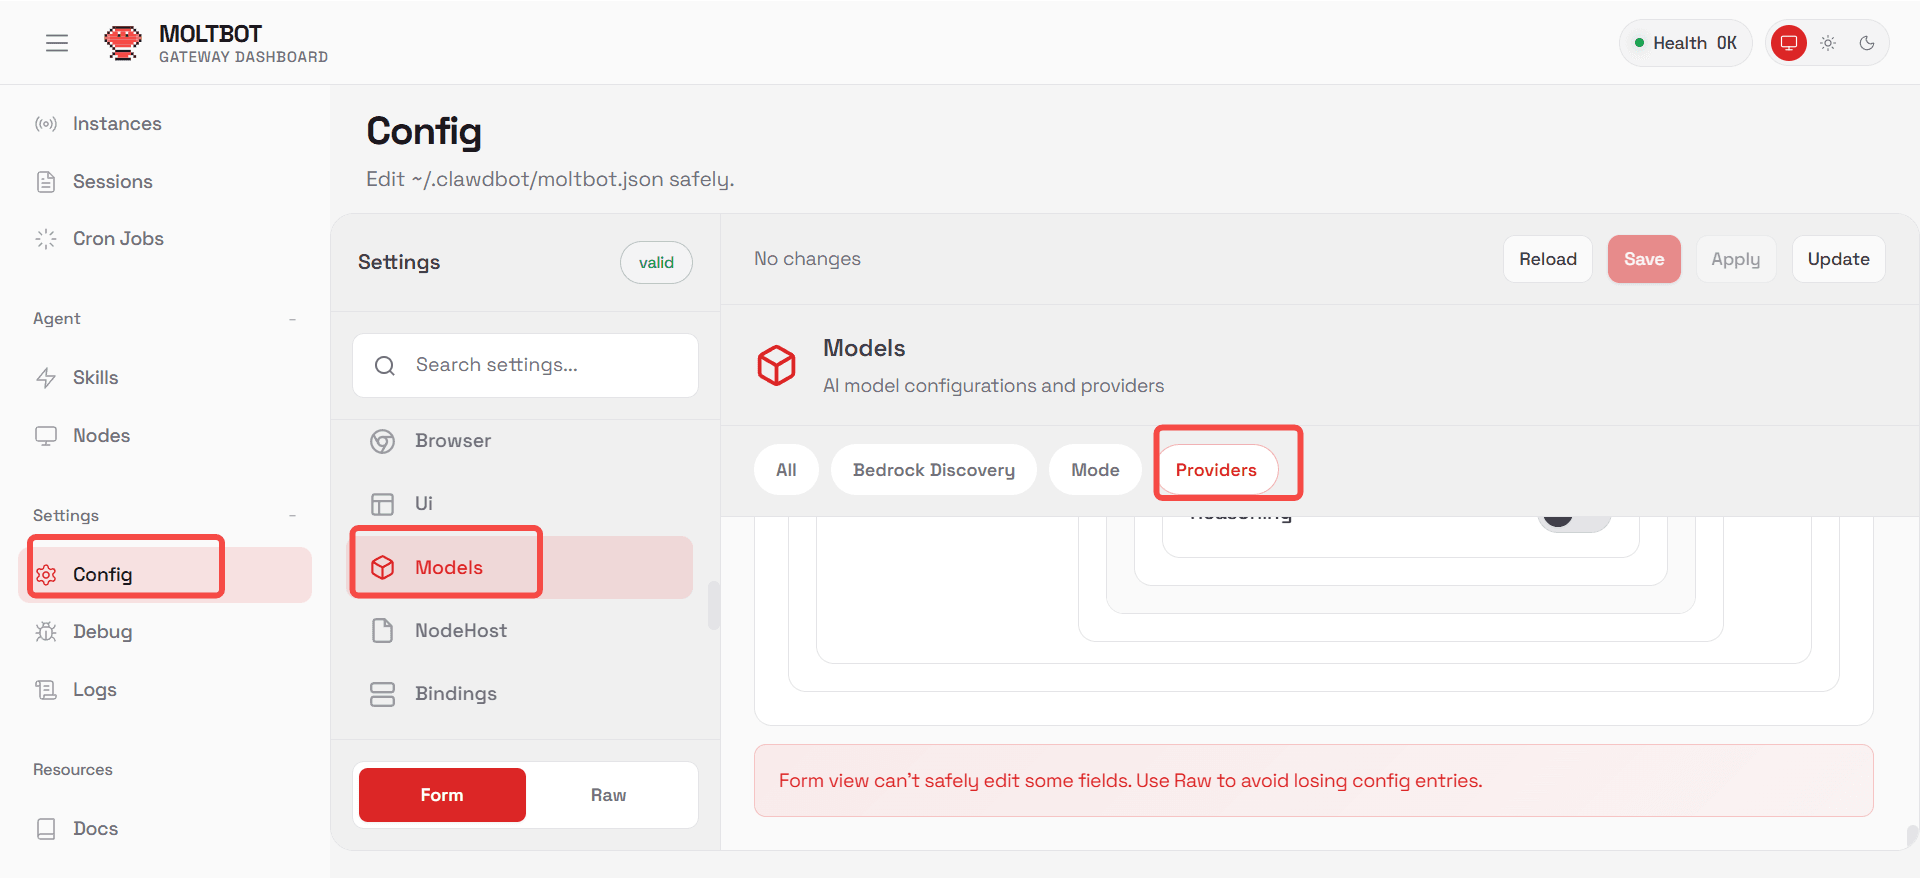
5. Use the interface to adjust settings, prompts, and memory. Remember to click Save and Update.
You're Done!
You can now chat with your bot directly on Telegram. It is powered by the DeepSeek model via Atlas Cloud, running 24/7 on your VPS.
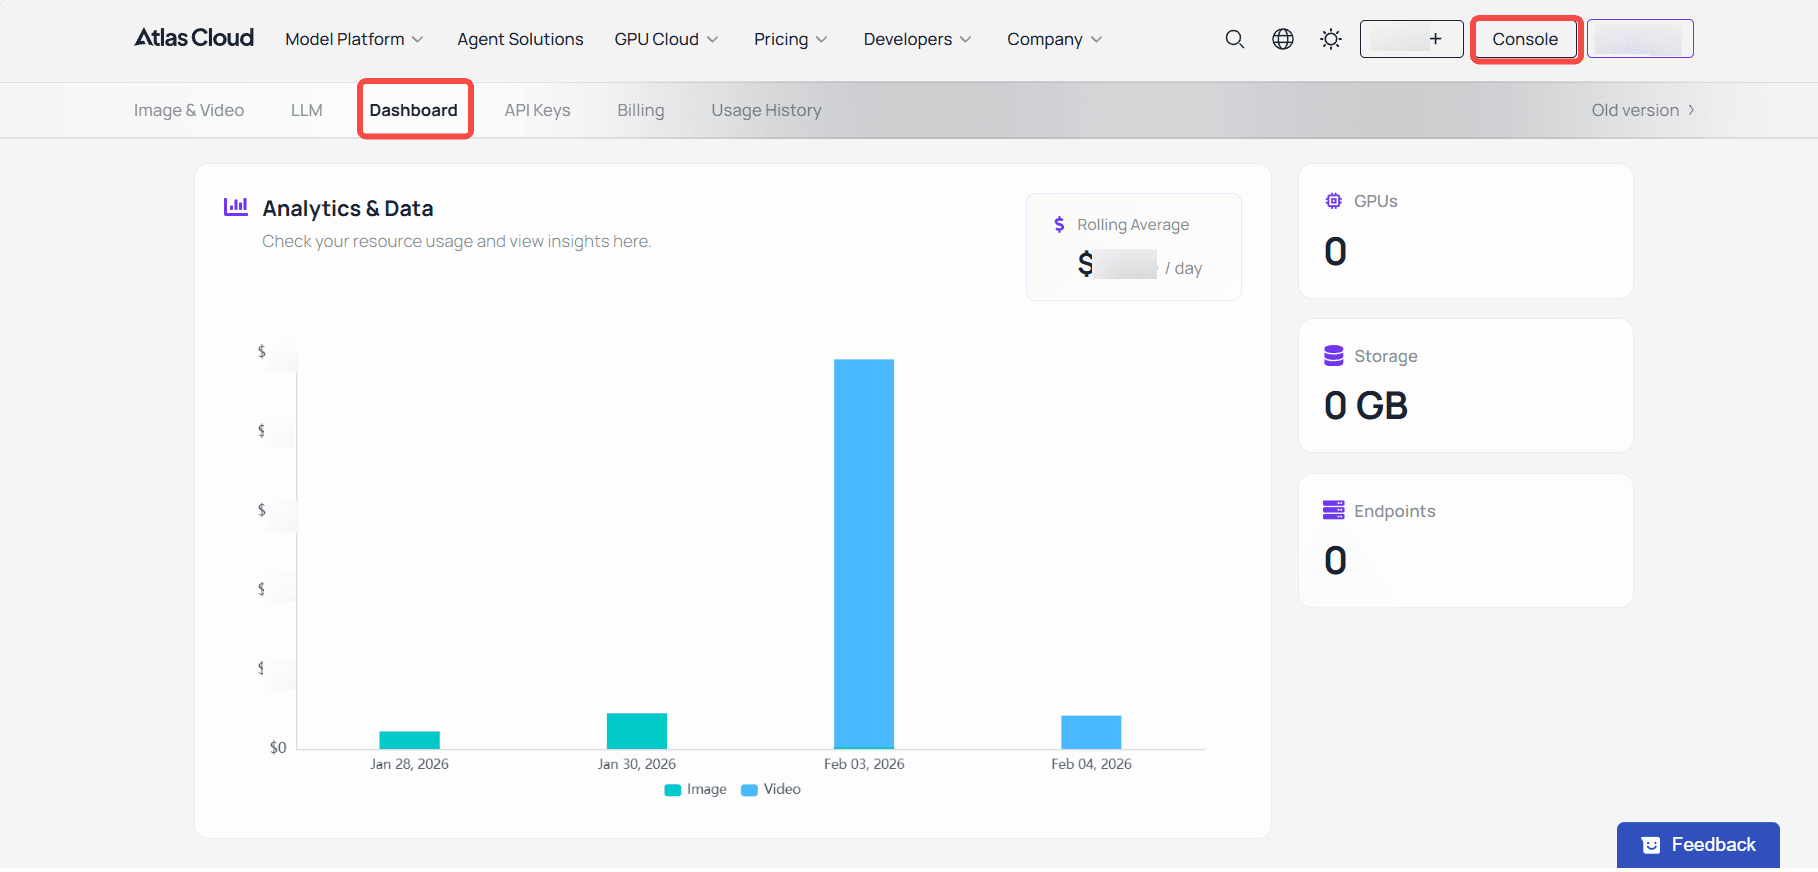
Pro Tip: Keep an eye on your usage in the Atlas Cloud dashboard to manage your token consumption.
Enjoy your new AI assistant!
