OpenClaw is built to be provider agnostic, which is its quiet superpower. It supports the usual names like OpenAI and Anthropic, but it also lets you plug in any OpenAI-compatible API as a custom provider (OpenClaw docs, 2026). That single design choice is what lets you keep the agent you like while running it on far cheaper open-weight models, the kind that cost a fraction of frontier pricing per token.
The catch is that the setup has one step almost everyone misses, and getting it wrong produces an error message that sends people down the wrong rabbit hole. This guide walks through a complete OpenClaw custom API setup the right way: how it works under the hood, the exact config to paste, the allowlist gotcha, and how to verify the connection. Budget about five minutes.
Why Do an OpenClaw Custom API Setup at All
The honest reason is cost. Agentic tools like OpenClaw resend the accumulated context on every reasoning step, so they burn 10 to 100 times more tokens than a chat window for the same task (LeanOps, 2026). That multiplier is why agent bills climb so fast, with heavy users on frontier models reaching around $13 per active developer-day (CloudZero, 2026). An OpenClaw custom API setup attacks that bill where it actually lives: the per-token price. Point the agent at an open-weight model instead of a frontier one and the unit cost drops sharply, often by 70% or more on routine work, while the quality gap on everyday coding stays small. You keep the OpenClaw workflow you already know and simply change what answers the requests. There is a second reason that matters for teams outside the regions a given vendor serves directly. A custom provider gives you a stable, compatible way to run the agent without depending on one company's billing, rollout schedule, or regional availability.
How an OpenClaw Custom API Setup Works: The Two Steps People Miss
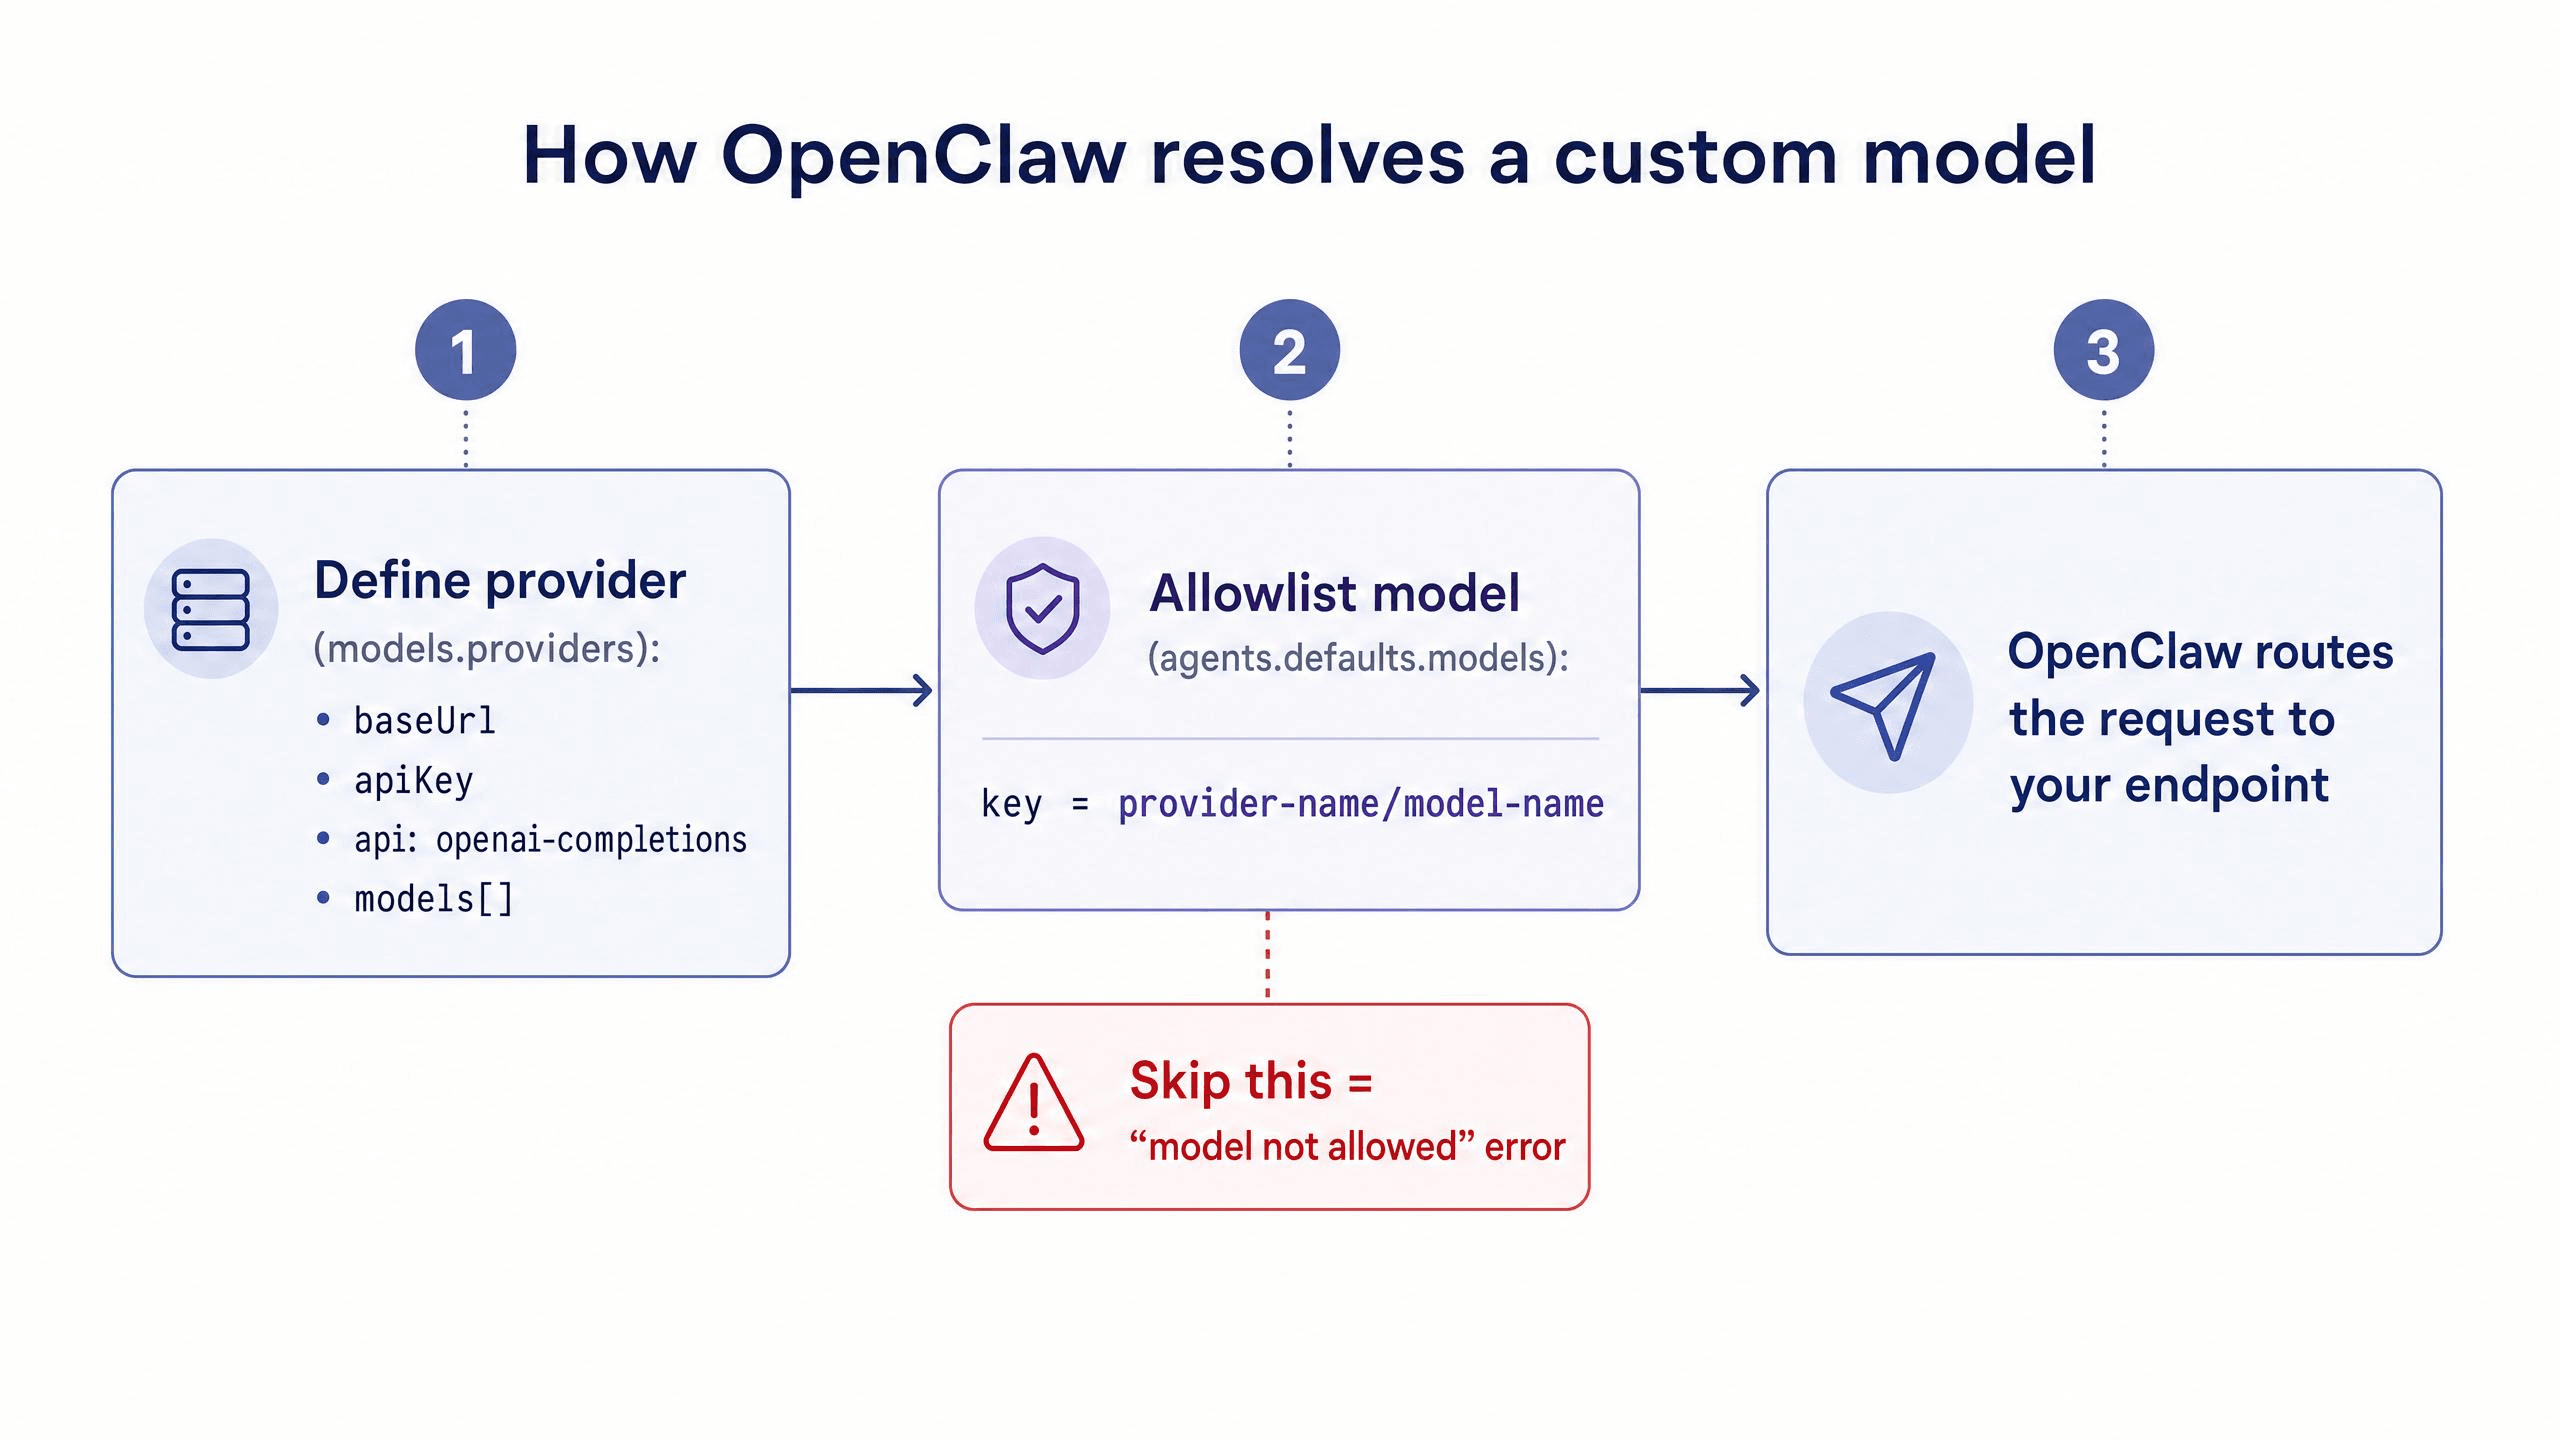
Before pasting config, understand the model OpenClaw uses, because it explains the one error everyone hits. A custom provider is defined in two places, and both are required.
First, you describe the provider itself in the models.providers section: its base URL, API key, the wire protocol (openai-completions for any OpenAI-compatible endpoint), and the list of models it serves. Second, and this is the part people miss, you have to allowlist the exact model in agents.defaults.models, using the fully qualified identifier provider-name/model-name (OpenClaw docs, 2026). Defining a provider does not automatically make its models usable. OpenClaw will reject anything not on the allowlist.
That is by design. The allowlist is what lets you define a big catalog of providers and models but only expose the specific ones you actually want the agent to reach for. Once you internalize that providers and allowlist are separate layers, the rest of the OpenClaw custom API setup is mechanical.
OpenClaw Custom API Setup, Step by Step
The example below uses Atlas Cloud as the provider, because it exposes one OpenAI-compatible endpoint that fronts the major open-weight models behind a single key. That keeps the config short and lets you swap models later without registering anything new. The same steps apply to any compatible provider; only the base URL and key change.
Step 1: Get Your Endpoint and API Key
By the end of this step you will have two strings: a base URL and a key.
- Create an account with your provider and open its API key section.
- Generate a key scoped to coding usage. On Atlas Cloud you select Coding Plan as the key type, which ties it to the credit-based coding quota rather than general pay-as-you-go.
- Note the base URL. For OpenAI-compatible clients like OpenClaw, Atlas Cloud uses https://api.atlascloud.ai/v1 (the /v1 suffix matters here).
Step 2: Run the Onboard Wizard, the Fastest OpenClaw Custom API Setup
By the end of this step the connection is live, the easy way. In a terminal, launch the guided wizard:
Bash1openclaw onboard
Then follow the prompts: choose Yes, pick QuickStart, and select Custom Provider. The wizard asks for the API Base URL (https://api.atlascloud.ai/v1), the API key you copied, and the model ID. Make sure to choose the OpenAI-compatible protocol when prompted. When it shows Verification successful, the endpoint works. Finish by giving the endpoint an ID and a friendly name. The wizard's hidden advantage: it writes both the provider definition and the model allowlist entry for you, then restarts the gateway, so you skip the most common failure mode entirely.
Step 3: Or Edit the Config File Directly
By the end of this step you will understand what the wizard actually wrote, which matters when you want to add more models later. The config lives at ~/.openclaw/openclaw.json (OpenClaw docs, 2026). Define the provider:
JSON1{ 2 "models": { 3 "mode": "merge", 4 "providers": { 5 "atlascloud": { 6 "baseUrl": "https://api.atlascloud.ai/v1", 7 "apiKey": "your-atlas-api-key", 8 "api": "openai-completions", 9 "models": [ 10 { "id": "zai-org/glm-5.1", "name": "glm-5.1", "contextWindow": 200000 } 11 ] 12 } 13 } 14 } 15}
The "mode": "merge" keeps your existing providers intact instead of overwriting them. For custom providers, fields like reasoning, cost, and maxTokens are optional and fall back to sensible defaults, so you do not need to fill in everything to get started.
Step 4: Allowlist the Model
By the end of this step OpenClaw will actually let you use the model. This is the step people skip. Add the fully qualified identifier to the allowlist:
JSON1{ 2 "agents": { 3 "defaults": { 4 "models": { 5 "atlascloud/zai-org/glm-5.1": { "alias": "glm" } 6 } 7 } 8 } 9}
The key is your provider name followed by the model ID exactly as you defined it. The alias is just a shortcut you can type instead of the full path. Without this block, the provider exists but every request gets rejected.
Step 5: Verify Your OpenClaw Custom API Setup
By the end of this step you will know it works. Start OpenClaw, select your model (or its alias), and give it a trivial task such as explaining a file. A normal response means requests are flowing to your endpoint. If you see "model not allowed," revisit Step 4, the allowlist key almost certainly does not match the provider and model names exactly. If you get an auth error, the key is wrong or has a stray space. If it cannot connect, recheck the base URL and the /v1 suffix.
Choosing a Model for Your OpenClaw Custom API Setup
Picking the model is where the savings get decided. The smart pattern is to default to a strong, cheap open model for everyday work and keep a pricier one in reserve for the hardest reasoning. The capability is real: on SWE-Bench Pro, leading open models score in the high 70s against roughly 91 for top frontier models (Codersera, 2026), a meaningful gap on the hardest problems but a small one for routine feature work and refactors. On a credit-based gateway, each model carries a multiplier that maps token usage to credits, which makes relative cost easy to compare:
| Model ID | Context | Input multiplier | Output multiplier | Approx. savings vs official |
|---|---|---|---|---|
| deepseek-ai/deepseek-v4-flash | 1M | 0.23 | 0.46 | ~50% |
| deepseek-ai/deepseek-v3.2 | 160K | 0.42 | 0.62 | ~55% |
| minimaxai/minimax-m2.5 | 200K | 0.65 | 2.18 | ~45% |
| moonshotai/kimi-k2.6 | 262K | 1.72 | 7.26 | ~45% |
| zai-org/glm-5.1 | 200K | 2.54 | 7.99 | ~45% |
Source: Atlas Cloud Coding Plan credit rules. Credit cost = input tokens × input multiplier + output tokens × output multiplier. A sensible default: run GLM-5.1 or Kimi K2.6 for interactive coding, drop to DeepSeek V4 Flash for high-volume or background jobs, and only reach for a frontier model on the occasional task an open model cannot crack. Because everything sits behind one provider, switching is a one-line change to the alias you call.
One Endpoint for OpenClaw, Claude Code, and Codex
The endpoint that powers your OpenClaw setup is not limited to OpenClaw. Most developers run more than one agent, and pointing each at a different vendor means juggling separate keys, separate dashboards, and separate bills. Consolidating onto a single OpenAI-compatible endpoint collapses that into one credit pool and one place to change models.
Because Atlas Cloud exposes the same base URL across tools, the OpenClaw config above has direct equivalents elsewhere. Claude Code reads its backend from ~/.claude/settings.json using ANTHROPIC_BASE_URL set to https://api.atlascloud.ai (note: no /v1 for Claude Code specifically). Codex uses ~/.codex/config.toml with base_url pointed at https://api.atlascloud.ai/v1. Cursor, OpenCode, and Copilot-style clients take the same /v1 endpoint. One key, one budget, every tool.
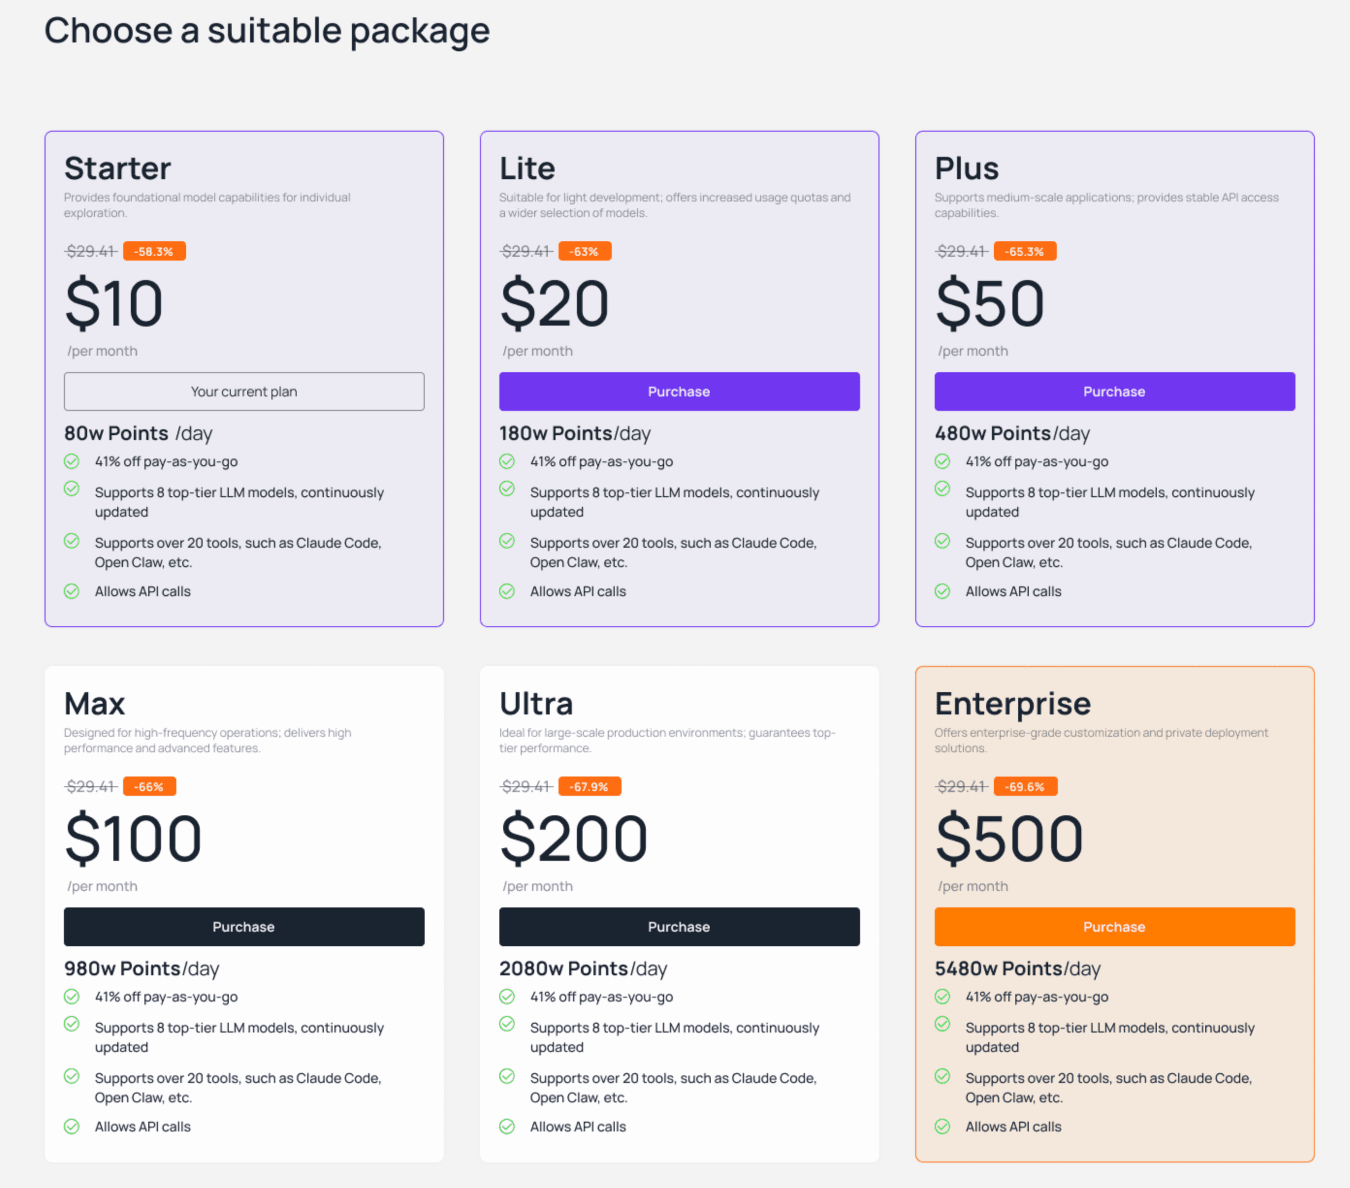
That consolidation also fixes spending control. A plan that refreshes a fixed daily credit allowance at midnight puts a structural ceiling on a runaway agent loop, while pay-as-you-go packs absorb the occasional spike. Atlas Cloud's plans start at $10 per month, pay-as-you-go packs carry a 41% discount, and mid-cycle upgrades are prorated, so a tier change can cost just the difference rather than a fresh plan.
Common OpenClaw Custom API Setup Mistakes
Most failed setups trace back to a short list of errors, and almost all of them live in the config rather than anything deeper. Forgetting the allowlist. The single most common mistake. Defining the provider is only half the job. If you see "model not allowed," the model is missing from agents.defaults.models or the key does not match (haimaker, 2026). Mismatched allowlist key. The allowlist key must be provider-name/model-name using the exact strings you defined. A typo in either half produces the same rejection as omitting it entirely. Wrong base URL path. OpenAI-compatible tools like OpenClaw expect the /v1 path. Leaving it off, or adding it where a given tool does not want it, causes connection errors. Overwriting instead of merging. If you edit the config by hand without "mode": "merge", you can wipe out your other providers. Keep the merge mode unless you mean to replace everything.
FAQ: OpenClaw Custom API Setup
Is an OpenClaw custom API setup hard to do?
No. The fastest path is the openclaw onboard wizard, which writes the provider definition and the model allowlist for you and takes about five minutes. The manual path is two small JSON edits. The only conceptual hurdle is remembering that defining a provider and allowlisting a model are separate steps.
What is the most common OpenClaw custom API setup error?
The "model not allowed" rejection, and it almost always means the model is missing from the allowlist in agents.defaults.models, or the provider-name/model-name key has a typo. Failing to allowlist is the number one cause of this error (haimaker, 2026), which is exactly why the onboard wizard handles it automatically.
Which model should I pick for my OpenClaw custom API setup?
For interactive coding, a strong general open model like GLM-5.1 or Kimi K2.6 is a good default. For high-volume or background work, a cheaper model such as DeepSeek V4 Flash makes sense. Keep a frontier model on standby only for tasks an open model genuinely cannot solve.
How much can a custom provider actually save me?
It depends on the model, but the spread is large. DeepSeek V4 Flash runs near $0.14 per million input tokens versus several dollars for frontier models (Codersera, 2026), so routing routine work to an open model commonly cuts the per-token bill by 70% or more without changing how you work.
Can I switch back to my original provider later?
Yes. Custom providers are additive when you keep "mode": "merge", so your original providers stay defined. Switching is just a matter of selecting a different model or alias in OpenClaw, and you can remove a provider block any time.
Conclusion
An OpenClaw custom API setup is one of the highest-leverage five-minute changes a developer can make in 2026. The agent stays the same, but the backend and the bill do not. Define the provider, allowlist the model, point it at an open-weight option, and you keep the OpenClaw workflow you know while paying a fraction of frontier prices. If you want it under one key and one budget that also covers Claude Code and Codex, you can spin it up through the Atlas Cloud Coding Plan console and switch models whenever the task changes.


