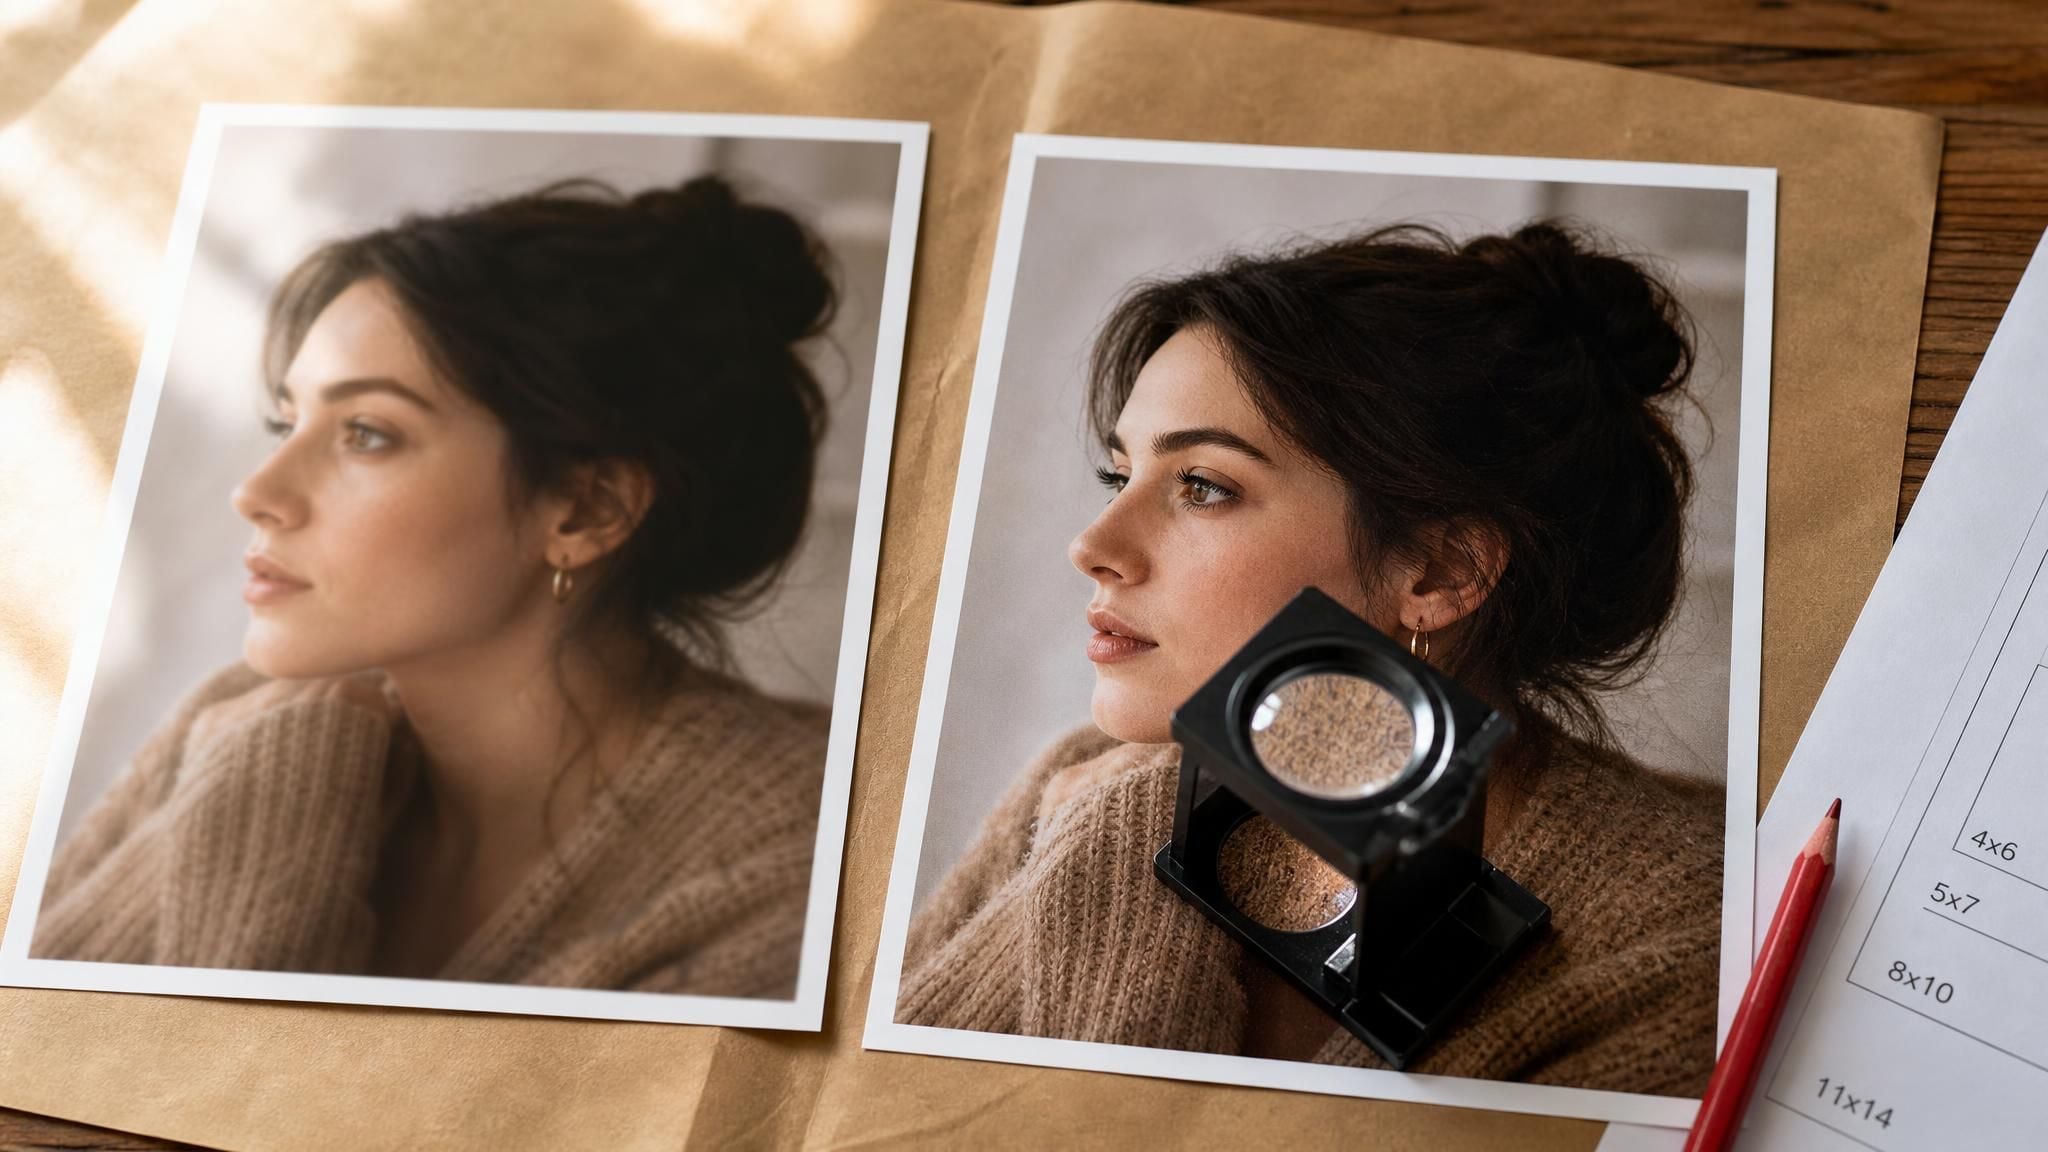
Toko cetak mengirimkan foto Anda kembali dengan tampilan buram. Seseorang memberi tahu Anda bahwa file perlu 300 DPI, lalu Anda membukanya, mengetik 300 di kotak resolusi, menyimpan, dan mencetak ulang. Hasilnya sama buramnya dengan yang pertama.
Tidak ada yang berubah, karena tidak ada yang ditambahkan. Untuk meningkatkan DPI gambar dengan cara yang benar-benar bisa digunakan printer, file tersebut membutuhkan piksel lebih banyak daripada sebelumnya, dan kotak resolusi itu tidak pernah menambah satu piksel pun. Dokumentasi Photoshop milik Adobe sendiri blak-blakan: jumlah piksel tetap stabil kecuali gambar di-resampling.
Jadi panduan ini membagi pekerjaan menjadi dua bagian yang sering disatukan orang. Dapatkan dulu piksalnya. Atur angkanya kedua.
Poin Penting
- Mengubah kolom DPI di editor gambar tidak menambah detail. Proses itu hanya memberi label ulang piksel yang sama pada kepadatan baru dan memperkecil ukuran cetak agar sesuai.
- Peningkatan DPI sejati membutuhkan lebih banyak piksel, dan hal itu dihasilkan oleh upscaler AI, bukan oleh dialog ubah ukuran.
- Adobe menganggap 300 PPI sebagai standar cetak, meskipun 220 PPI biasanya cukup untuk keluaran foto inkjet, jadi target piksel Anda bergantung pada ukuran cetak dan printer.
- Upscalerbrowser gratismembangun ulang sumber kecil pada 2x, sehingga sisi panjang input Anda menentukan apakah alat ini bisa membantu atau tidak.
- Setelah jumlah piksel benar, nilai DPI tetap harus ditulis ke dalam file agar perangkat lunak cetak membacanya dengan benar.
Mengapa Menambah Angka DPI Saja Tidak Memperbaiki Apa Pun
Kolom resolusi itu adalah label, bukan tuas. Kolom tersebut memberi tahu perangkat lunak cetak seberapa rapat mengemas piksel yang sudah Anda miliki. Mengubahnya tanpa resampling hanya akan menyeimbangkan ulang aritmetikanya: dokumentasi Adobe menyatakan bahwa "total data gambar tetap konstan kecuali gambar di-resampling", dan menaikkan resolusi membuat lebar dan tinggi "menurun secara proporsional untuk mempertahankan jumlah data yang sama".
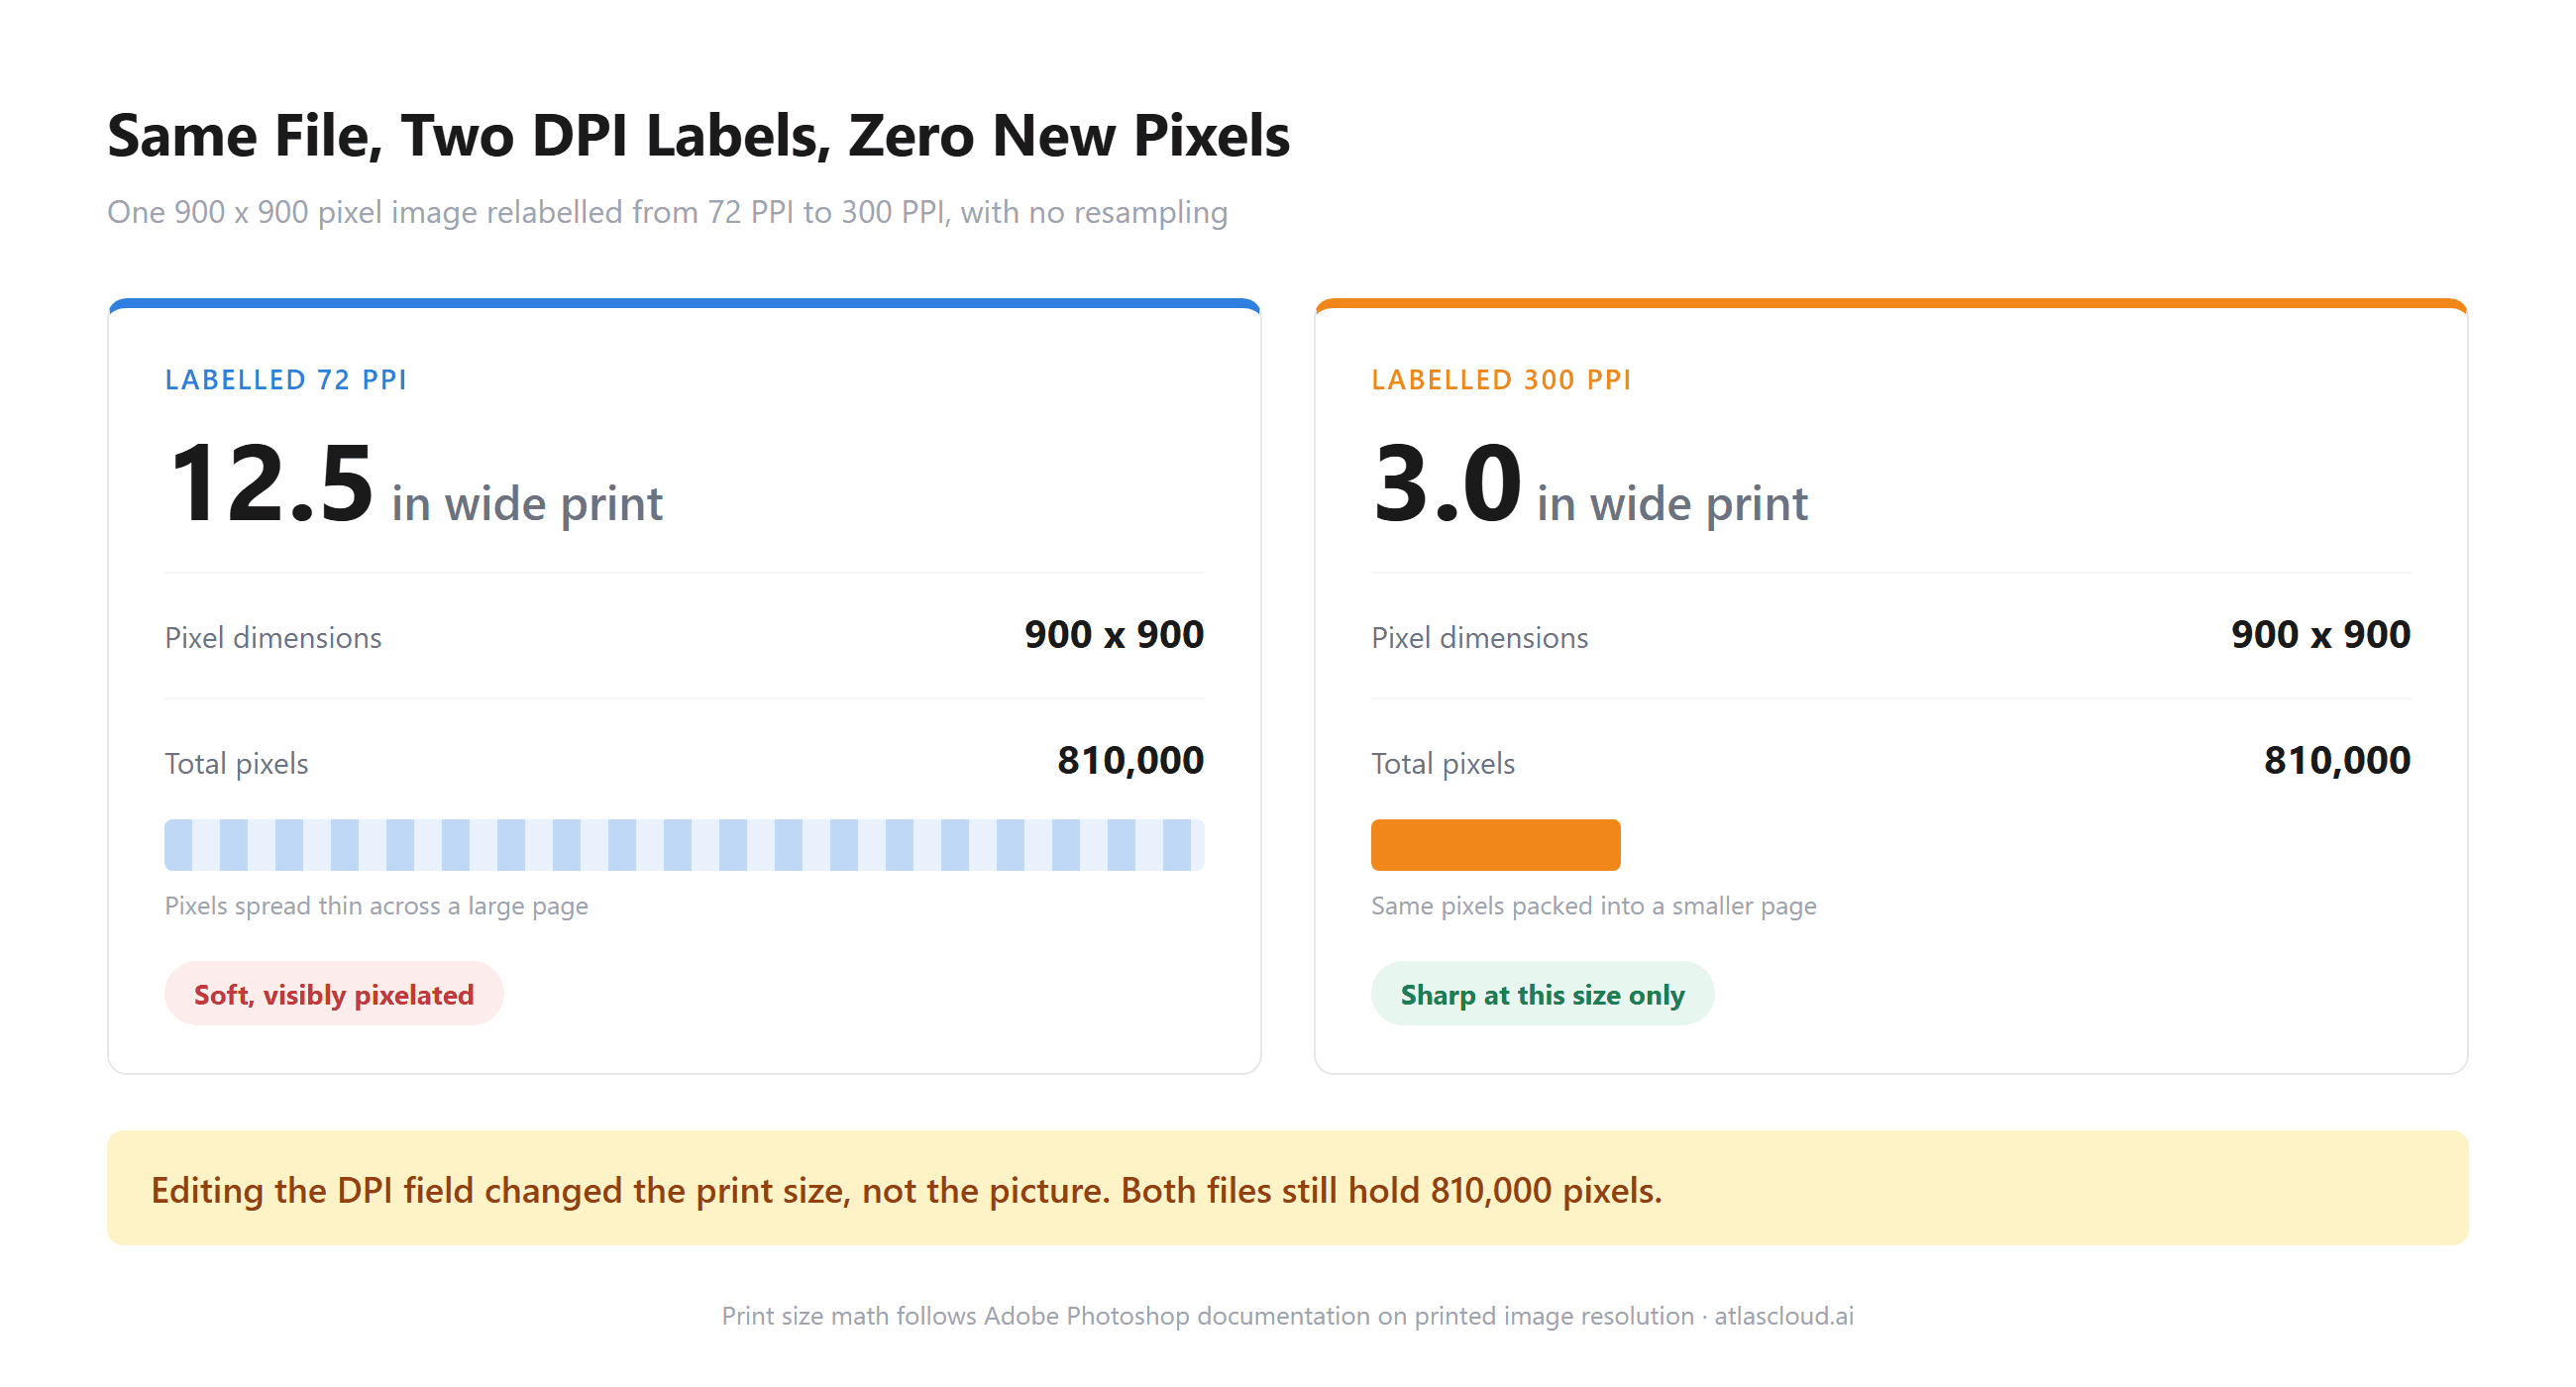
Bayangkan avatar 900 x 900 piksel. Beri label 72 PPI, maka ia tercetak selebar 12,5 inci, dengan hasil buruk. Beri label 300 PPI pada file yang sama, maka ia tercetak selebar 3 inci, dengan tajam. Kedua file berisi 810.000 piksel. Anda tidak mendapatkan detail tambahan. Anda hanya memberi tahu printer untuk memakainya di area yang lebih kecil.
Karena itu saran toko tadi hanya setengah benar. Mereka menginginkan 300 DPI pada ukuran cetak yang Anda rencanakan, dan kedua angka itu saling mengalikan menjadi jumlah piksel. Naikkan piksalnya atau perkecil cetakannya.
DPI vs. PPI: Angka yang Sebenarnya Dibaca Perangkat Lunak Cetak Anda
Dua pengukuran berbeda berbagi singkatan DPI, dan mencampuradukkan keduanya adalah yang membuat orang pergi ke kotak resolusi. Piksel per inci menggambarkan file gambar Anda. Titik per inci menggambarkan tinta printer.
Angka milik Adobe sendiri memisahkan keduanya dengan jelas. Printer inkjet bekerja "dalam kisaran 720 hingga 2880 dpi", dan angka itu "tidak sama dengan resolusi gambar." Halaman yang sama menetapkan batas bawah yang berguna untuk sisi gambar, dengan menyebutkan setidaknya 220 PPI "biasanya cukup untuk menghasilkan cetakan foto berkualitas tinggi pada printer inkjet."
Jadi ketika permintaan masuk ke kotak masuk Anda yang meminta DPI lebih tinggi, biasanya itu berarti PPI, dan batasnya mungkin lebih rendah dari 300 yang disebutkan secara default. Pantas ditanyakan sebelum Anda meng-upscale apa pun.
Solusi Sebenarnya: Tambahkan Piksel dengan Upscaler AI Gratis
Sumber kecil adalah yang paling terpukul di sini. Foto produk 400 piksel yang diambil dari daftar lama, potret kepala yang dipotong dari foto bersama, logo yang disimpan dalam ukuran layar bertahun-tahun lalu. Tidak satu pun dari mereka bisa diberi label ulang menjadi kualitas cetak, dan meregangkannya di editor akan menyebarkan piksel yang ada semakin tipis hingga tepian menjadi lembek.
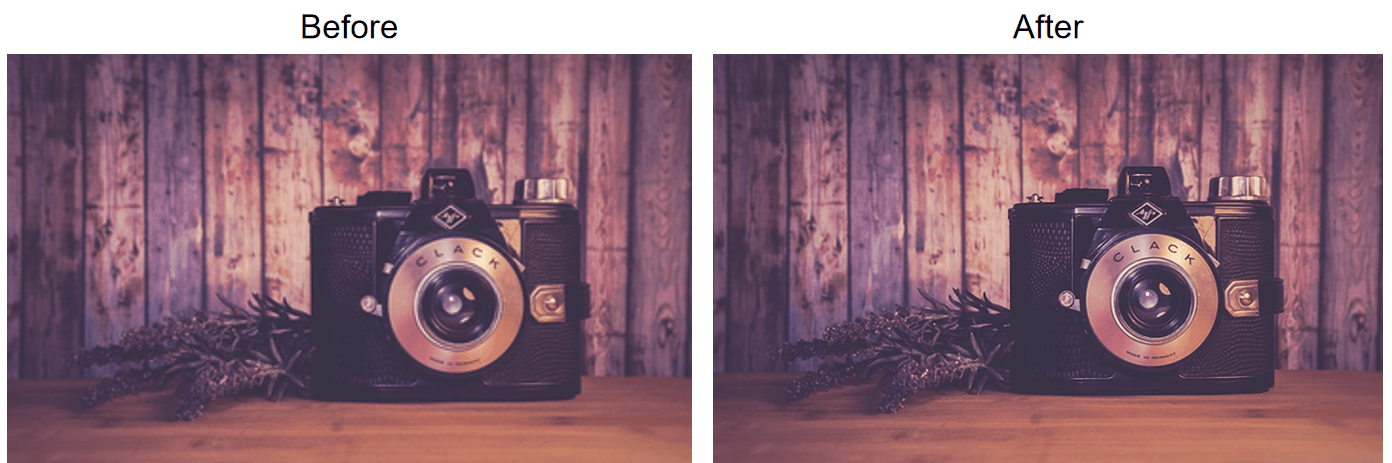
Upscaler bekerja sebaliknya. Ia memprediksi apa yang akan dikandung oleh versi lebih besar dari gambar itu lalu menggambarnya, menyusun ulang tepian dan tekstur pada ukuran baru, bukan sekadar interpolasi antar piksel tetangga. Upscaler AI gratis di Atlas Cloud menjalankan model super resolusi Swin2SR untuk hal ini, dan yang diunduh adalah PNG resolusi penuh tanpa logo pojok dan tanpa kualitas ekspor yang ditahan. Alat ini berada di samping alat AI lain di platform.
Meningkatkan DPI Gambar dalam Tiga Langkah
- Buka upscaler AI gratis dan unggah sumber Anda. Tidak ada halangan antara halaman dan proses pertama, jadi tenggat cetak tidak perlu menunggu formulir pendaftaran. File JPG, PNG, atau WebP yang jernih memberi model bahan paling banyak untuk diproses.
- Biarkan skala pada 2x, sesuai keluaran model Swin2SR lokal, lalu pilih PNG agar hasilnya tidak terkena artefak kompresi putaran kedua.
- Jalankan lalu unduh PNG-nya. Proses pertama mengunduh model 54MB sekali ke cache browser, jadi bersabarlah sebentar. Proses berikutnya melewati langkah itu sepenuhnya.
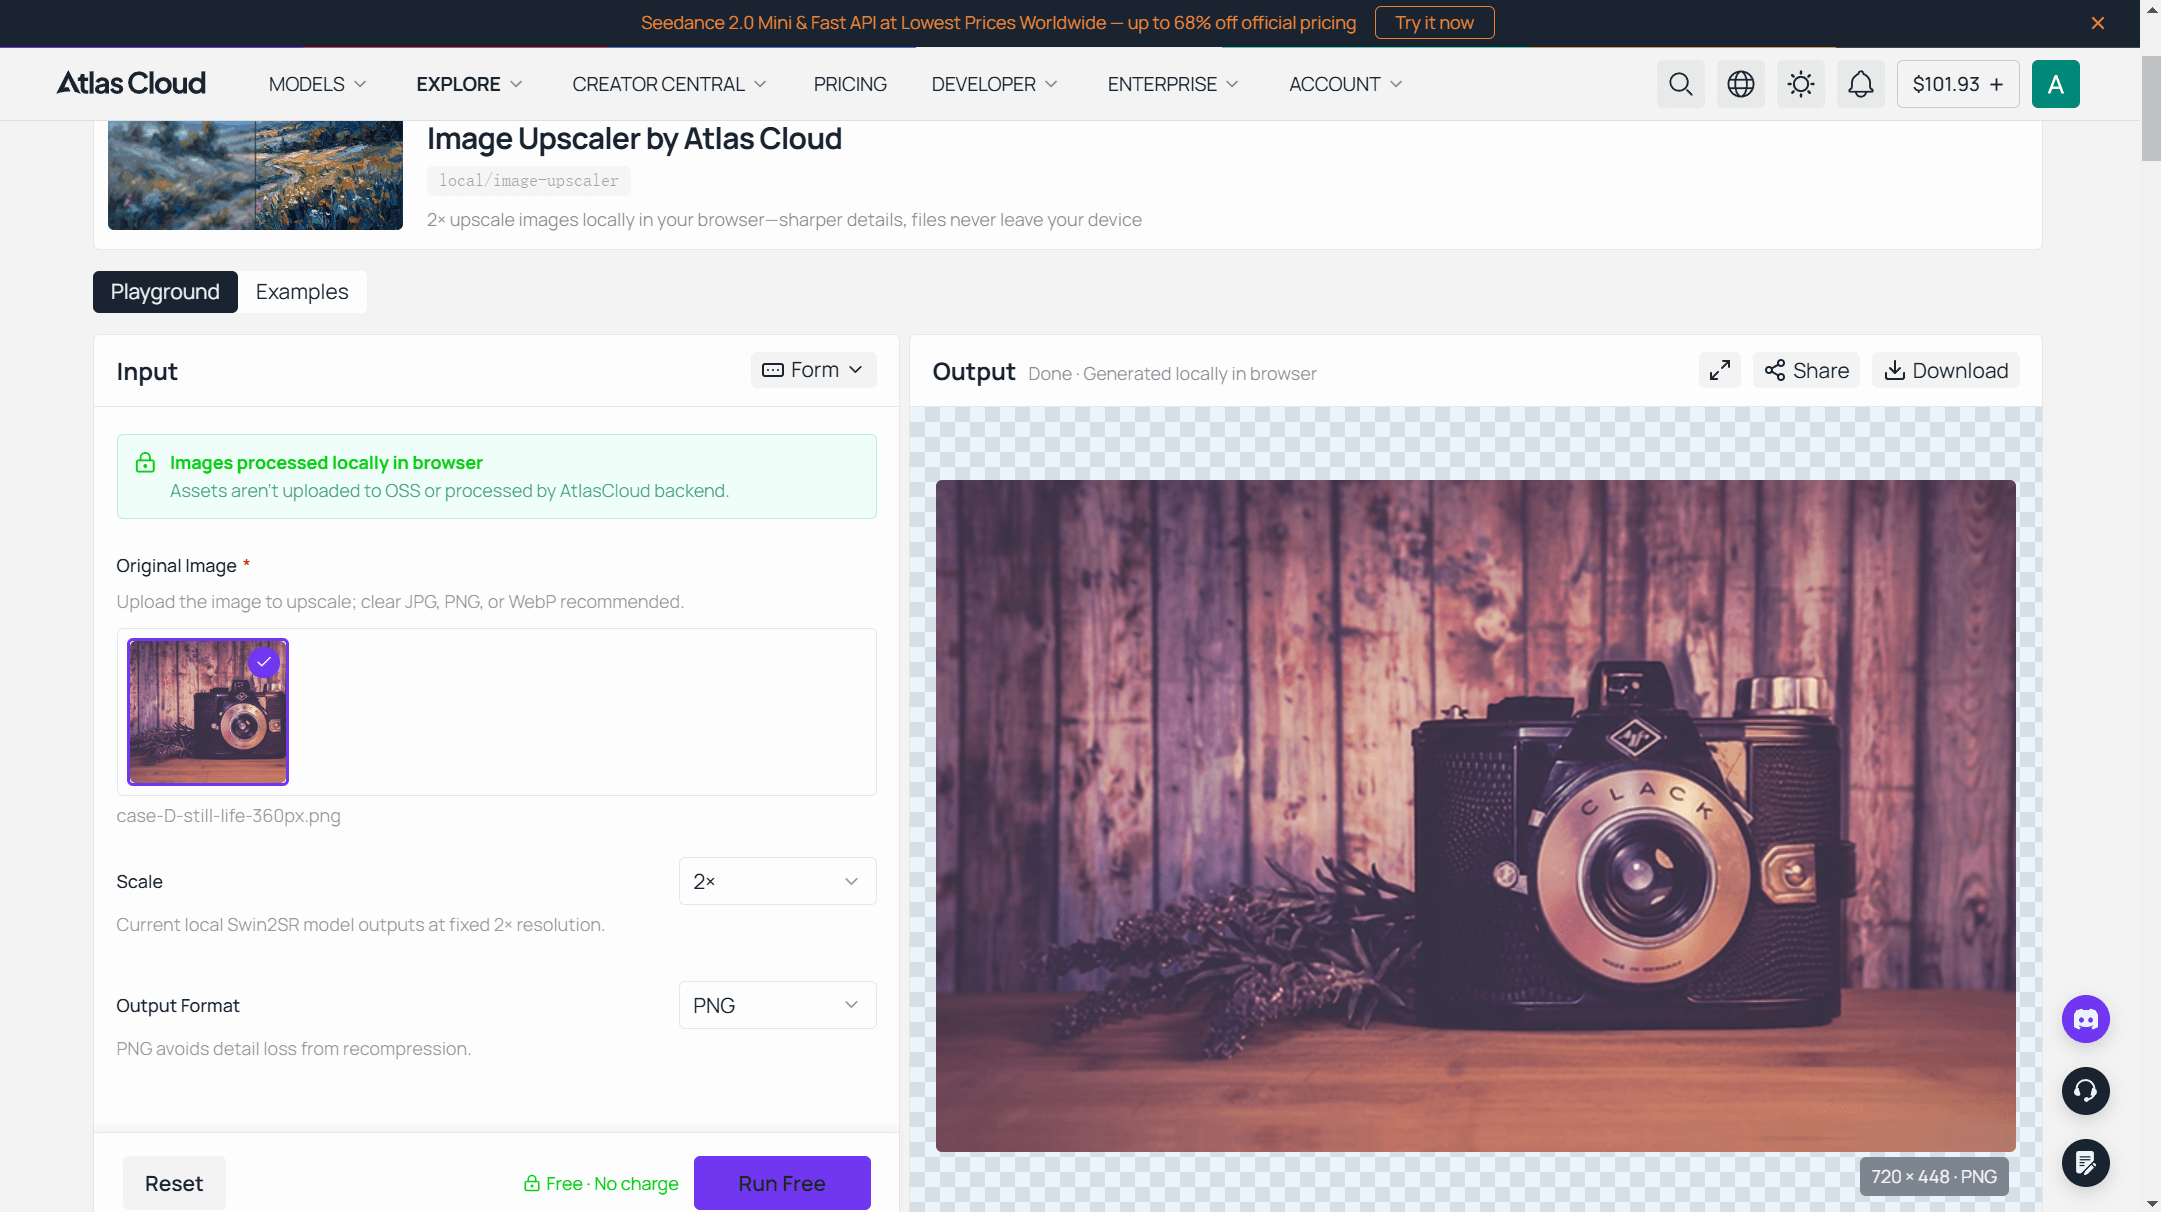
Sekarang keluarannya benar-benar lebih besar dalam piksel. Angka DPI Anda masih terbaca seperti sebelumnya, dan bagian terakhir panduan ini akan memperbaikinya dalam sekitar sepuluh detik.
Berapa Banyak Piksel yang Sebenarnya Anda Butuhkan untuk Cetak 300 DPI
Bekerjalah mundur dari cetakan, jangan pernah maju dari file. Kalikan setiap dimensi cetakan jadi dalam inci dengan kepadatan target Anda, dan hasilnya adalah kebutuhan piksel Anda. Cetak 8 x 10 pada 300 PPI membutuhkan 2400 x 3000 piksel. Tidak ada yang lebih misterius dari itu.
Adobe menyebut 300 PPI "standar industri untuk menghasilkan cetakan berkualitas tinggi," sambil mencatat bahwa kepadatan yang lebih rendah "masih bisa bekerja dengan baik untuk cetakan format besar yang dimaksudkan untuk dilihat dari kejauhan." Papan reklame bisa menggunakan resolusi jauh lebih rendah karena detail halus berhenti terlihat pada jarak itu.
| Ukuran cetak | Piksel pada 300 PPI | Piksel pada 220 PPI |
|---|---|---|
| 4 x 6 inci | 1200 x 1800 | 880 x 1320 |
| 5 x 7 inci | 1500 x 2100 | 1100 x 1540 |
| 8 x 10 inci | 2400 x 3000 | 1760 x 2200 |
| 11 x 14 inci | 3300 x 4200 | 2420 x 3080 |
| 16 x 20 inci | 4800 x 6000 | 3520 x 4400 |
Baca tabel itu secara terbalik dan jangkauan alat gratisnya menjadi jelas. Sisi panjang 768 piksel mencakup sekitar 2,5 inci pada 300 PPI, atau 3,5 inci pada batas inkjet 220 PPI. Cukup untuk cetakan dompet, gambar kecil katalog, lencana nama. Bukan poster.
Batas 384 Piksel pada Upscaler Gratis Ini
Alat browser ini jujur tentang batasnya sendiri, dan itu lebih penting daripada angka 2x. Model ini menerima sisi panjang maksimal 384 piksel, yang membuat batas keluaran berada di 768. File apa pun yang lebih besar akan diperkecil ke batas itu sebelum model melihatnya.
Jika Anda memberinya foto 2000 piksel, Anda akan mendapatkan sekitar 768 kembali, yang lebih kecil dari awalnya. Batas itu mencegah browser kehabisan memori saat model berjalan secara lokal, dan itu berarti alat ini berguna untuk sumber yang benar-benar kecil. Periksa sisi panjang Anda sebelum mengunggah.
| Upscaler browser gratis | Titik akhir upscaler cloud | |
|---|---|---|
| Skala | Tetap 2x | outscale dari 1.0 hingga 4.0 |
| Sisi input terpanjang | 384 px | Tanpa batas piksel yang dipublikasikan, input yang sangat besar mungkin ditolak |
| Batas keluaran | 768 px | Mengikuti skala input |
| Per proses | Satu gambar | Satu gambar per panggilan, dapat dibuat skrip dalam loop |
| Proses sebelum paywall | Tanpa batas, tanpa daftar | Ditagih per gambar, akun diperlukan |
| Watermark | Tidak ada | Tidak ada |
| Model | Swin2SR, lokal | Backend RealESRGAN |
Saat Upscaler Cloud yang Menangani Pekerjaan Ini
Semua yang ditujukan untuk ukuran cetak sungguhan langsung menemui batas itu. Titik akhir atlascloud/image-upscaler yang dihosting menerima URL gambar plus nilai outscale hingga 4.0 dan mengembalikan JPEG, PNG, atau WebP, yang merupakan rute untuk input yang akan diperkecil oleh alat browser. Alat ini menangani satu gambar per panggilan, jadi folder berisi banyak file berarti memanggilnya berulang kali, bukan mengunggah satu set. Playground menampilkan biaya sebuah proses sebelum Anda berkomitmen, sehingga Anda bisa memperkirakan pekerjaan terlebih dahulu.
Ujilah di alat gratis, pelajari bagaimana super resolusi memperlakukan jenis gambar Anda, lalu pindahkan pekerjaan yang membutuhkan 4000 piksel ke titik akhir yang memang dibangun untuk itu.
Menyetel Nilai DPI Baru Setelah Anda Upscale
Piksel sudah beres, labelnya masih salah. Adobe menggambarkan kolom resolusi sebagai nilai yang menentukan piksel per inci untuk kualitas cetak, jadi itulah yang dibaca perangkat lunak cetak untuk memutuskan seberapa rapat piksel Anda ditempatkan. Sebaiknya diatur sebelum file dikirim.
Di Photoshop, buka Image > Image Size dan hapus centang Resample sebelum menyentuh apa pun. Dengan resampling nonaktif, mengetik 300 pada Resolution hanya mengubah dimensi cetak yang ditampilkan di sampingnya. Jumlah piksel tetap persis seperti yang ditinggalkan upscaler Anda. Di macOS, Preview melakukan hal yang sama di Tools > Adjust Size dengan opsi Resample image tidak dicentang.
Periksa lebar dan tinggi cetak yang muncul setelah Anda mengetik angka tersebut. Jika sesuai dengan ukuran yang ingin Anda cetak, file siap digunakan. Jika ternyata lebih kecil dari yang Anda butuhkan, Anda kekurangan piksel dan tidak ada pengeditan metadata yang bisa menutup celah itu.
Empat kolom memberi tahu Anda apakah prosesnya berhasil. Angka-angka ini mengikuti file 720 x 448 piksel, ukuran yang dihasilkan dari sumber kecil setelah pembangunan ulang 2x.
| Yang perlu diperiksa | Sebelum mengetik 300 | Setelah, dilakukan dengan benar | Tanda peringatan |
|---|---|---|---|
| Kotak Resample | Tercentang secara default | Tidak tercentang | Masih tercentang, jadi perangkat lunak membangun ulang piksel alih-alih memberi label ulang |
| Dimensi piksel | 720 x 448 | 720 x 448, tidak berubah | Ada perubahan di sini berarti Anda melakukan resampling |
| Resolusi | 72 | 300 | Masih terbaca 72 setelah disimpan, jadi nilainya tidak pernah diterapkan |
| Lebar cetak | 10 inci | 2,4 inci | Tidak berubah, jadi kepadatan baru tidak diterapkan |
Baris terakhir itu yang perlu direnungkan. Lebar cetak yang turun dari 10 inci menjadi 2,4 bukanlah kerugian; itulah file yang akhirnya jujur tentang seberapa besar ia bisa dicetak pada kepadatan foto.
Pertanyaan yang Sering Diajukan
Apakah mengubah DPI di Photoshop meningkatkan kualitas gambar?
Tidak dengan sendirinya. Dengan Resample dimatikan, data piksel tidak tersentuh dan hanya dimensi cetak yang berubah. Dengan Resample dinyalakan, Photoshop menciptakan piksel dengan interpolasi, yang memperbesar file tetapi cenderung melunakkan tepian alih-alih membangunnya kembali. Upscaler AI adalah versi dari langkah itu yang menyusun ulang detail alih-alih merata-ratakannya.
Apa perbedaan antara DPI dan PPI?
PPI menghitung piksel dalam file gambar Anda per inci cetakan. DPI menghitung titik tinta yang diletakkan printer Anda per inci, angka yang diatur oleh perangkat keras, bukan oleh file Anda. Permintaan "DPI lebih tinggi" dari klien dan toko cetak hampir selalu merujuk pada PPI, karena angka printer itu sendiri bukanlah sesuatu yang bisa Anda kendalikan dari editor gambar.
Bisakah saya meningkatkan DPI JPEG?
Anda bisa mengubah angkanya, dan perilakunya sama seperti di format lain. Tag resolusi adalah metadata, jadi mengeditnya memberi label ulang pada piksel yang sudah ada di file dan menggeser dimensi cetak agar sesuai. Jumlah piksel hanya bertambah jika Anda melakukan resampling atau upscale terlebih dahulu. JPEG menambahkan satu biaya tersendiri, karena setiap penyimpanan menulis encode lossy baru, jadi lakukan upscale dulu, tulis nilai DPI sekali, dan jaga file itu dari siklus simpan-ulang dalam perjalanannya ke printer.
Apakah ada cara gratis untuk meng-upscale gambar ke 4K?
Tidak melalui alat browser gratis, yang menangani satu gambar pada 2x tetap dengan batas keluaran 768 piksel. Mencobanya tidak memungut biaya dan memberi tahu Anda dengan cepat apakah super resolusi cocok untuk bahan sumber Anda. Pekerjaan yang membutuhkan keluaran 4K, faktor skala lebih tinggi, atau banyak gambar sebaiknya menggunakan titik akhir yang dihosting, tempat Anda memilih skala sendiri.
Kesimpulan
Cetak ulang buram di awal panduan ini tidak ada hubungannya dengan angka yang salah di kotak dialog. Ada 810.000 piksel yang diminta untuk menutupi halaman yang membutuhkan beberapa juta piksel, dan tidak ada penulisan ulang label yang pernah menyelesaikan hal itu. Piksel berasal dari model yang bisa menyusunnya ulang. Tag DPI kemudian memberi tahu printer seberapa rapat menempatkannya.
Jadi lakukan dua langkah itu sesuai urutannya. Periksa sisi panjang sumber Anda, bangun ulang dengan upscaler jika hitungan cetak mengatakan Anda kekurangan, lalu setel kolom resolusi dengan resampling dimatikan dan pastikan dimensi cetak berada di tempat yang Anda inginkan. Lakukan dengan cara itu dan Anda benar-benar meningkatkan DPI gambar, alih-alih memberi label ulang pada gambar buram yang sama dan berharap mesin cetak tidak setuju.





