2026 has seen a change in the digital world toward "Authentic Cinematicism." A $5,000 camera setup and a Hollywood budget are no longer necessary for producing high-end 4K b-roll. Anyone can create realistic photo animation AI 2026 standards from a single still image with the correct tools.
The Challenge of "Free" AI
Even though there are many choices out there, creators usually deal with two main problems:
- Watermarks: Ugly logos that make the video look cheap and messy.
- The Uncanny Valley: Weird-looking bodies or backgrounds that melt and ruin the effect.
The 180-Second Promise
This 3 minute AI video tutorial simplifies the process using 2026’s top-tier free models. By leveraging the daily credit refreshes of elite platforms, you can secure professional-grade output for $0.
Achieving Professional Results
To get photo to video ai free results that look intentional, focus on professional AI camera movements free of charge. Just follow a simple workflow: prep your image, add some movement, and upscale it. You can turn a flat photo into a cinematic shot in less than three minutes.
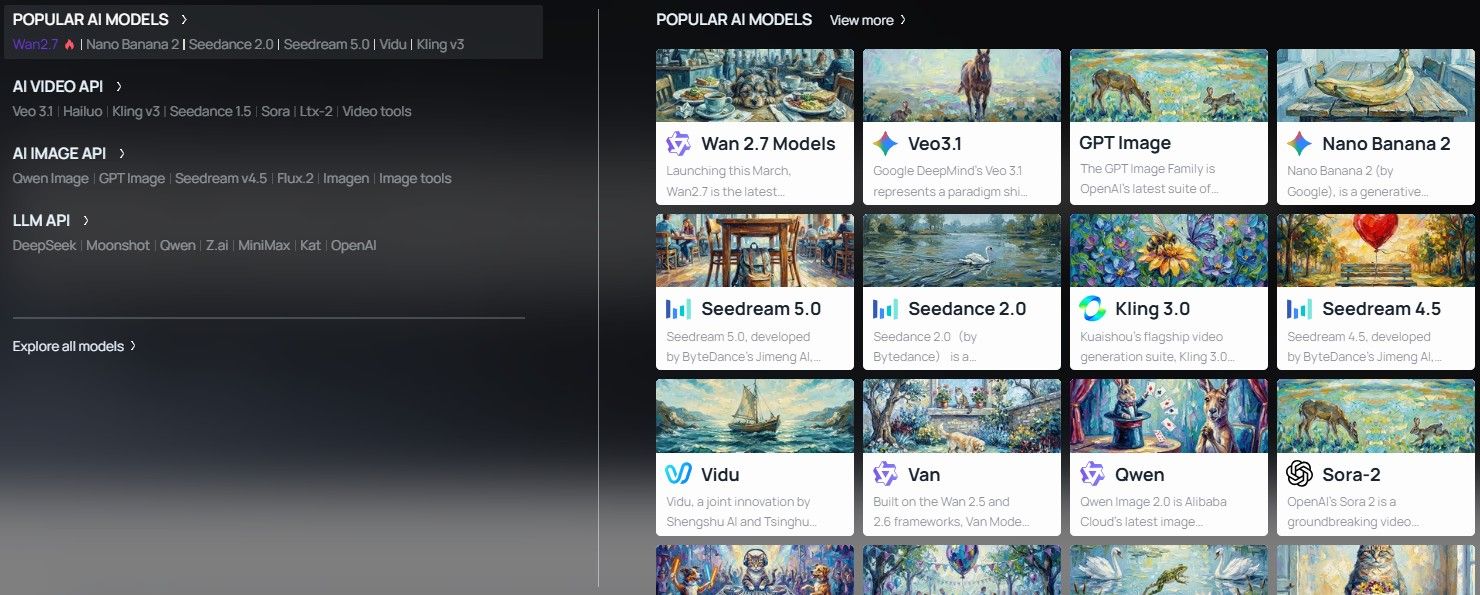
The "Big Three" Free AI Tools of 2026
Navigating the world of photo to video AI free options can be overwhelming for those just starting out. To simplify your journey, this beginner guide to AI animation 2026 highlights the three industry leaders that offer the most robust free tiers without sacrificing cinematic quality.
According to 2026 industry benchmarks, these platforms have revolutionized instant photo to video AI free accessibility by providing high-fidelity motion previously reserved for paid studios.
| Tool | Best For | Free Allowance (2026) | Key Edge |
|---|---|---|---|
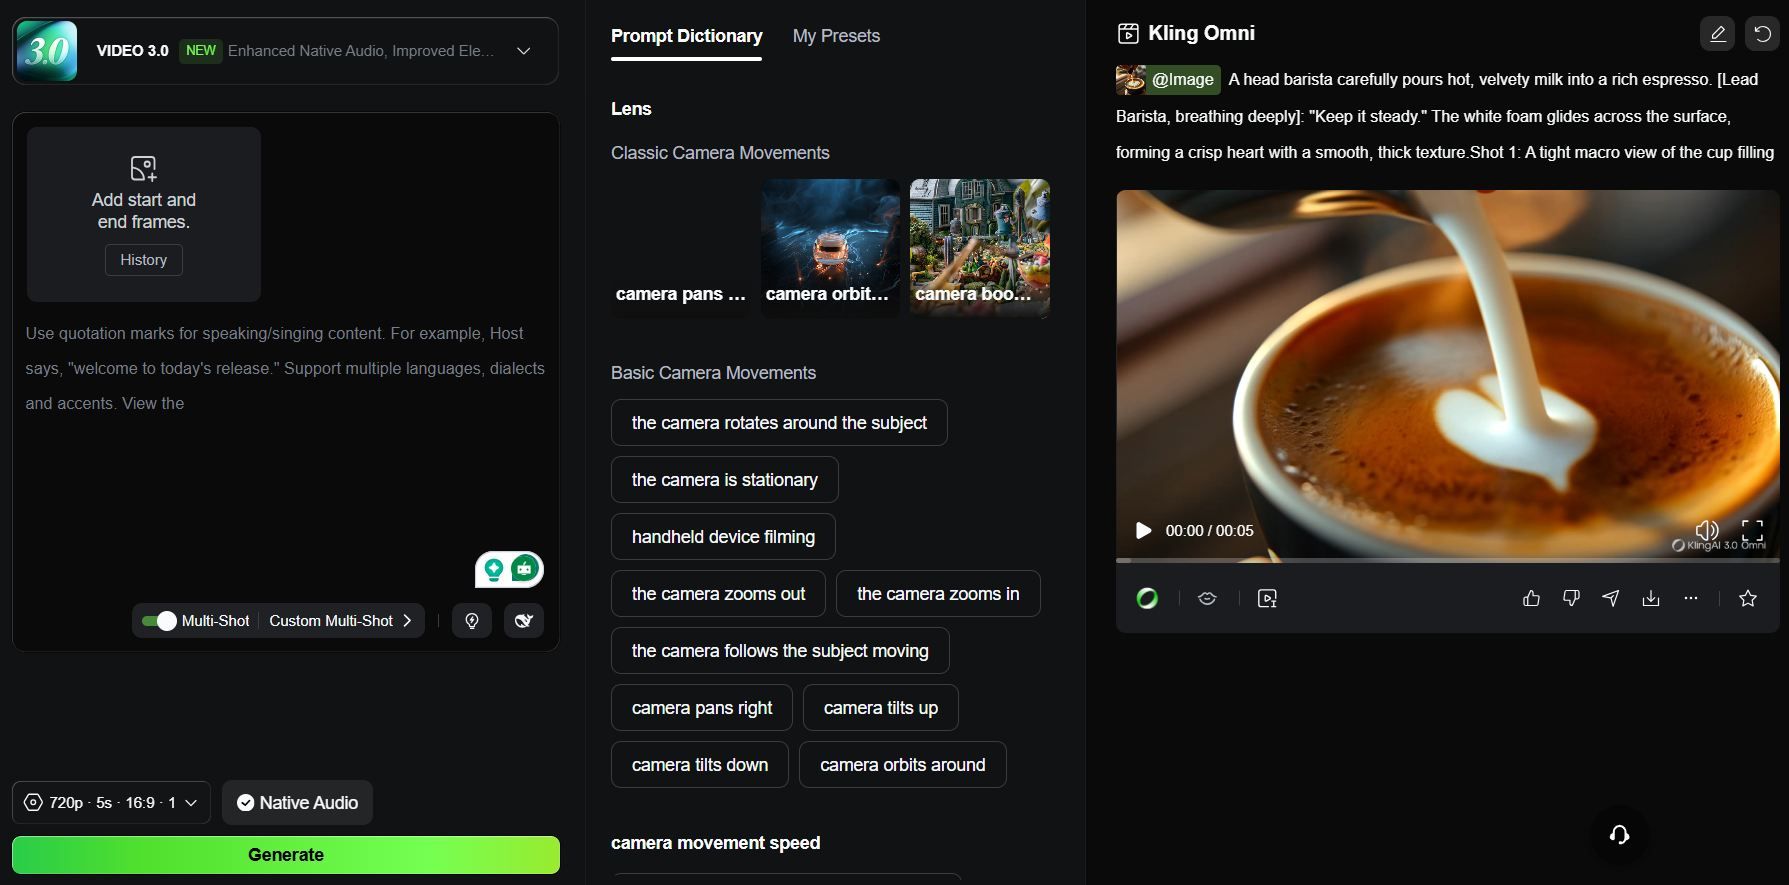
| Kling AI 3.0 | Realistic Physics | Register to receive 66 Credits | Bind elements, Custom Multi-Shot, Inspiration & Presets |
| Vidu Q3 | Narrative Stories | Register to receive 20 Credits; complete tasks to earn 70–110 points. | 1080p/H265 & Native Audio |
| Luma Dream 2.5 | Viral Social Clips | Register to receive 3,000 credits | High-Energy Action & End-Frame Control |
Choosing Your Starting Point
- For Consistency:Kling AI 3.0 is the gold standard for daily creators, offering a generous credit refresh every 24 hours. Its 16-bit HDR color depth ensures your animations retain a professional "film" look.
- For Storytelling:Vidu Q3 is great for keeping a story going. It makes 16-second clips with sound included, which is perfect for hitting key plot points.
- For Impact: If you need fast, realistic action like a splashing wave or a car chase, Luma Dream 2.5 is the best bet. It renders in just 120 seconds.
Step-by-Step: Your 3-Minute Animation Workflow
Transforming a static image into a high-fidelity cinematic sequence requires more than just a "Generate" button. This beginner guide to AI animation 2026 breaks down the professional workflow into three distinct, one-minute phases that ensure your instant photo to video AI free results look like they were shot on a Hollywood backlot.
Step 1: The "Clean" Image Prep (0:00–1:00)
The foundation of a great AI video isn't the prompt; it's the pixels. Most photo to video AI free models, such as Kling 3.0 or Vidu Q3, rely on depth-mapping—a process where the AI calculates the distance between objects to simulate realistic parallax.
To help the AI "see" your scene correctly, follow these preparation rules:
-
Pick High Contrast: Clear gaps between the subject and background stop "melting" bugs. If the subject blends into the shadows, the AI might accidentally move the background like it's part of your clothes.
-
Match Your Ratio: Always pick the right shape for the platform.
- 16:9: Best for YouTube and cinematic widescreen shots.
- 9:16: Needed for TikTok, Reels, and YouTube Shorts.
-
Check Resolution: You can use lower-quality images, but 2026 standards show that higher pixel counts lead to much cleaner final results. Starting with a 2K source file cuts down on "flicker" while the AI works because it has more detail to follow.
Now, let's test this out. I'll start by making a high-quality 2K image using the GPT image tool.
Step 2: Advanced Prompting—The "Director" Secret (1:00–2:00)
Beginners often use vague prompts like "Make it move" or "Cool animation." In 2026, the most successful creators use "Director-Level" language that describes the camera's mechanical behavior rather than the desired emotion.
To move from amateur to pro, adopt the SAECS Framework (Subject, Action, Environment, Camera, Style):
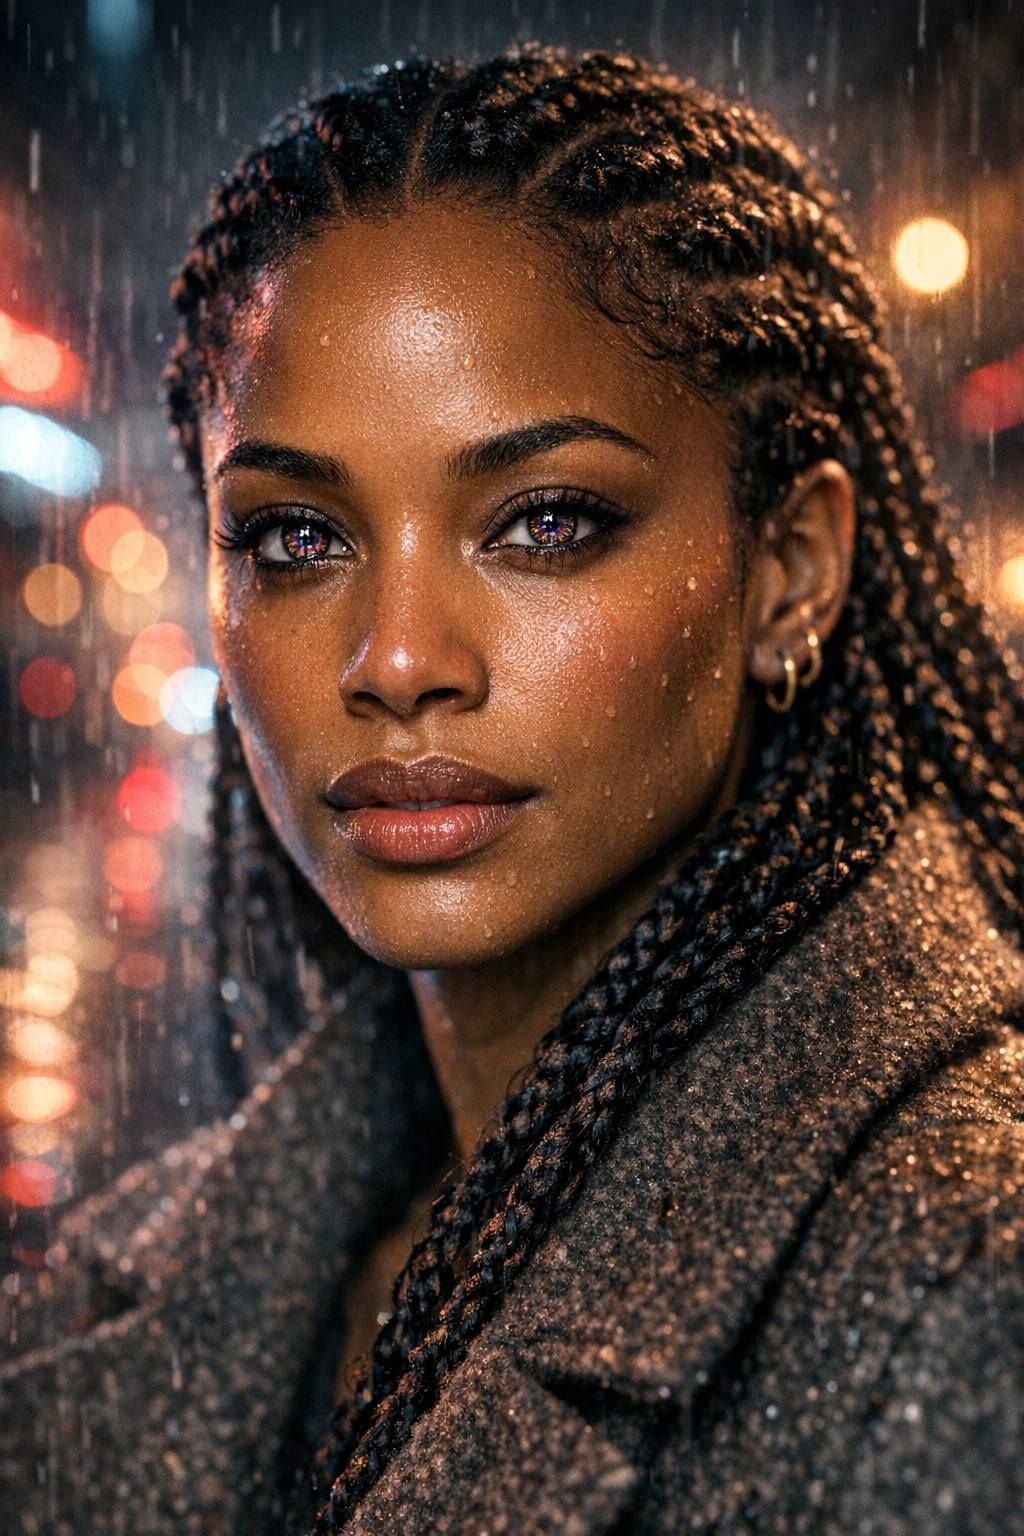
- The Amateur Prompt: "A woman walking in the rain, realistic, 4k."
- The Director Prompt:"Cinematic slow-pan, 4k, realistic fluid dynamics of raindrops hitting a silk jacket, soft bokeh background with anamorphic lens flares, 60fps."
Why the "Director Prompt" Works
The difference lies in technical specificity. By mentioning "fluid dynamics," you instruct the AI’s physics engine to prioritize the weight and splash of the rain. Specifying a "slow-pan" tells the model to move the virtual camera on a horizontal axis rather than zooming in, which creates a more stable and professional look.
| Feature | Generic Prompt Result | "Director" Prompt Result |
|---|---|---|
| Motion Stability | Shaky, random movement | Smooth, gimbal-like tracking |
| Lighting | Flat, "AI-looking" glow | Realistic light-wrap and depth |
| Physics | Objects may "teleport" | Natural weight and momentum |
Regarding resolution, most videos generated using photo to video AI-free are 720p/1080p. To generate 4K videos, you'll need to subscribe to a subscription or find other tools to enhance the image quality. Regarding free methods to upscale video resolution, please check "From Still Image to 4K Cinema."
Step 3: Scene-Based Storyboarding (2:00–3:00)
The biggest update in 2026 is the ability to generate Multi-Shot Narratives. Vidu Q3 now supports clips up to 16 seconds, allowing you to bridge multiple "scenes" in one go.
| Technique | How to Execute | Pro Benefit |
|---|---|---|
| Shot-Reverse-Shot | Prompt: "Shot 1: Wide view... Shot 2: Close-up on face..." | Creates an edited "rough cut" instantly. |
| End-Frame Anchoring | Upload your start photo and an "End Frame" (Available in Luma/Kling). | Forces the AI to follow a logical path between two points. |
| Native Audio Sync | Toggle "Auto-Sync" in Vidu Q3 before generating. | Automatically generates matching foley sounds for your motion. |
Pro tips: In 2026, "Expertise" is shown by Sequence Planning. Rather than gambling credits on a single random generate, use the "Draft Mode" (available in Luma Dream Machine) to check the motion path in low-res. If the physics look solid, only then commit your daily credits to the Native final render. This "Editor's Secret" ensures you never waste a free credit on a broken animation.
This time, I used Luma Labs' Kling 3.0 to generate a video. Let's take a look at the results together:
The Final Polish
Once the generation is complete, the 2026 standard for high-quality output often involves one final "Trust Signal": the Before vs. After check. If your video shows a significant jump in quality compared to a generic generation, you have successfully mastered the workflow.
By spending just three minutes—one on prep, one on motion control, and one on technical prompting—you can turn any photo to video AI free tool into a professional animation studio. Whether you are building a faceless YouTube channel or creating high-end social media ads, these "insider" steps ensure your content stands out in an increasingly crowded AI-generated world.
Troubleshooting: Solving the "Free Tier" Pain Points
Even with the best cinematic AI motion prompts for photos, you will inevitably encounter technical hurdles when using free platforms. As a beginner guide to AI animation 2026 user, understanding these "workarounds" is essential for professional-grade output.
Common Challenges and Pro Solutions
| Challenge | Practical Solution |
|---|---|
| The Watermark | Compose your shot with a "Safe Zone" in the lower third. Crop your 16:9 video to a 21:9 cinematic aspect ratio in post-production to cleanly remove the branding. |
| Melting Faces | This often occurs when the AI struggles with complex geometry. Instead of high-action prompts, use "slow, subtle movement" keywords. Avoid excessive motion on skin surfaces to maintain anatomical integrity. |
| Queue Times | Server demand for instant photo to video AI free tools fluctuates wildly. Aim to generate during "off-peak" hours—typically early mornings in the server's home region—to bypass long wait times often associated with Kling or Vidu. |
Why Precision Matters
Many creators believe "melting" issues are purely hardware-related, but they are often the result of improper prompt structure. By refining your inputs—focusing on descriptive, steady camera language rather than demanding erratic motion—you drastically reduce the likelihood of generation errors.
Remember, these photo to video ai free models function as predictive engines. Providing them with a clean, high-contrast start frame and a well-defined directorial prompt gives the system the stability it needs to deliver the high-quality, professional results you expect without requiring a paid subscription.
Beyond the Hobbyist: Scaling with Atlas Cloud
If you are tasked with producing 500 product clips for an e-commerce catalog or a full-length cinematic game trailer, the manual limitations of free platforms become apparent. According to 2026 production efficiency reports, manual generation on web-based free tiers can take up to 40% longer due to the following factors:
- Busy Queues: When many people use the site, you might wait over 15 minutes for one clip.
- License Limits: Free accounts usually do not let you use the videos for paid ads.
- Watermark Issues: Taking out logos by hand after editing takes too much time for professional teams.
When "free" becomes a bottleneck, the logical pivot is toward instant photo to video AI free from technical friction through API-first solutions. Atlas Cloud offers a professional-grade alternative designed for developers and studios who require cinematic AI motion prompts for photos at scale.
| Feature | Free Tier Tools | Atlas Cloud API |
|---|---|---|
| Throughput | Sequential (1 at a time) | High-Concurrency (Unlimited) |
| Model Access | Standard Web Interface | Advanced Models 300+ (Wan 2.6 / Kling 3.0...) |
| Output Quality | Often Watermarked | 100% Clean / Commercial Rights |
| Integration | Manual Upload | Unified API / Automated Workflow |
By transitioning to Atlas Cloud, you gain unlimited throughput and a developer-ready environment that bridges the gap between a 3-minute hobby and a 24/7 automated production engine.
Conclusion: Your Cinematic Path
The landscape of photo to video AI free technology has reached a point where the barrier between a static image and a cinematic sequence is merely three minutes of strategic directing. Whether you are a solo creator or part of a global production team, the choice of workflow depends entirely on your required scale and speed.
Choosing Your Trajectory
Making high-quality animations in 2026 usually comes down to two different paths depending on how much you need to make and what you need it for:
- For Individual Creators: If you just need a few good clips for social media or your own projects, use the "Big Three" (Kling, Vidu, and Luma). It is the cheapest way to work. You can get a steady look without spending money just by using their daily free credits and learning the right motion prompts for your photos.
- For Enterprises and Developers: When your project requires hundreds of assets or high-concurrency processing, manual uploads are no longer viable. The shift to instant photo to video AI free of technical bottlenecks happens through API integration.
Summary of Production Paths
| User Type | Recommended Workflow | Key Advantage |
|---|---|---|
| Hobbyist | Manual Web Interface | $0 Cost / Daily Credits |
| Marketing Teams | Batch Processing / Pro Tiers | Commercial Rights / No Watermarks |
| Developers/Studios | Atlas Cloud Video API | Unlimited Throughput / ultra HD Automation |
Want to move past making every clip by hand? Take a look at the Atlas Cloud Video API docs to start automating your 4K video work today. Turning a single photo into a pro movie shot is now as easy as writing a few lines of code.
FAQ
What are the standard limitations of free AI video generators?
Most free plans prioritize accessibility over high-end production. You will typically encounter these constraints:
- Length: Most free clips only last between 3 and 10 seconds.
- Quality: You usually get 720p resolution, while 1080p and 4K are locked behind paid plans.
- Branding: Sites like HaiLuo and Runway often slap their logo on your free videos.
- Queue Times: Free users may experience longer processing times during peak hours.
How can I ensure my character looks the same in every video?
Keeping character consistency is a big trend in 2026. Recommend using an Identity Anchor. This is just one high-quality master image of your character. Always upload this same photo with your prompts. This helps the AI keep the same face and outfit in every scene.
What are the legal restrictions for using free AI-generated videos?
In 2026, the legal landscape for AI content is defined by transparency and usage rights. Copyright protection typically requires significant human creative intervention beyond a single "generate" click. Furthermore, most free tiers come with strict licensing boundaries:
| Feature | Free Tier Policy | Paid Tier Policy |
|---|---|---|
| Commercial Rights | Personal use only; no monetization | Full commercial usage allowed |
| Transparency | Mandatory "AI-generated" metadata | Optional or customizable markers |
| IP Indemnification | None (User bears all legal risk) | Often included in Enterprise plans |
California’s SB-942 also forces big platforms to offer "transparency tools." These tools help users spot if a video was changed by AI. This law ensures that all cinematic content stays honest and ethically disclosed.
How can I get better video quality on the free plan?
You can skip resolution limits by using a multi-step "External Upscaling" workflow. Instead of using the tool’s own export, use this method to keep your video looking sharp:
- Use an HD Image: Start with a crisp, upscaled photo, 1080p or higher, as your reference frame instead of just using text.
- Generate a "Seed" Clip: Create a short 3–5 second clip at the platform's free resolution (typically 720p).
- Use a Third-Party Upscaler: Run your final clip through free AI video enhancers like Topaz Video AI (Trial) or open-source tools like Real-ESRGAN.
This method allows you to achieve a "Pro" look while staying within the credit limits of free tools like Kling or Pika.


