Installing DeepSeek Harness takes one command. Thirty seconds later you are staring at a beautiful, completely empty interface on http://127.0.0.1:3080, and nobody has told you what to do next.
The README is famously thin. The Cordis paper it links to talks about spatiotemporal composability. You just wanted the thing to read your code.
This guide starts at that empty screen. You will get the install command, yes, but the part that actually costs you an afternoon is wiring up a model provider, and there are three default values in that step that quietly break DeepSeek models and throw away 75% of your context window. Almost nobody documents them.
Key takeaways
npx @deepseek-ai/dsh webis the whole install. Node.js^22.19.0or>=24.0.0is the only prerequisite.- DeepSeek Harness is a harness, not a model. It ships with zero credentials, so it does nothing until you attach a provider.
- Any OpenAI-compatible endpoint works, including DeepSeek's own API, a gateway, or a local Ollama server.
- When you add a custom provider, the harness guesses the thinking dialect from your base URL. Guess wrong and
reasoning_contentbreaks. - Hand-declared models default to a 262,144 context window, so V4's full 1,048,576 window stays switched off until you say otherwise.
Terminal showing green passing tests beside a glowing modular harness rig, illustrating how to install DeepSeek Harness
The 60-Second Version of What You Are Building
Here is the payoff before any theory. Three files in an empty folder, one paste-in prompt, and the agent reads the code, runs pytest, watches two tests fail, changes a single character, and re-runs until the suite is green.
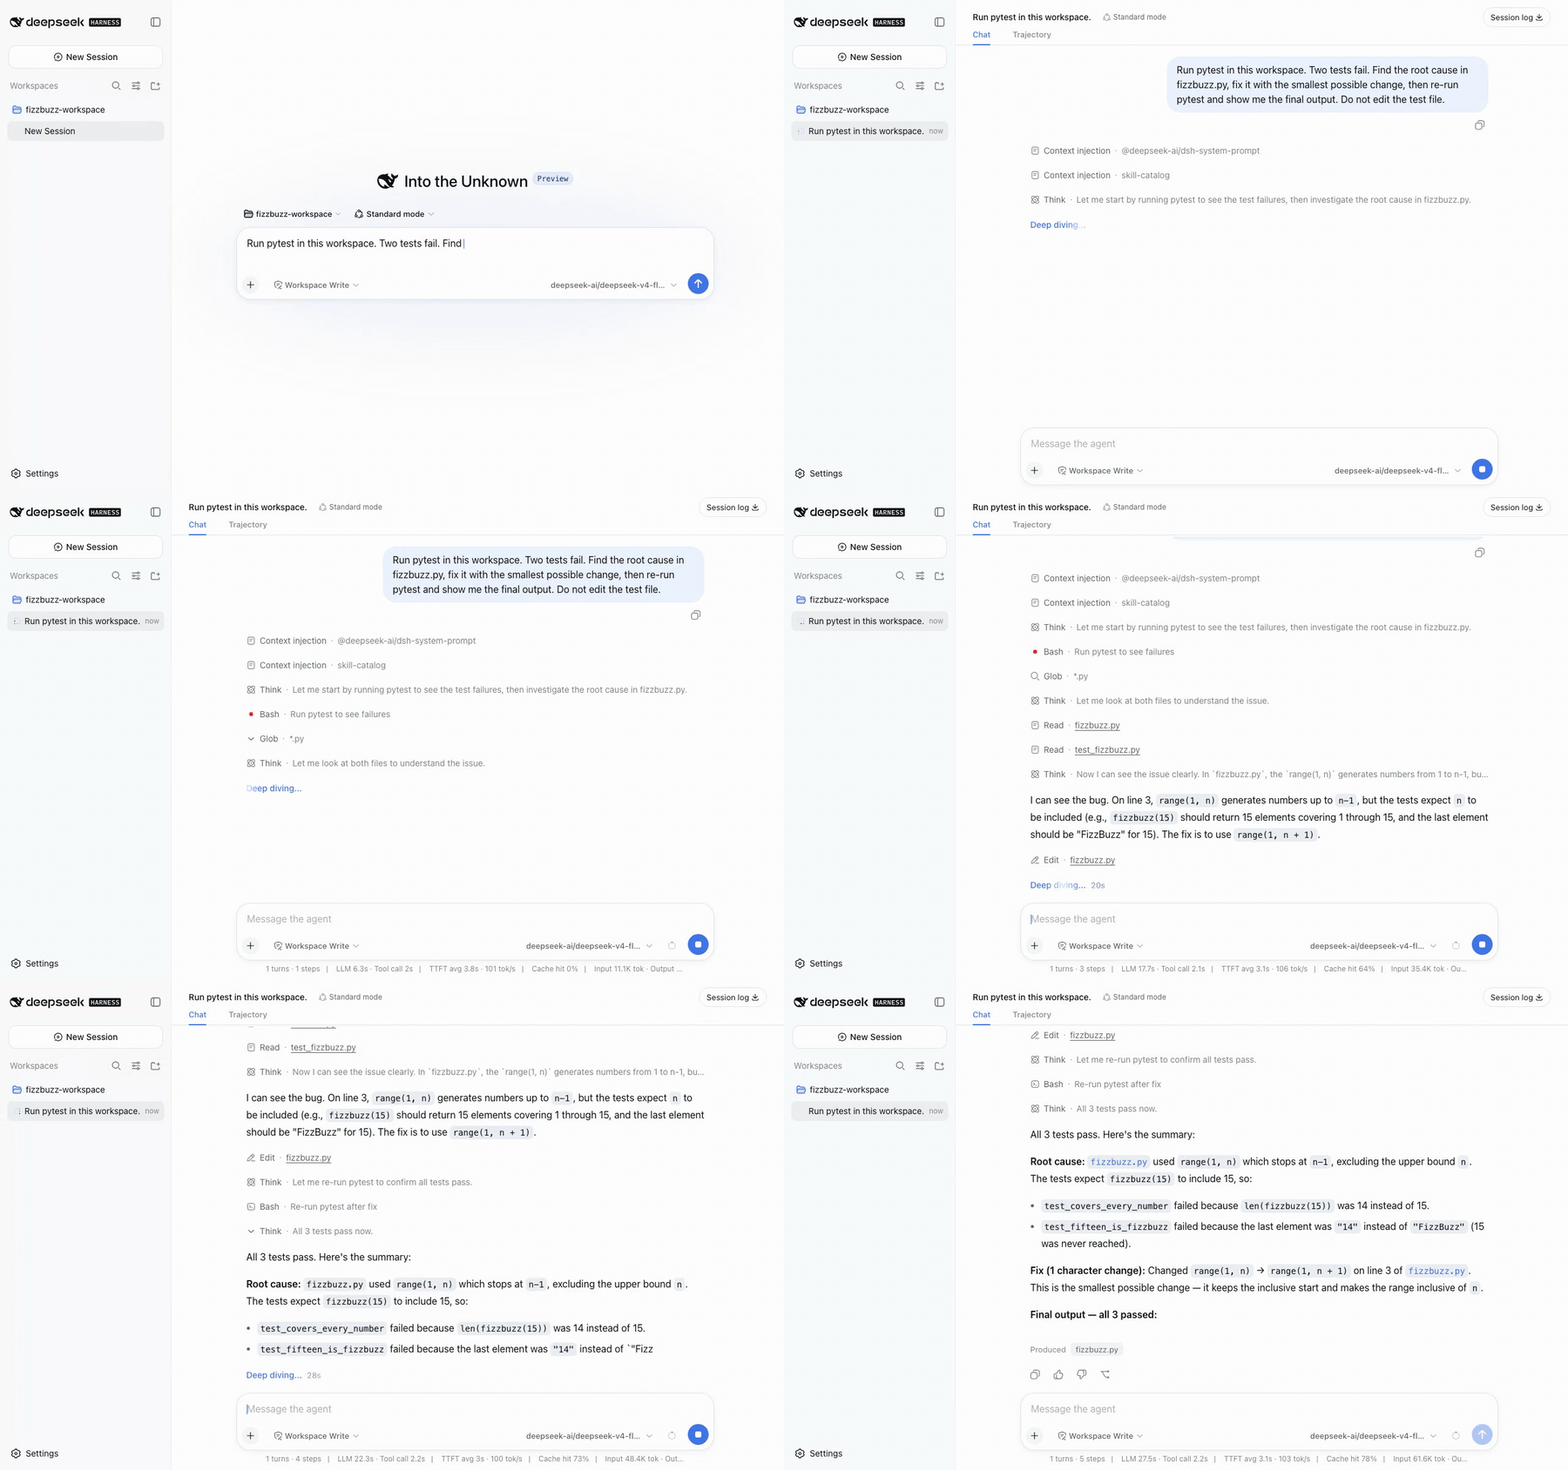
DeepSeek Harness reading fizzbuzz.py, running pytest, fixing the off-by-one bug and re-running to 3 passed
The full loop: read, run, diagnose, patch, re-run. Every step of it lands in an append-only session log you can replay later.
That is the demo we will build together in Step 6. It is deliberately small enough to reproduce in a scratch directory, and it does not depend on any external repository that might drift next week.
Why Most Attempts to Install DeepSeek Harness Stall at Step Two
The install genuinely is trivial. The stall happens immediately after, and it is a design decision rather than a bug: DeepSeek Harness ships no keys, no default provider, and no bundled model.
DeepSeek open sourced the project on August 13, 2026 under the MIT license, and it went vertical. As of August 17, 2026 the repository sits at 144,361 stars and 14,689 forks (GitHub, August 2026), which is a lot of people arriving at the same empty screen in the same week.
The Hacker News thread from launch week captures the split reaction. People love the transparency: everything the model sees is recorded in an append-only session log, and one commenter noted that "US models won't let you see that." The complaints are just as consistent. "The README is pretty bare outside of installation instructions," one developer wrote, and the Cordis paper drew the verdict that it reads like "word salad" (Hacker News, August 2026).
So the four things that actually block people are all post-install:
- Node is too old, so
npxfails before anything starts. - Port 3080 is already taken by another dev server.
- The custom provider returns 401, or the model list comes back empty.
- The model connects but reasoning output arrives mangled, or long files blow the context window early.
Steps 1 through 5 below are aimed squarely at those four.
Before You Install DeepSeek Harness: Pick a Model and a Key
Answer first: the harness itself is free and local, but it will not do a single useful thing until you give it an OpenAI-compatible base URL, a key, and at least one model ID. Decide this before you install and the whole setup takes ten minutes.
Everything happens in one browser tab at 127.0.0.1:3080. You are choosing between three routes, and all three work.
Table B: model access options that work with DeepSeek Harness today
| Route | Base URL | Price per 1M tokens | Context | Payment | Best for |
|---|---|---|---|---|---|
| DeepSeek official API | https://api.deepseek.com | V4-Flash $0.22 in / $0.66 out off-peak, $0.44 / $1.32 peak. Cache hits from $0.007 | 1M | Varies by region | First-party behaviour, very cheap cache hits |
| OpenAI-compatible gateway (example: Atlas Cloud) | https://api.atlascloud.ai/v1 | V4-Flash $0.14 in / $0.28 out. V4-Pro $1.68 / $3.38 | 1,048,576 | Card, no minimum spend | Flat rates with no peak-hour surcharge |
| Local Ollama | http://localhost:11434/v1 | No token cost | Model dependent | None | Private code, offline work |
Two things worth knowing before you pick. DeepSeek's first-party API moved to peak and off-peak billing, where peak hours are 01:00 to 04:00 and 06:00 to 10:00 UTC and off-peak is exactly half of peak (DeepSeek API Docs, August 2026). Its cache-hit input pricing is extremely low, so a workload that re-reads the same context repeatedly can be very cheap first-party.
A gateway trades that for predictability. Atlas Cloud serves the same DeepSeek models on a flat rate with no peak surcharge and no subscription, which is the example I will use in the setup below because it needs no regional payment method. Swap in whichever route matches your situation; the config shape is identical for all of them.
How to Install DeepSeek Harness, Step by Step
There are three ways in. Pick a row, then follow the steps.
Table A: installation methods compared
| Method | Time | Needs | Upgrades | Best for |
|---|---|---|---|---|
| npx | Under a minute | Node 22.19+ or 24+ | Re-run npx | Almost everyone |
| From source | 5 to 10 minutes | Node, pnpm, git | git pull and rebuild | Contributors, plugin authors |
| Desktop build | About a minute | Nothing | Reinstall | Anyone avoiding a Node install |
Step 1: Check Your Prerequisites Before You Install DeepSeek Harness
The single most common failure is a Node version that looks recent enough but is not. The repository requires ^22.19.0 || >=24.0.0. Nothing on the 23.x line qualifies at any patch level.
bash1node -v # must be >= 22.19.0 on 22.x, or >= 24.0.0 2npm -v 3
If node -v prints 22.14 or 20.x, upgrade before going further. You only need pnpm if you plan to build from source or author plugins:
bash1npm install -g pnpm 2
Step 2: Install DeepSeek Harness With One Command
This is the entire install. It downloads and launches the web profile in one go.
bash1npx @deepseek-ai/dsh web 2
Open http://127.0.0.1:3080. If that port is already busy, the launcher passes any flags it does not recognise straight through to the profile, so you can move it:
bash1npx @deepseek-ai/dsh web --port 8080 2
What you get is an empty shell. No provider, no model, no key. That is expected, and it is where most guides stop.
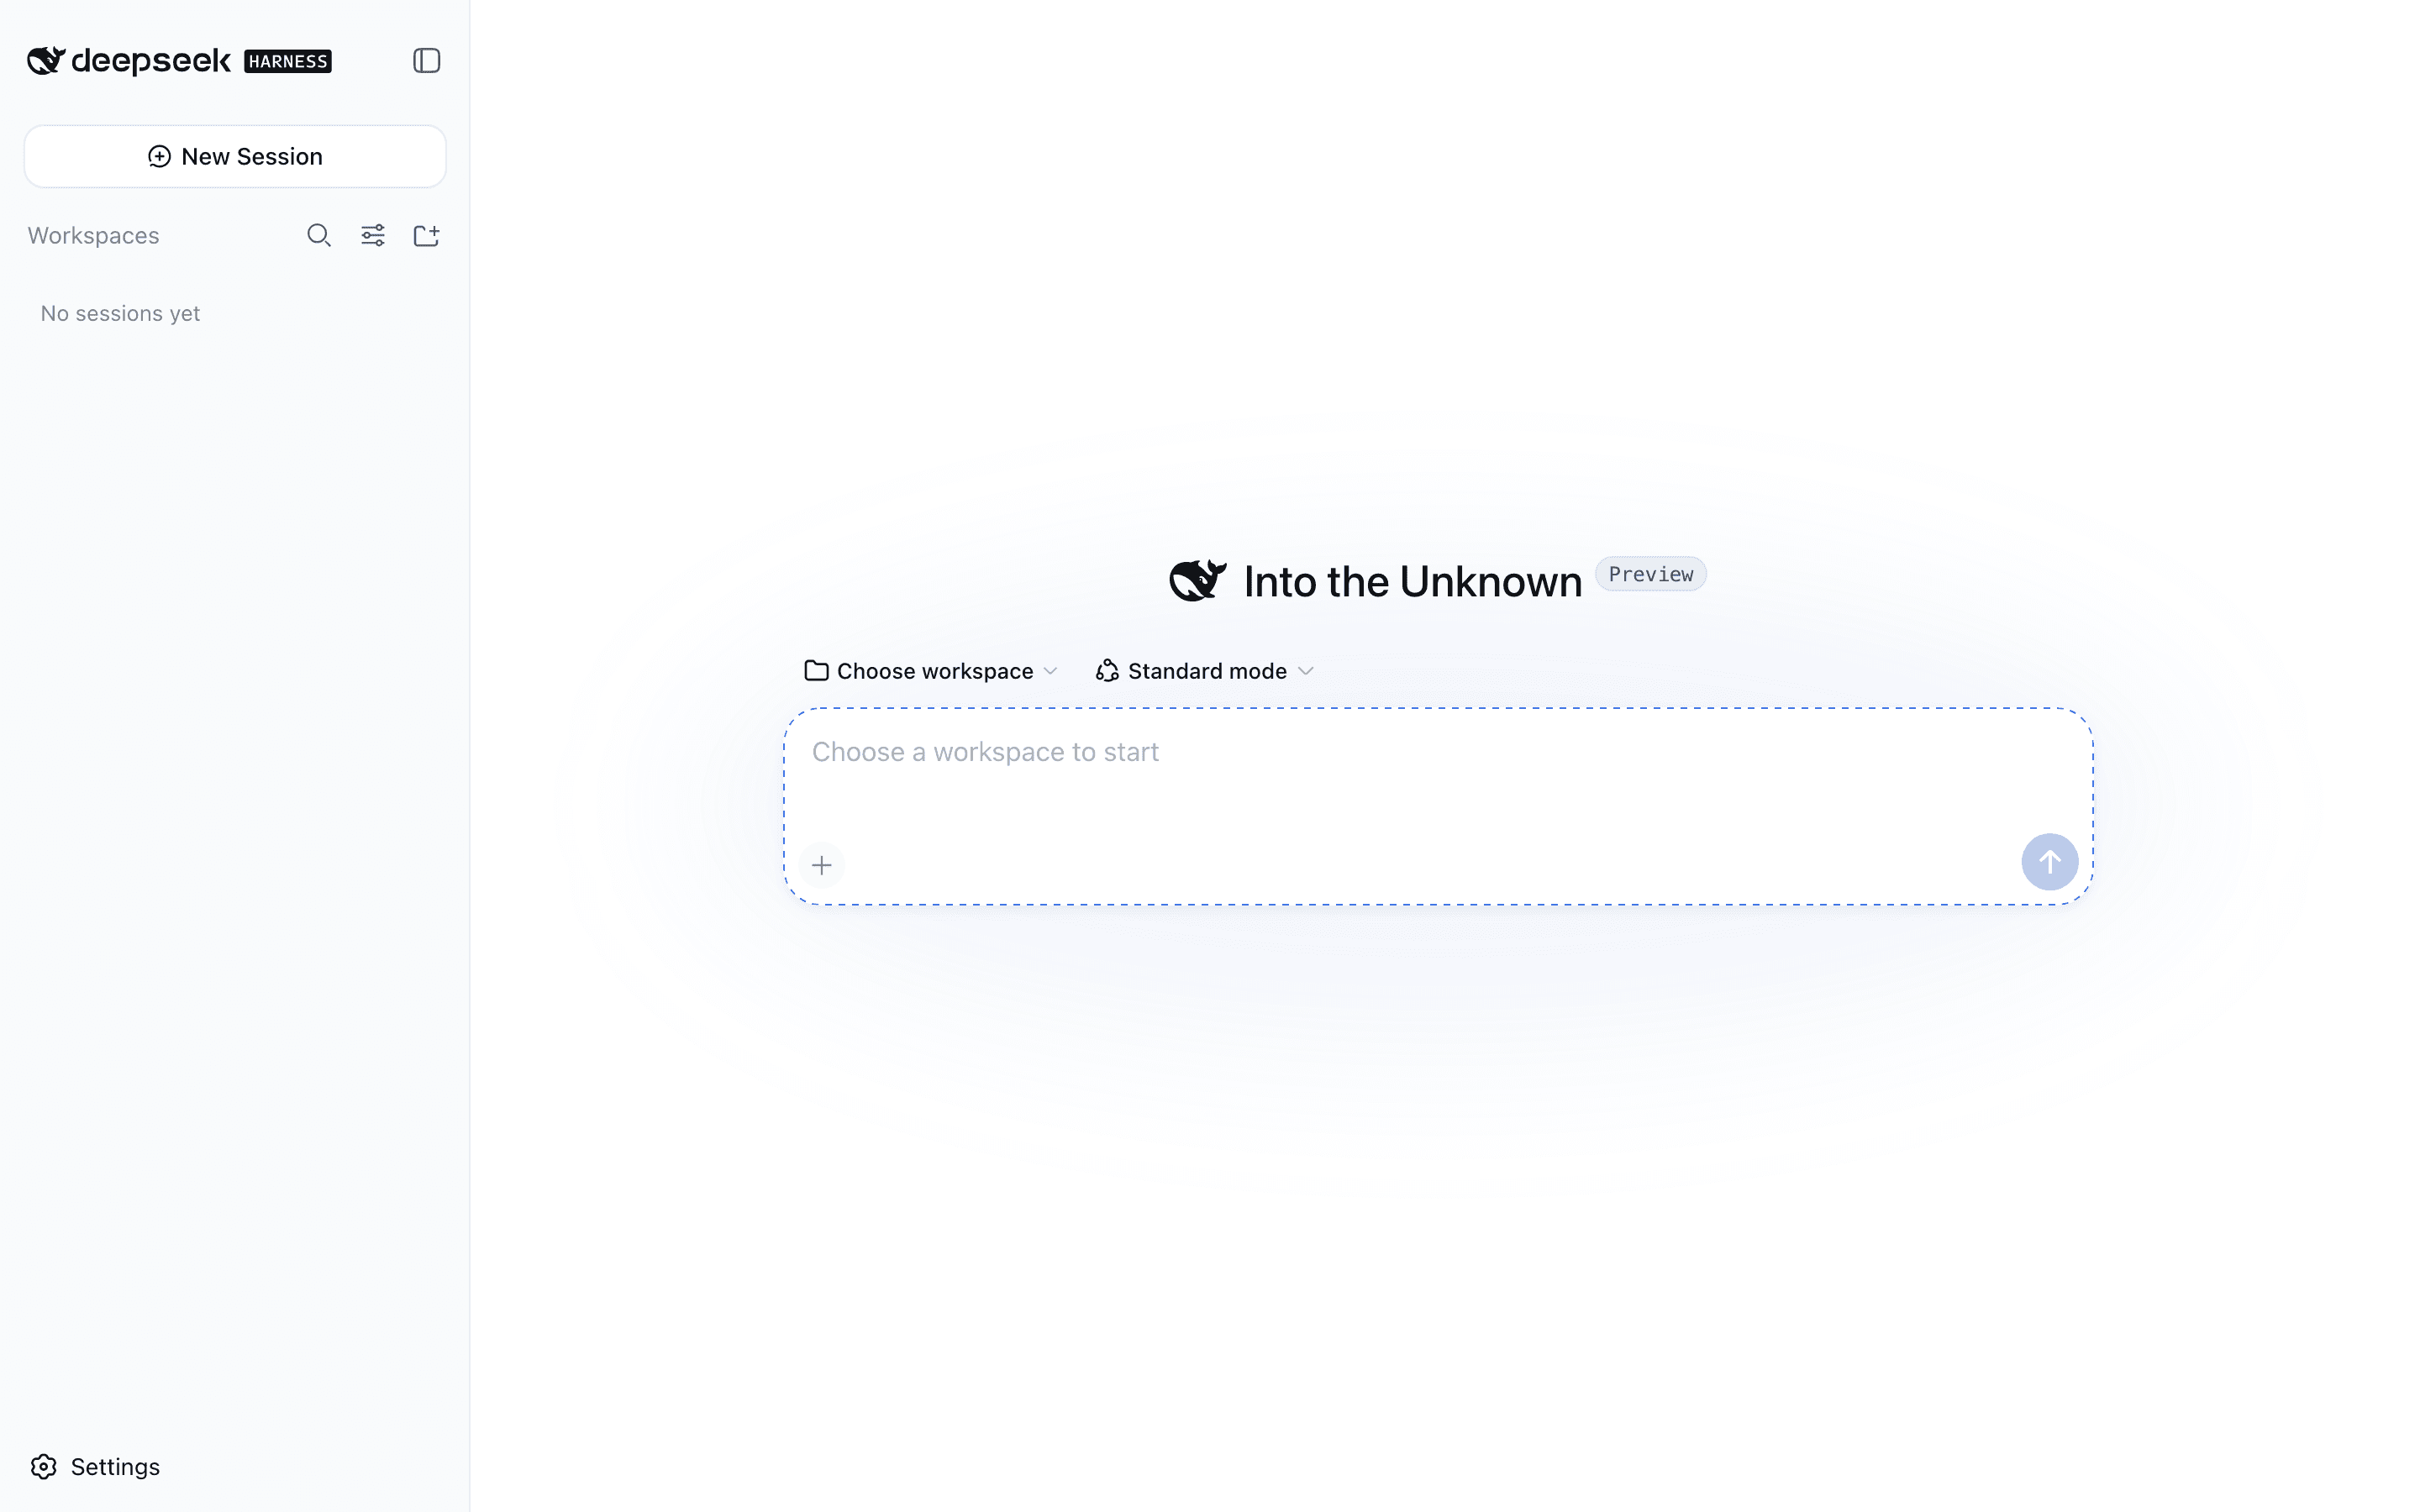
The DeepSeek Harness web UI at 127.0.0.1:3080 immediately after install, with no provider or model configured
Install complete, and completely inert. Everything from here is wiring.
Step 3: Get an API Key for DeepSeek Harness
Whichever route you picked from Table B, you need a key and a base URL. For the first-party route, sign up at platform.deepseek.com and create a key there. Billing options differ by region, so check that your payment method is supported before you commit to it.
For the gateway route used in this walkthrough, create a key in the Atlas Cloud dashboard under API Keys, then export it so the harness can read it without storing it in a settings file:
bash1export ATLASCLOUD_API_KEY="sk-your-key-here" 2
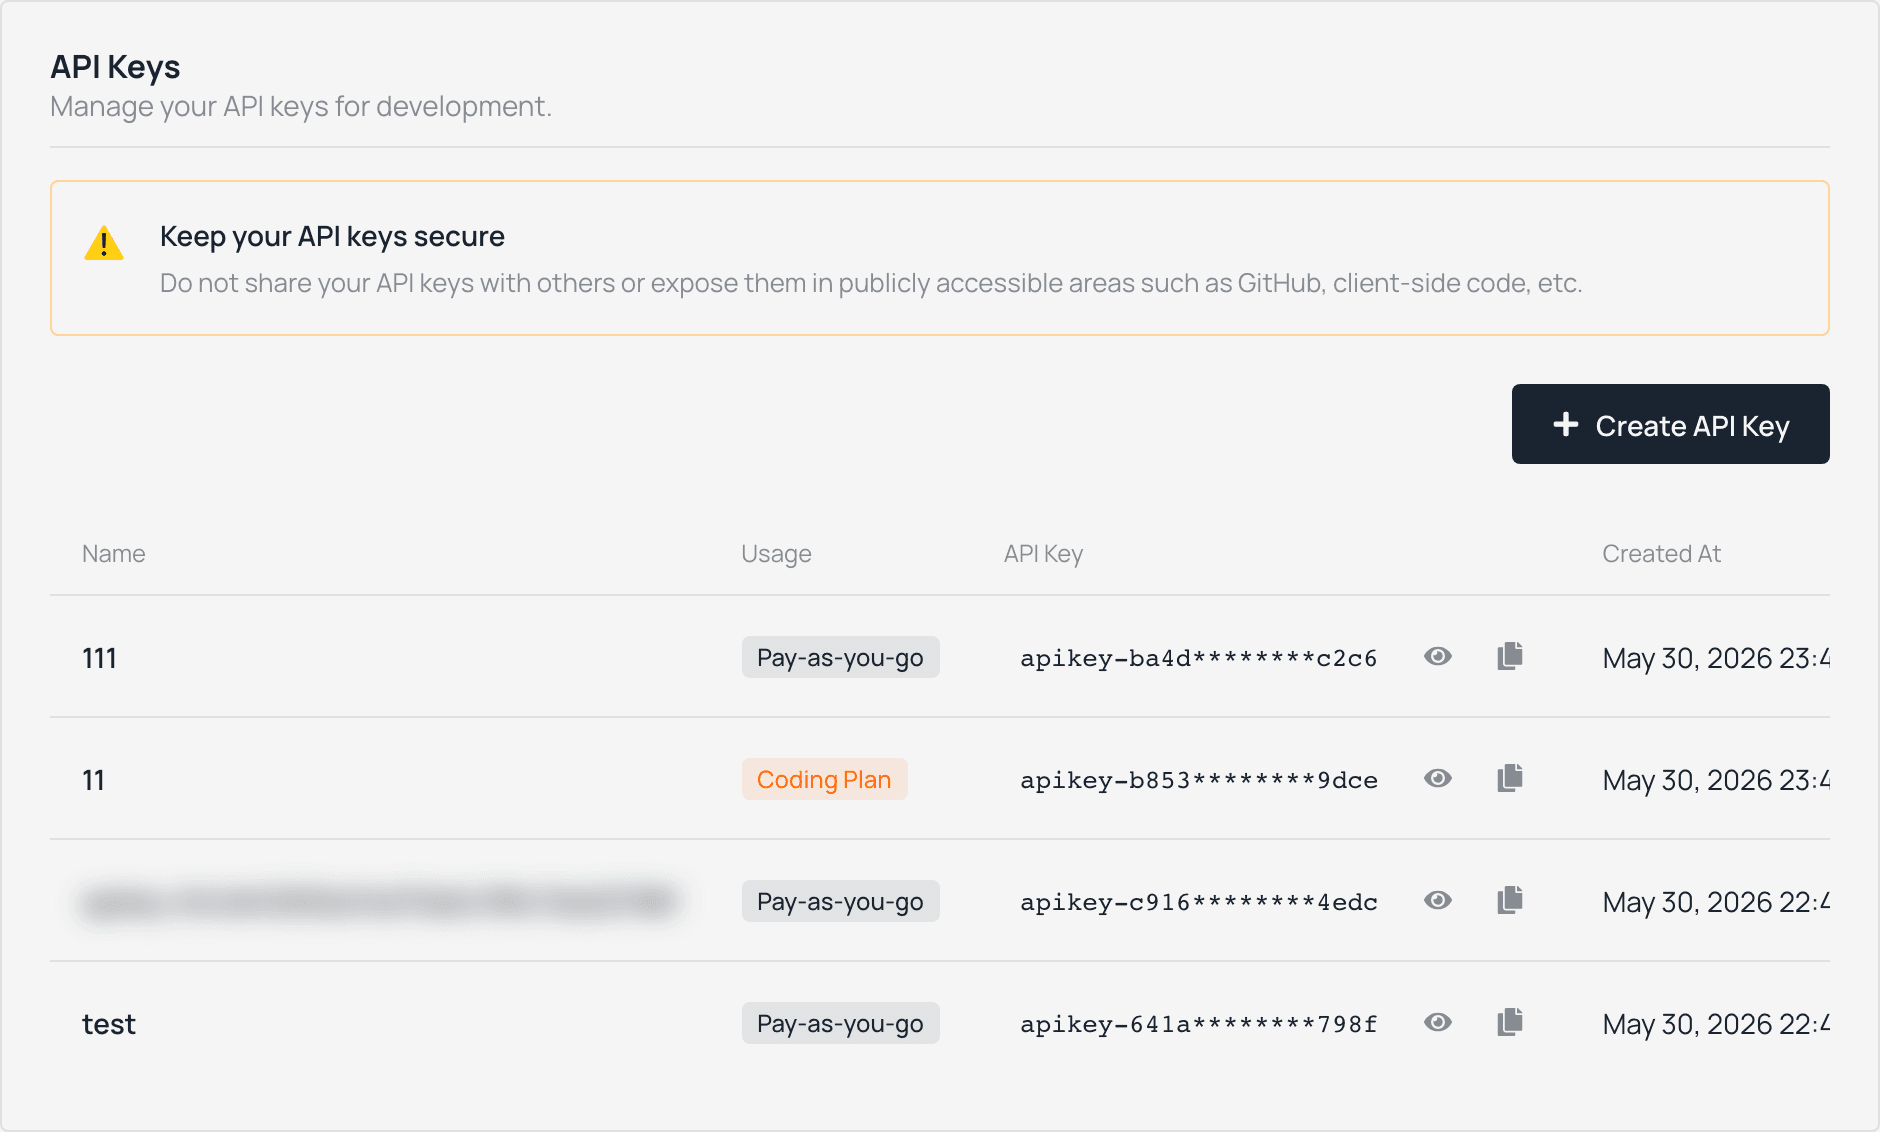
The API Keys page of the Atlas Cloud dashboard with a newly created key, partially masked
Copy the key once. It is not shown again after you leave the page.
Step 4: Add Your Model Provider to DeepSeek Harness
In the UI, go to Settings, then Models, then Add a custom provider. The form needs a Provider ID, a display name, a base URL, an API protocol, a credential, and at least one model.
One warning that the docs are right to repeat: the Provider ID is permanent. It is written into requests, saved sessions, model defaults, and credential references. If you dislike it later, your only option is to create a new provider and delete the old one.
| Field | What to enter |
|---|---|
| Provider ID | atlas (lowercase, permanent) |
| Display name | Atlas Cloud |
| Base URL | https://api.atlascloud.ai/v1 |
| API protocol | openai-completions |
| API key | Your key |
| Models | Click Fetch available models, or type deepseek-ai/deepseek-v4-flash by hand |
If fetching models returns 401, the key is wrong. If it returns an empty list, the endpoint simply does not expose a model index, which is harmless: type the model ID manually and move on.
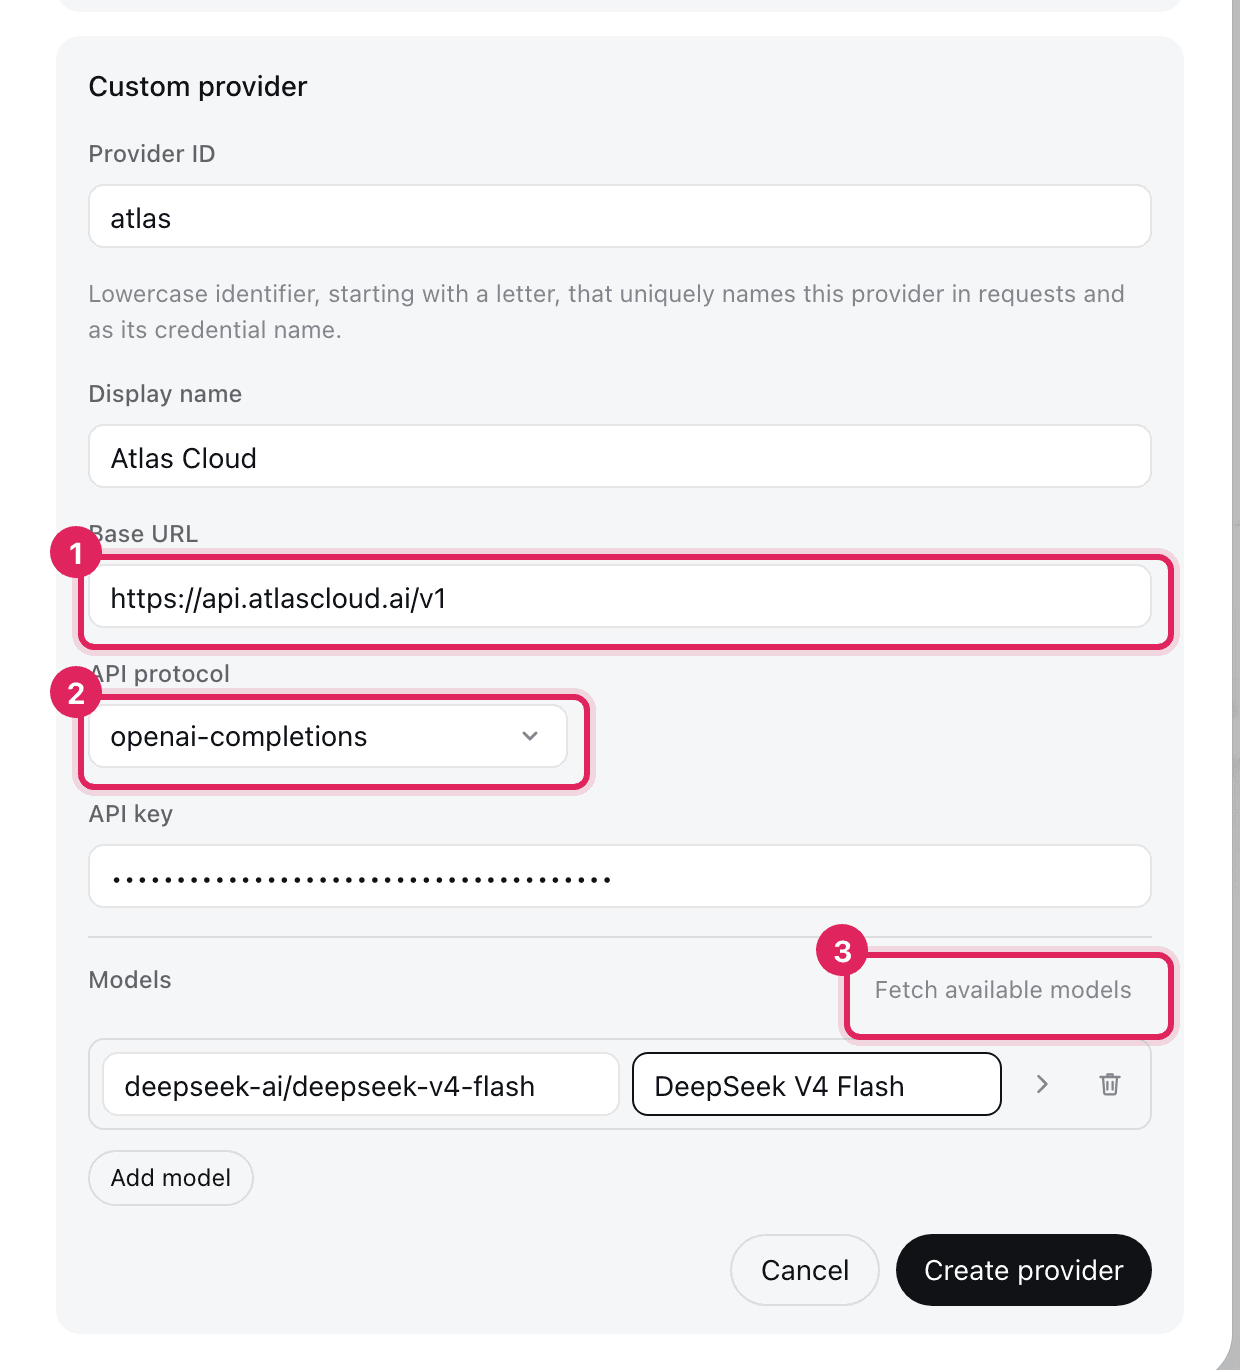
The Add a custom provider form filled in, with the base URL, API protocol and Fetch models control marked
The three fields that decide whether the next step works: base URL, protocol, and the model list.
Step 5: The Three DeepSeek Harness Defaults That Silently Break DeepSeek Models
This is the part no other install guide covers, and it is the reason your setup may look connected but behave strangely.
The harness's LLM layer infers which thinking dialect to speak from your endpoint URL. The internal docs are blunt about the consequence: "pi-ai guesses from the endpoint URL; a private gateway's URL says nothing, so a DeepSeek-dialect gateway would be spoken to in the OpenAI dialect with no way to correct it." In plain terms, any base URL that is not obviously DeepSeek gets treated as OpenAI, and DeepSeek's reasoning_content handling goes wrong.
The second and third traps are capacity. A model you declared by hand falls back to defaultContextWindow of 262,144 and defaultMaxTokens of 32,768. V4 supports 1,048,576 tokens of context, so accepting the default throws away three quarters of it.
Write these into your settings file:
yaml1# $DSH_HOME/settings.yaml (defaults to ~/.dsh/settings.yaml) 2llm-pi-ai: 3 providers: 4 atlas: 5 displayName: Atlas Cloud 6 api: openai-completions 7 baseURL: https://api.atlascloud.ai/v1 8 apiKeyEnv: ATLASCLOUD_API_KEY 9 compat: 10 thinkingFormat: deepseek # 1. stop the URL-based guess 11 defaultContextWindow: 1048576 # 2. default is only 262144 12 defaultMaxTokens: 32768 # 3. raise for long-output jobs 13 models: 14 - id: deepseek-ai/deepseek-v4-flash 15 contextWindow: 1048576 16 - id: deepseek-ai/deepseek-v4-pro 17 contextWindow: 1048576 18
Three things to keep in mind. Settings resolve model first, then route, then the installed catalog entry, then the URL-derived guess, so a per-model value always wins. Both compat switches, thinkingFormat and supportsReasoningEffort, exist only under openai-completions; put them on another protocol and resolution fails. And this adapter deliberately does not cover Bedrock, Vertex, Azure or Codex, whose auth flows need more than a key, an endpoint and headers.
Step 6: Run Your First Real Task in DeepSeek Harness
Now the demo from the top of this article. Create an empty folder and add three files.
fizzbuzz.py, containing one off-by-one bug:
python1def fizzbuzz(n): 2 out = [] 3 for i in range(1, n): 4 if i % 15 == 0: 5 out.append("FizzBuzz") 6 elif i % 3 == 0: 7 out.append("Fizz") 8 elif i % 5 == 0: 9 out.append("Buzz") 10 else: 11 out.append(str(i)) 12 return out 13
test_fizzbuzz.py, where two of three tests fail:
python1from fizzbuzz import fizzbuzz 2 3def test_starts_correctly(): 4 assert fizzbuzz(5)[:3] == ["1", "2", "Fizz"] 5 6def test_covers_every_number(): 7 assert len(fizzbuzz(15)) == 15 8 9def test_fifteen_is_fizzbuzz(): 10 assert fizzbuzz(15)[-1] == "FizzBuzz" 11
And requirements.txt:
text1pytest>=8.0 2
Running the suite by hand first is worth doing, so you know what the agent is walking into:
text1.FF [100%] 2=================================== FAILURES =================================== 3___________________________ test_covers_every_number ___________________________ 4E AssertionError: assert 14 == 15 5___________________________ test_fifteen_is_fizzbuzz ___________________________ 6E AssertionError: assert '14' == 'FizzBuzz' 7=========================== short test summary info ============================ 82 failed, 1 passed in 0.01s 9
Set the agent mode to Standard and the model to deepseek-ai/deepseek-v4-flash, then paste this prompt exactly:
Run pytest in this workspace. Two tests fail. Find the root cause in fizzbuzz.py, fix it with the smallest possible change, then re-run pytest and show me the final output. Do not edit the test file.
The correct fix is one character: range(1, n) becomes range(1, n + 1), and the suite reports 3 passed.
Now the part that makes a harness different from a chat window. Every run is recorded in an append-only session log, and you can fork it. Go back to the point where the agent first read fizzbuzz.py and branch a second attempt:
Fork this session from the step where you first read fizzbuzz.py. This time rewrite it as a dict-based lookup instead of patching the if-branch, then run pytest again.
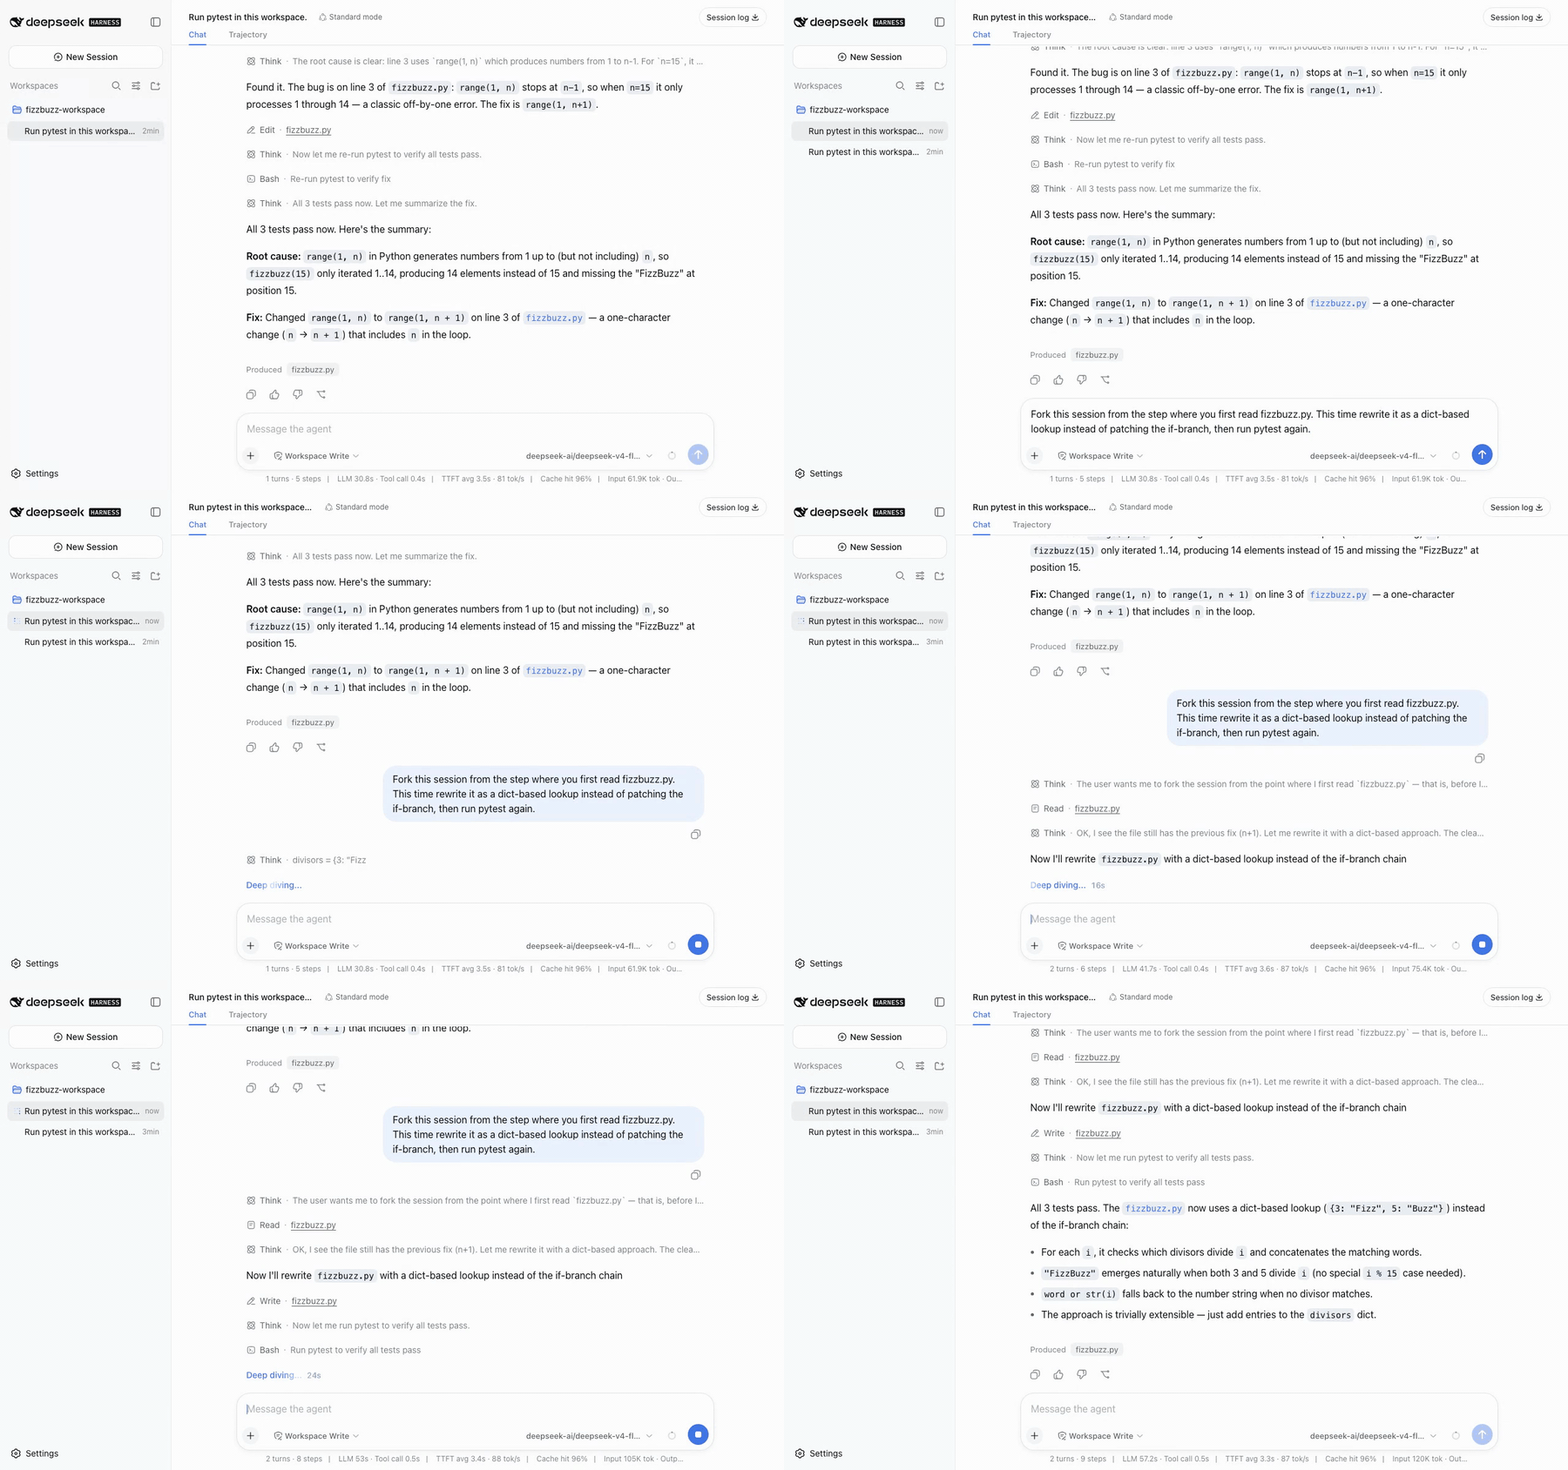
Forking a DeepSeek Harness session log to produce a second, dict-based implementation from the same starting point
One starting point, two branches. This is the feature the launch-week crowd actually cared about.
Step 7: Go Headless for Scripts and CI
Two profiles initialise themselves on first use: web and headless. You have been using web, and dsh web is just an alias for dsh --profile web.
Headless runs one fresh persisted session, prints the final answer, and exits, which is exactly the shape a CI job wants:
bash1dsh --profile headless "Run the tests and fix any failures. Report the diff." 2
Any other profile has to be created through dsh plugin. Profiles live in $DSH_HOME/profiles/<name>, which defaults to ~/.dsh/profiles/<name>.
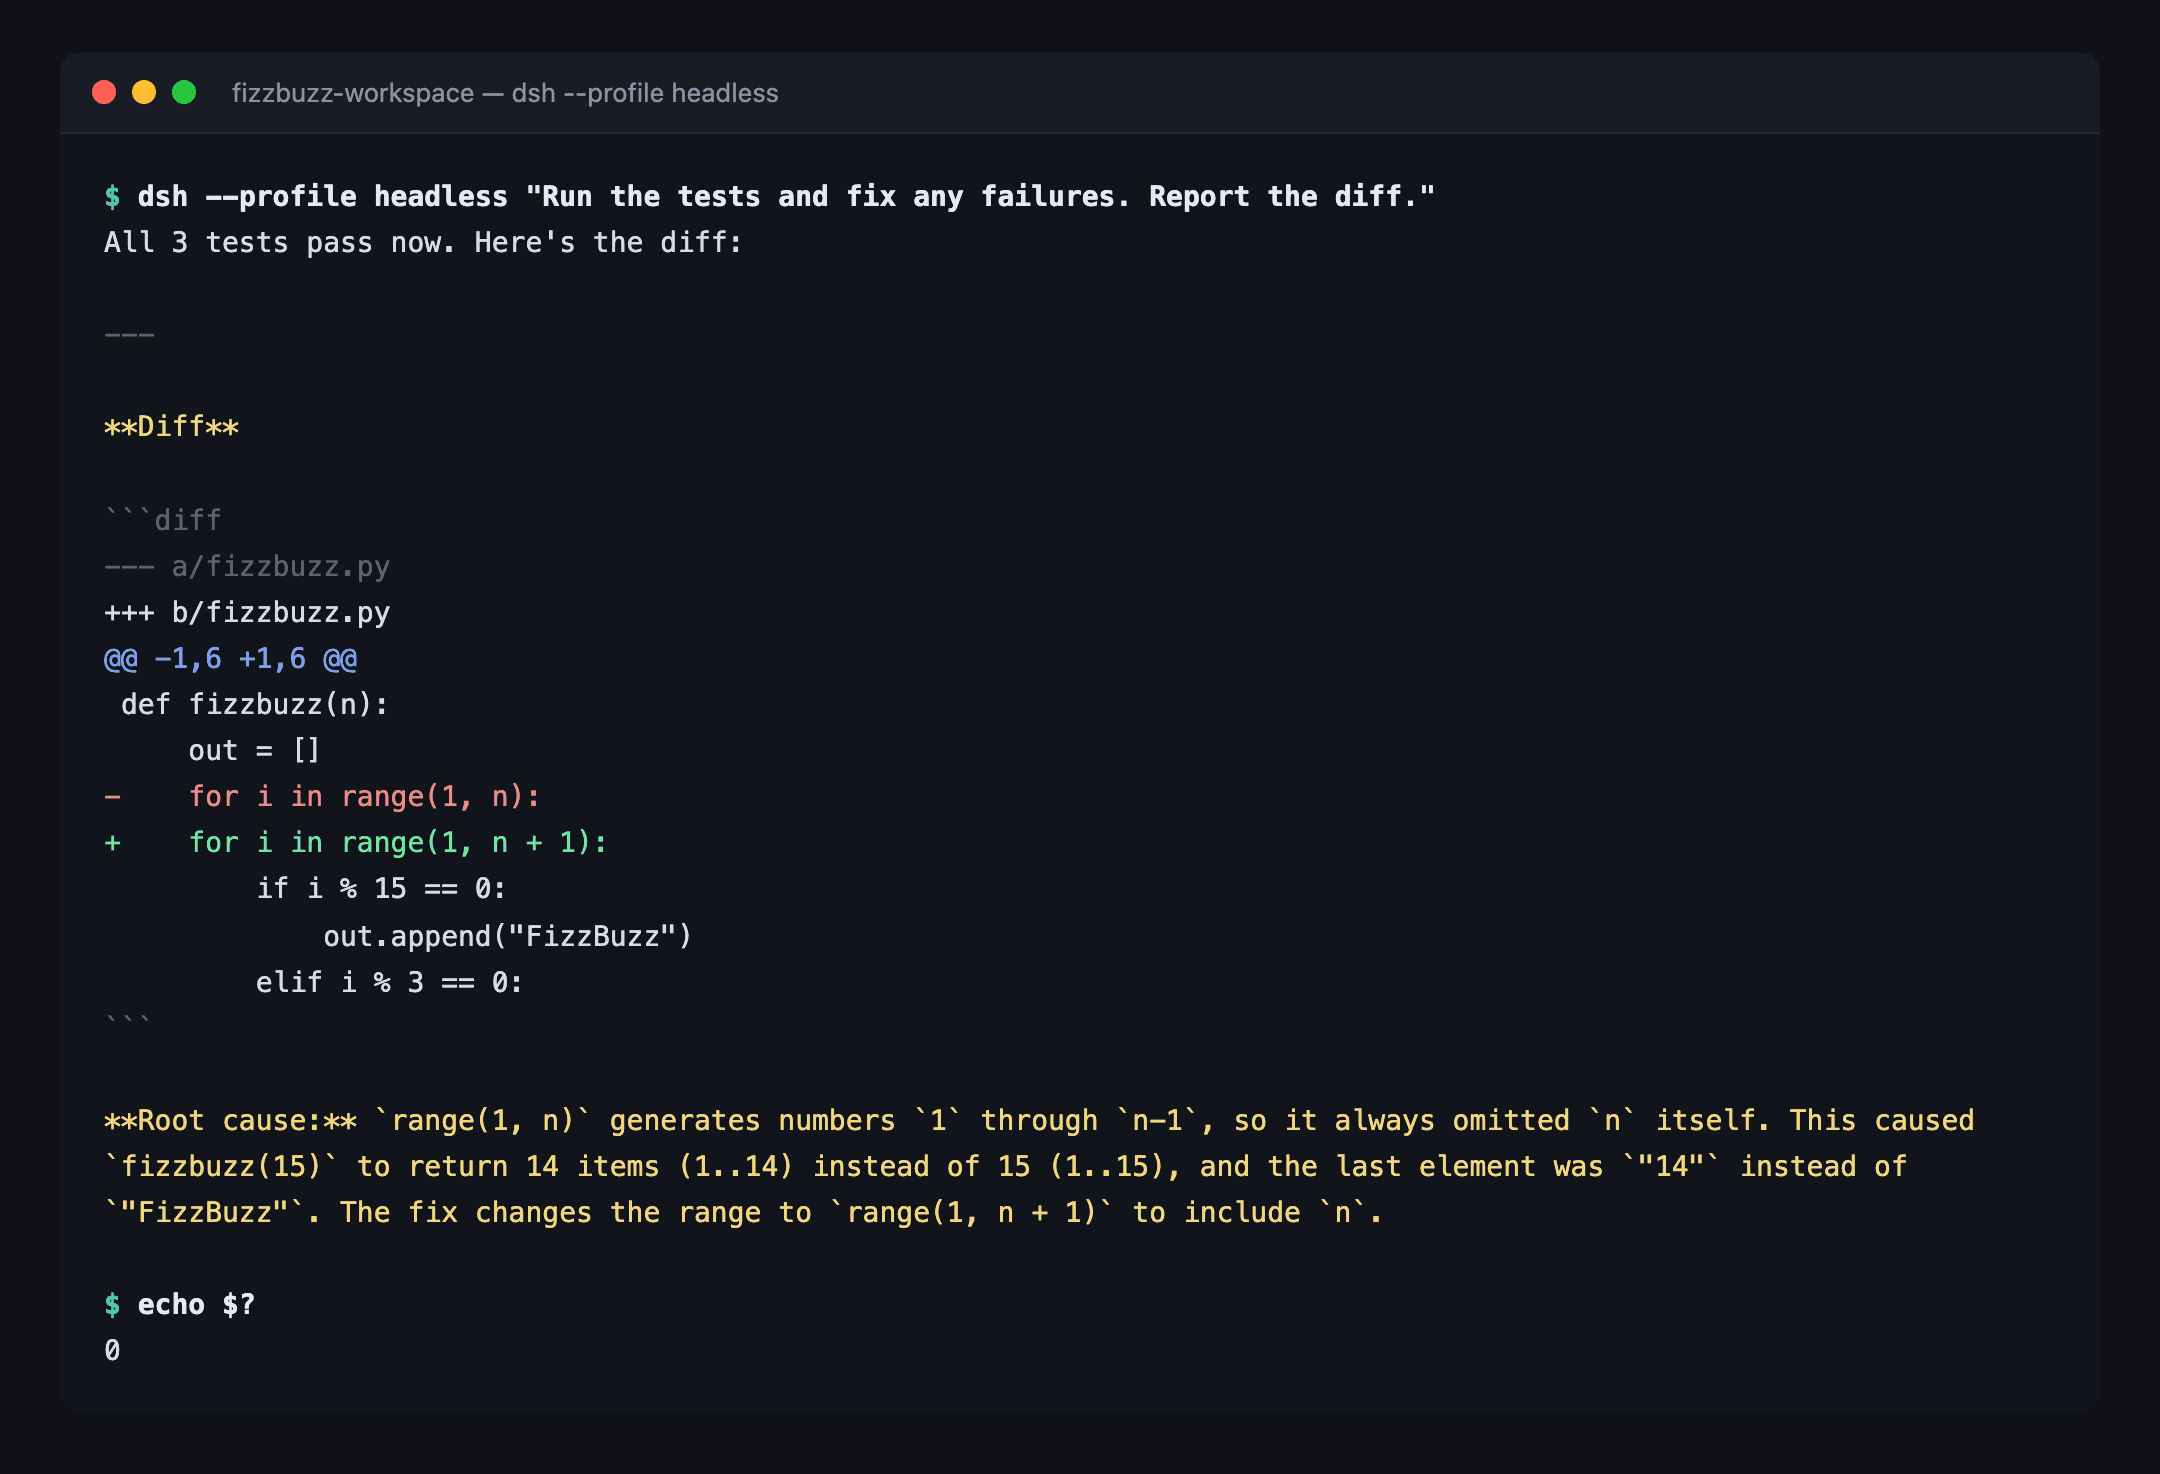
Terminal output from a headless DeepSeek Harness run printing the final answer and exiting
Headless mode: one session, one answer, exit code you can branch on.
Other Ways to Install DeepSeek Harness
The npx route covers most people. These three are worth knowing about.
Install DeepSeek Harness From Source With pnpm
If you want to read the code, patch it, or write plugins against it:
bash1git clone https://github.com/deepseek-ai/deepseek-harness 2cd deepseek-harness 3pnpm install 4pnpm run build 5pnpm dsh web 6
The 5 MB Desktop Build
A community project, hairyf/deepseek-harness-desktop, wraps the harness in Tauri and ships a roughly 5 MB installer for Windows, macOS and Linux with no Node setup at all. It is not an official DeepSeek release, so treat it accordingly: at the time of writing it sits at around 400 stars and was created a day after the harness itself.
Run DeepSeek Harness Fully Local With Ollama
Ollama ships a first-party integration. The short version is one command:
bash1ollama launch dsh 2
That installs and runs the harness with Ollama wired in, keeping its settings at ~/.ollama/launch/dsh/settings.yaml (Ollama Docs, August 2026). One caveat worth reading before you assume everything is offline: the built-in web search is enabled automatically and needs Ollama cloud access plus a model that supports tools. A genuinely local model gives you zero token cost, at the price of speed and, usually, weaker tool calling.
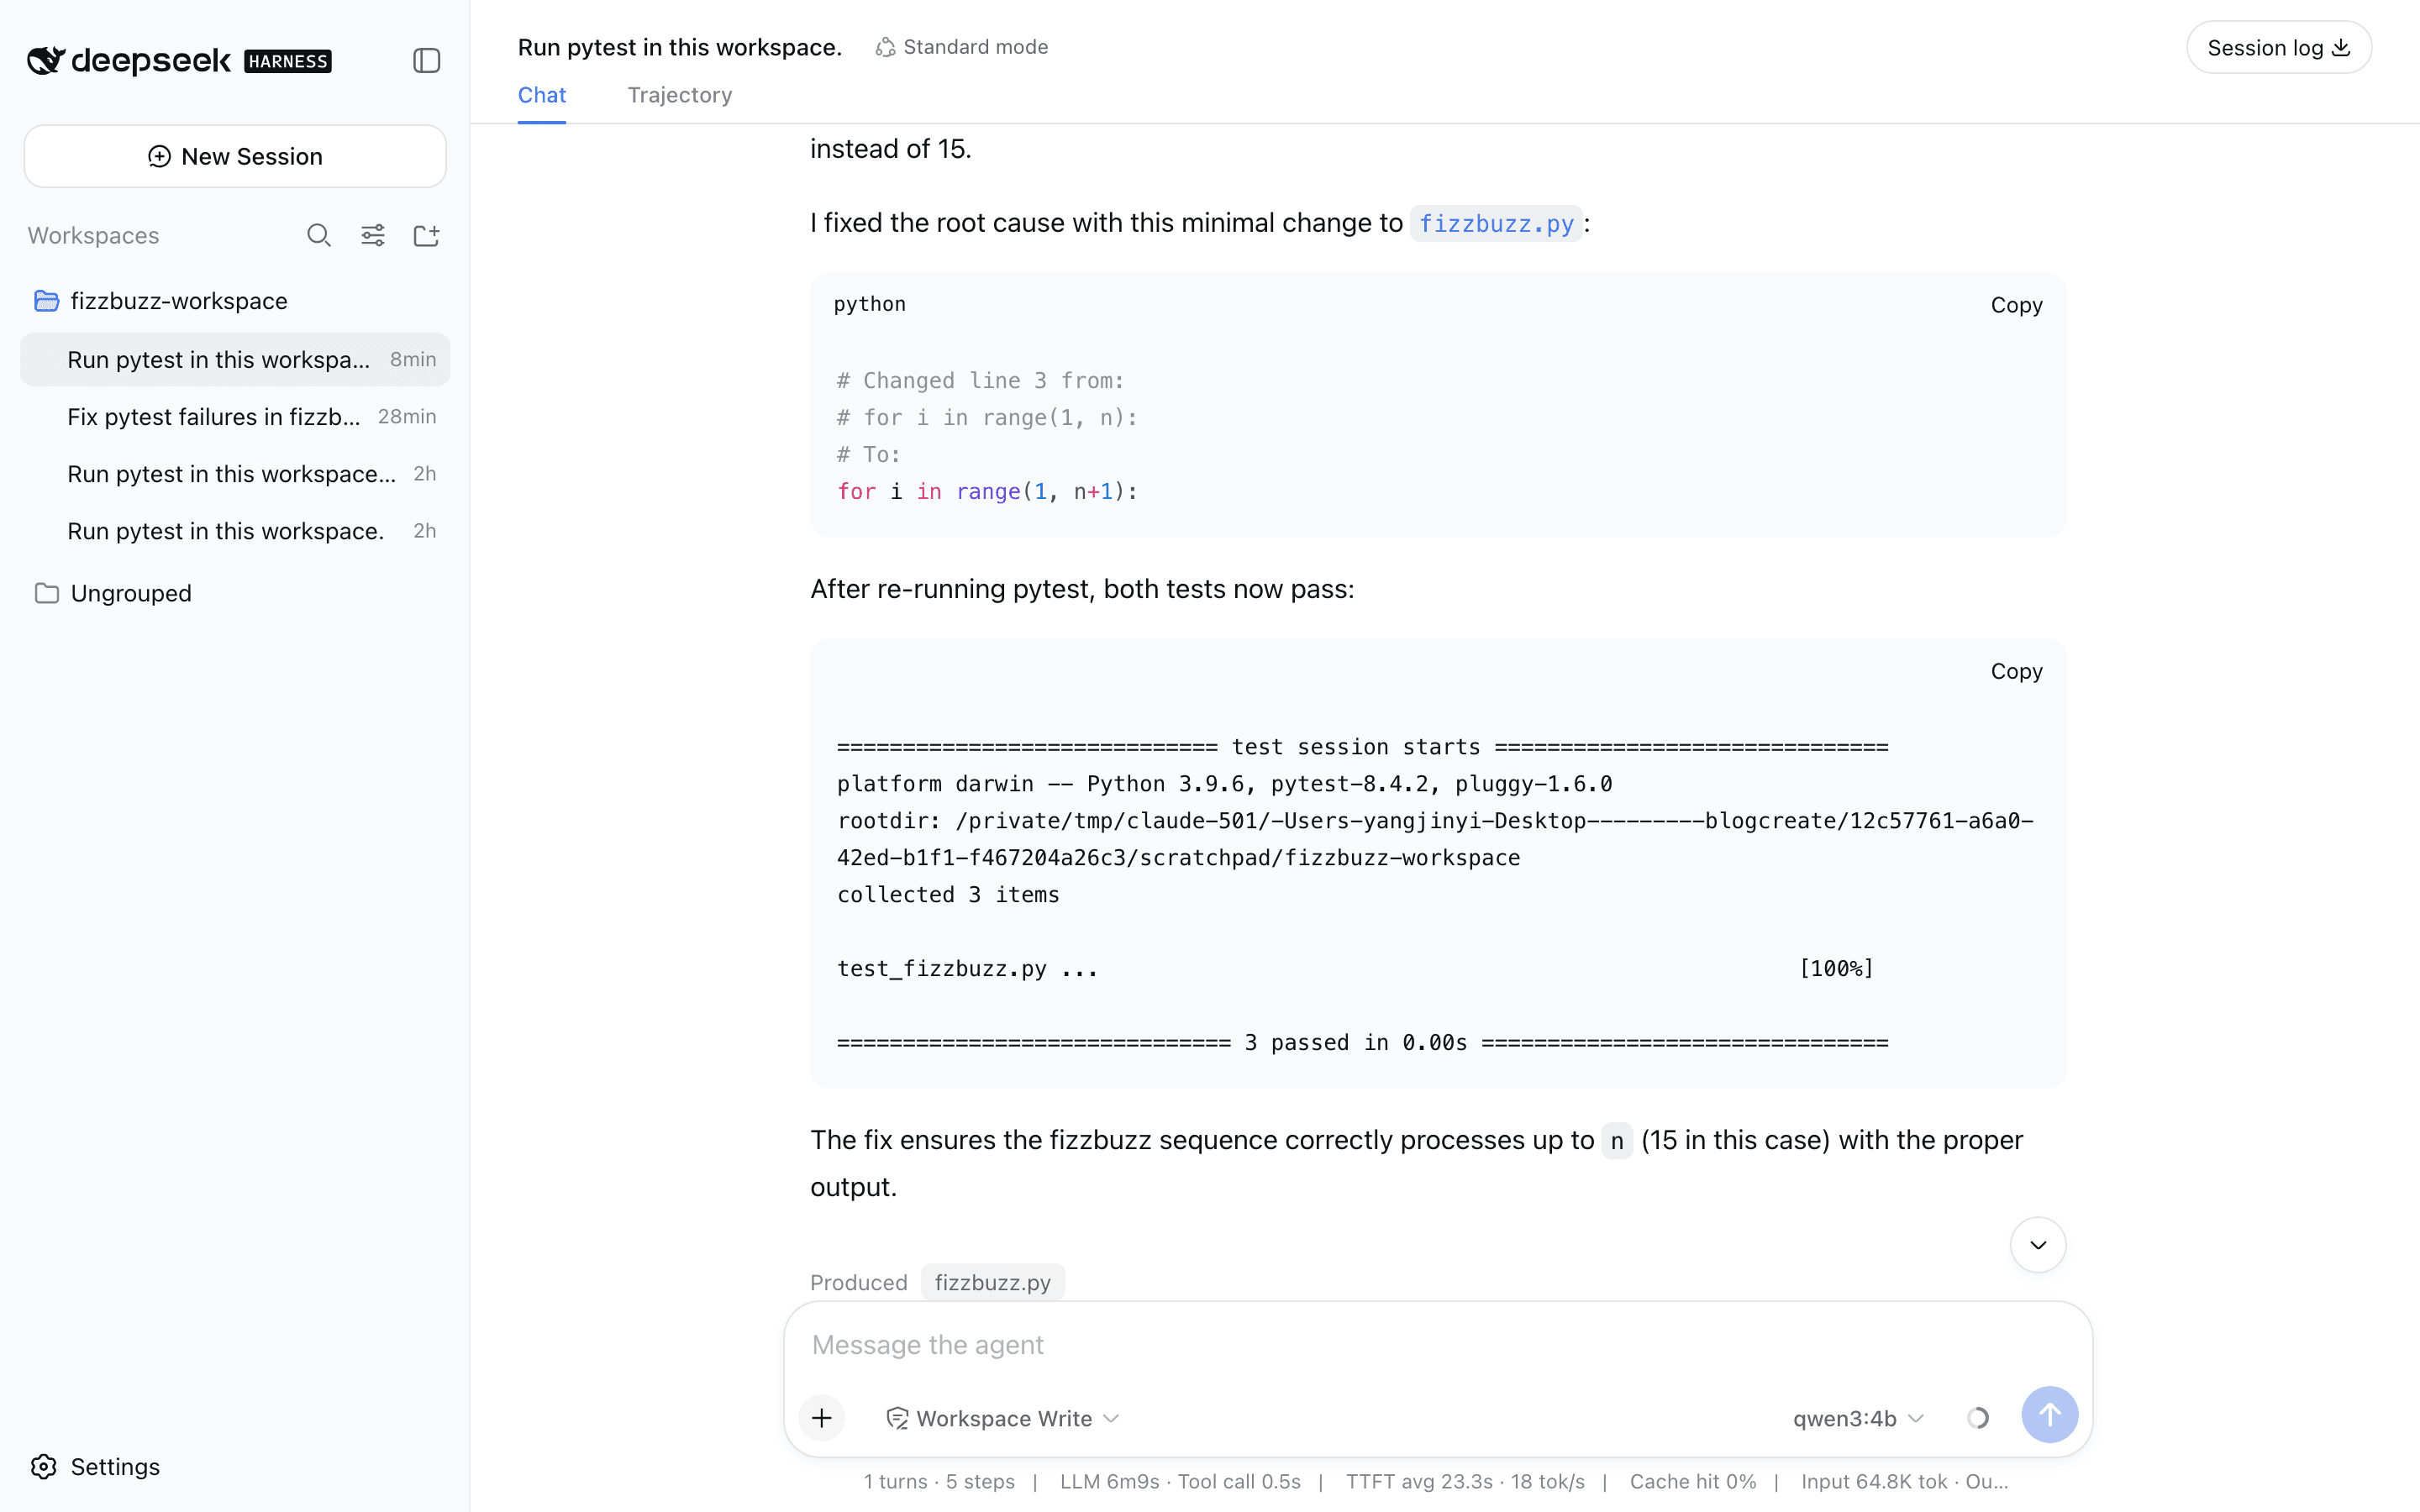
DeepSeek Harness connected to a local Ollama server running the same failing-test task
Same task, no network round trip, no per-token bill.
Is DeepSeek Harness Free? What Running It Actually Costs
Answer first: the software is free and MIT licensed, including for commercial use. The tokens are not free, unless you run models locally. Nothing about the harness itself is metered, gated, or tied to a DeepSeek account.
Table C: what is actually free and what is not
| Component | Free? | Notes |
|---|---|---|
| The harness software | Yes | MIT licensed, no account required |
| Model tokens via an API | No | Billed per token by whoever serves the model |
| Model tokens via local Ollama | Yes | You pay in hardware and latency instead |
| Long context | Depends | Priced per token, so a 1M window costs what you fill it with |
A worked example, using round numbers rather than a specific run. Say a debugging session like Step 6 consumes 200,000 input tokens and 20,000 output tokens, which is realistic once the agent has read a few files and iterated. At the flat gateway rate of $0.14 in and $0.28 out, that session costs about 3.4 cents. On the first-party API at off-peak cache-miss rates it is about 5.7 cents, and during peak hours about 11 cents. If most of your input is cache hits, first-party gets dramatically cheaper on the input side, because cache-hit input starts at $0.007 per 1M tokens.
The practical levers, in order of impact: keep sessions short so context does not snowball, run routine work on Flash and save Pro for the genuinely hard tasks, and use Minimal mode for benchmark-style runs since it gives the model exactly two tools and no context compaction.
Before You Ship: DeepSeek Harness License and Preview Risks
Three short things, and then the FAQ.
The license is MIT, so commercial use is fine. But the project labels itself a developer preview and states, in capitals, that there will be compatibility-breaking changes. Pin a version and do not wire it into a production release pipeline yet.
Your credentials live in plain text on your machine, at $DSH_HOME/.credentials.yaml with settings alongside in $DSH_HOME/settings.yaml, both defaulting to ~/.dsh. If your harness home ever ends up inside a repository, add it to .gitignore:
text1.dsh/ 2
And the obvious one that is easy to forget: your code goes to whichever endpoint you configured in Step 4. Read that provider's data terms before you point an agent at a private codebase.
Frequently Asked Questions
Is DeepSeek Harness free?
The harness is free and MIT licensed, with no account or subscription required, and you may use it commercially. Model tokens are billed separately by whichever provider you connect. Pointing it at a local Ollama model gives you a genuinely zero-token-cost setup, paid for in hardware and speed.
Do I need a DeepSeek API key to install DeepSeek Harness?
No. Installation and a DeepSeek key are unrelated. npx @deepseek-ai/dsh web runs without any credential at all. You only need a key when you want the agent to actually call a model, and it can be a key for any OpenAI-compatible endpoint, including a local server.
Can DeepSeek Harness run models other than DeepSeek?
Yes. Custom providers accept openai-completions, and the adapter covers protocols that can be described with a key, an endpoint and headers. Add a second provider by adding another block under providers: in settings.yaml with its own ID, base URL and models. Bedrock, Vertex, Azure and Codex are deliberately out of scope because their auth needs more than that.
Why does my custom provider return 401 or "unknown model"?
A 401 almost always means the key is wrong or is not being read from the environment variable named in apiKeyEnv. An unknown model usually means the endpoint does not expose a model index, so nothing got fetched: type the model ID by hand instead. Also check the Provider ID spelling, since it cannot be renamed, only replaced.
Where does DeepSeek Harness store my API key and settings?
Keys go to $DSH_HOME/.credentials.yaml and hand-written model settings to $DSH_HOME/settings.yaml, both under ~/.dsh unless you override DSH_HOME. Sessions live in $DSH_HOME/storages and profiles in $DSH_HOME/profiles/<name>. Keep the whole directory out of version control.
Is DeepSeek Harness ready for production?
Not yet, by its own account. The project ships as a developer preview and warns explicitly about compatibility-breaking changes, which is a fair description of software that is a few days old. Use it for local development and CI assistance, pin the version you tested, and re-read the providers doc after upgrades.
Verified against the DeepSeek Harness developer preview on August 17, 2026. This project ships breaking changes by design, so if a field name in your build looks different from the YAML above, check the official providers documentation before assuming the config is wrong.





