

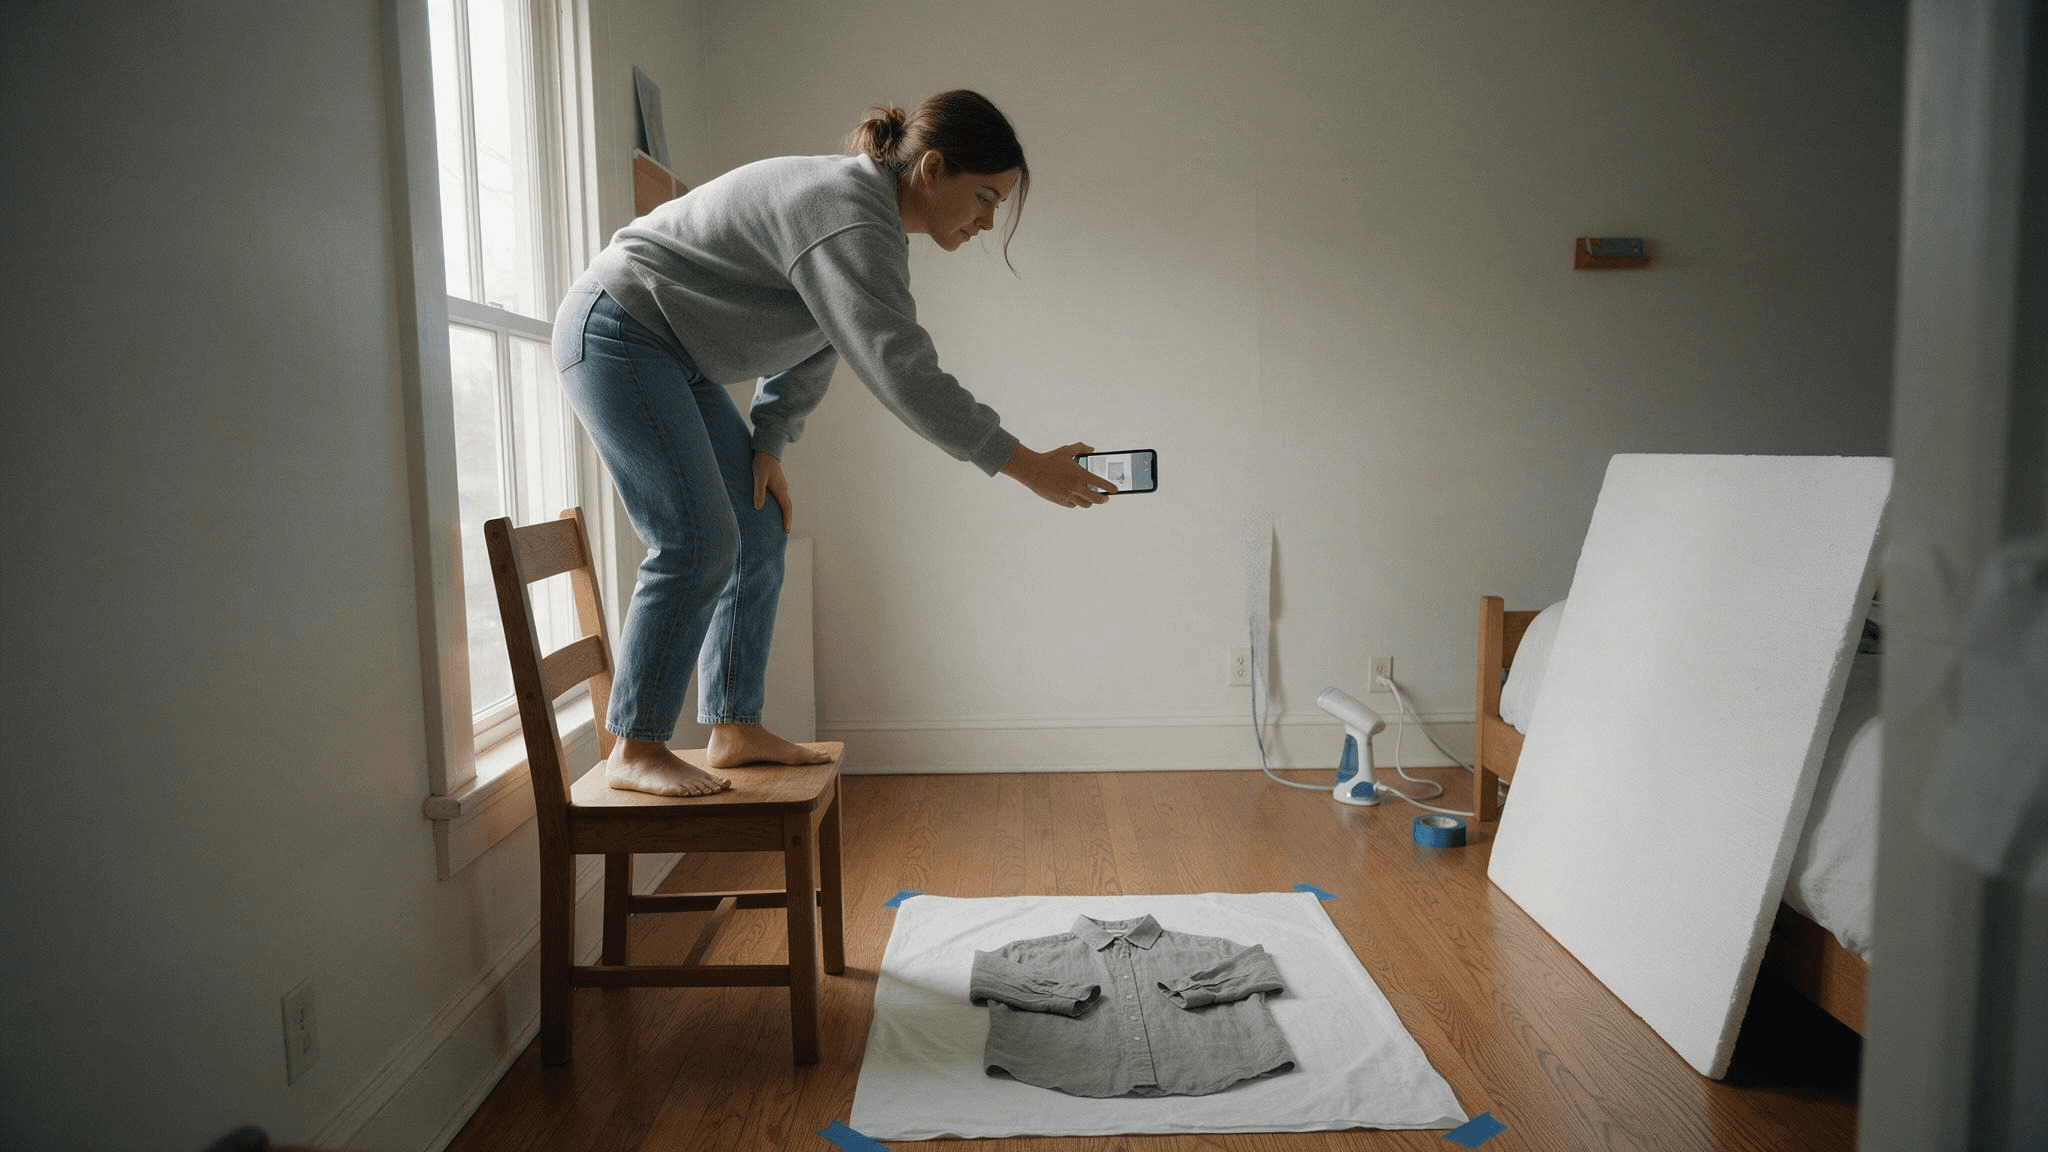
The sweater is on the bedroom floor, the window is doing the lighting, and you are standing on a kitchen chair holding a phone. That is the whole studio. Done with care, flat lay clothing photography gives you a listing image that marketplaces accept and buyers trust. It also gives you something less obvious: a clean source photo that AI can turn into an on-model shot, a ghost mannequin shot and a fabric close-up without a second shoot.
This guide covers the floor setup, the window light, the styling, and the moment a mannequin or a model beats the flat lay. The on-model, ghost mannequin and detail examples below all came from one photo of one cardigan, so you can see what a single good flat lay buys you.
Key Takeaways
- Flat lay clothing photography at home needs a floor, a window, a steamer and a phone held parallel to the garment.
- Amazon's clothing guidelines require a standing model on adult apparel main images, with no mannequin or hanger in view.
- Mannequin photography suits structured jackets and dresses, while flat lay wins for knits, kids' wear and accessories.
- One clean flat lay photo is all Apparel Photoshoot needsto return on-model, ghost mannequin anddetailimages.
- Steam first, stuff sleeves with tissue and pin excess fabric underneath before you take a single frame.
What Flat Lay Clothing Photography at Home Actually Needs
A flat lay is a garment lying on a flat surface, photographed from directly above, the way a buyer sees it unfolded on a bed. Shops use it for knitwear, T-shirts, kids' clothing, folded sets and anything with no structure to hold itself up.
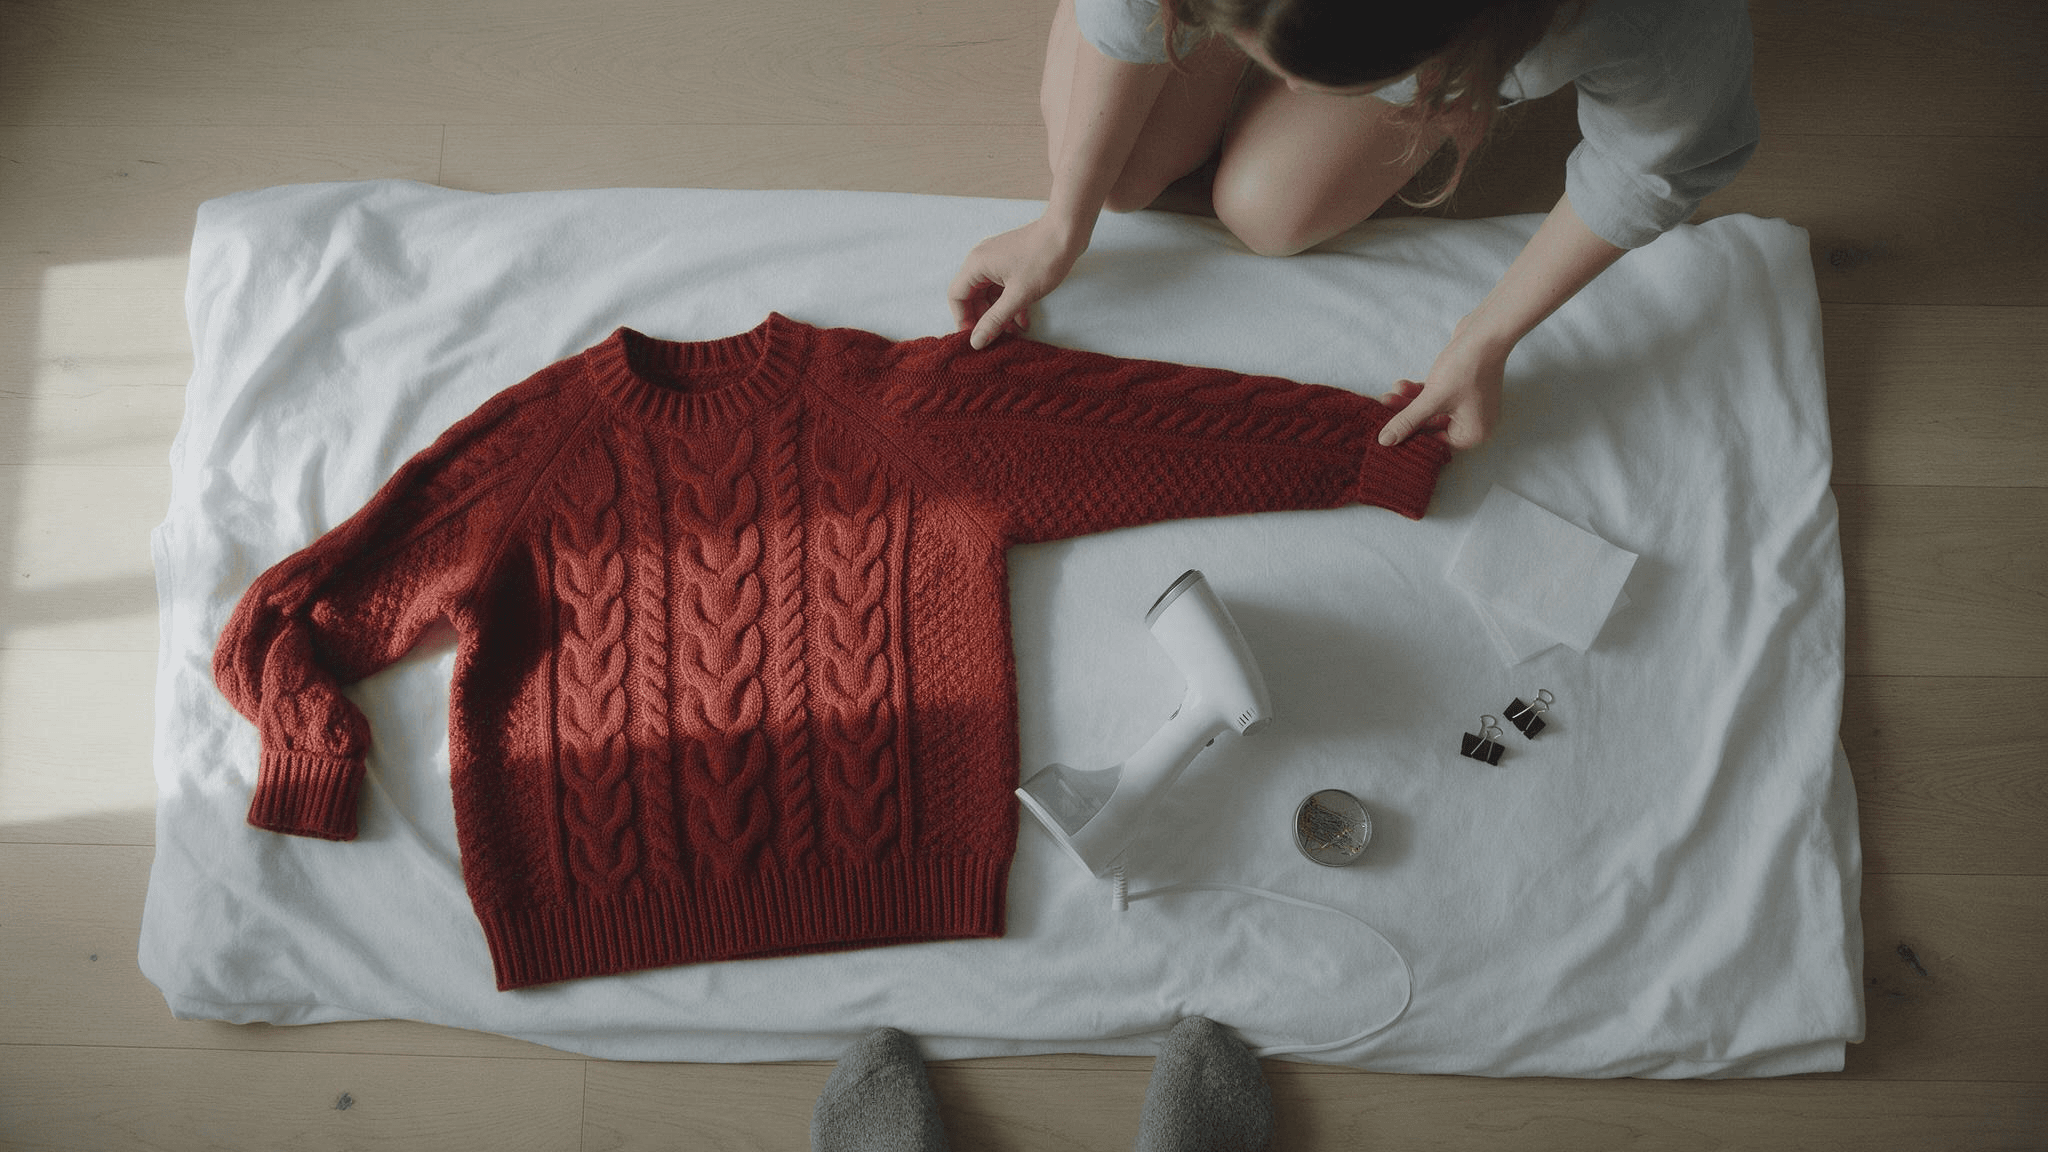
The kit is short. You need a stretch of floor near a window, a white bedsheet or two sheets of white poster board taped flat, a handheld garment steamer, a few sheets of tissue paper for stuffing sleeves, binder clips or pins to hold hems, and a phone. A sturdy chair gets you high enough for a sweater; a tripod with a horizontal arm covers a long dress and is the only item here you might have to buy.
What a flat lay cannot show is fit, which is why the sections below first get this one photo right and then show how it feeds the other three shot types a listing needs.
Ecommerce Fashion Photography From One Flat Lay Photo
Ecommerce fashion photography needs four shot types: flat lay, on-model, ghost mannequin and detail close-up. At home you only shoot the flat lay. We uploaded one photo of a beige knit cardigan to Atlas Cloud and ran the Apparel Photoshoot workflow once for each of the other three.
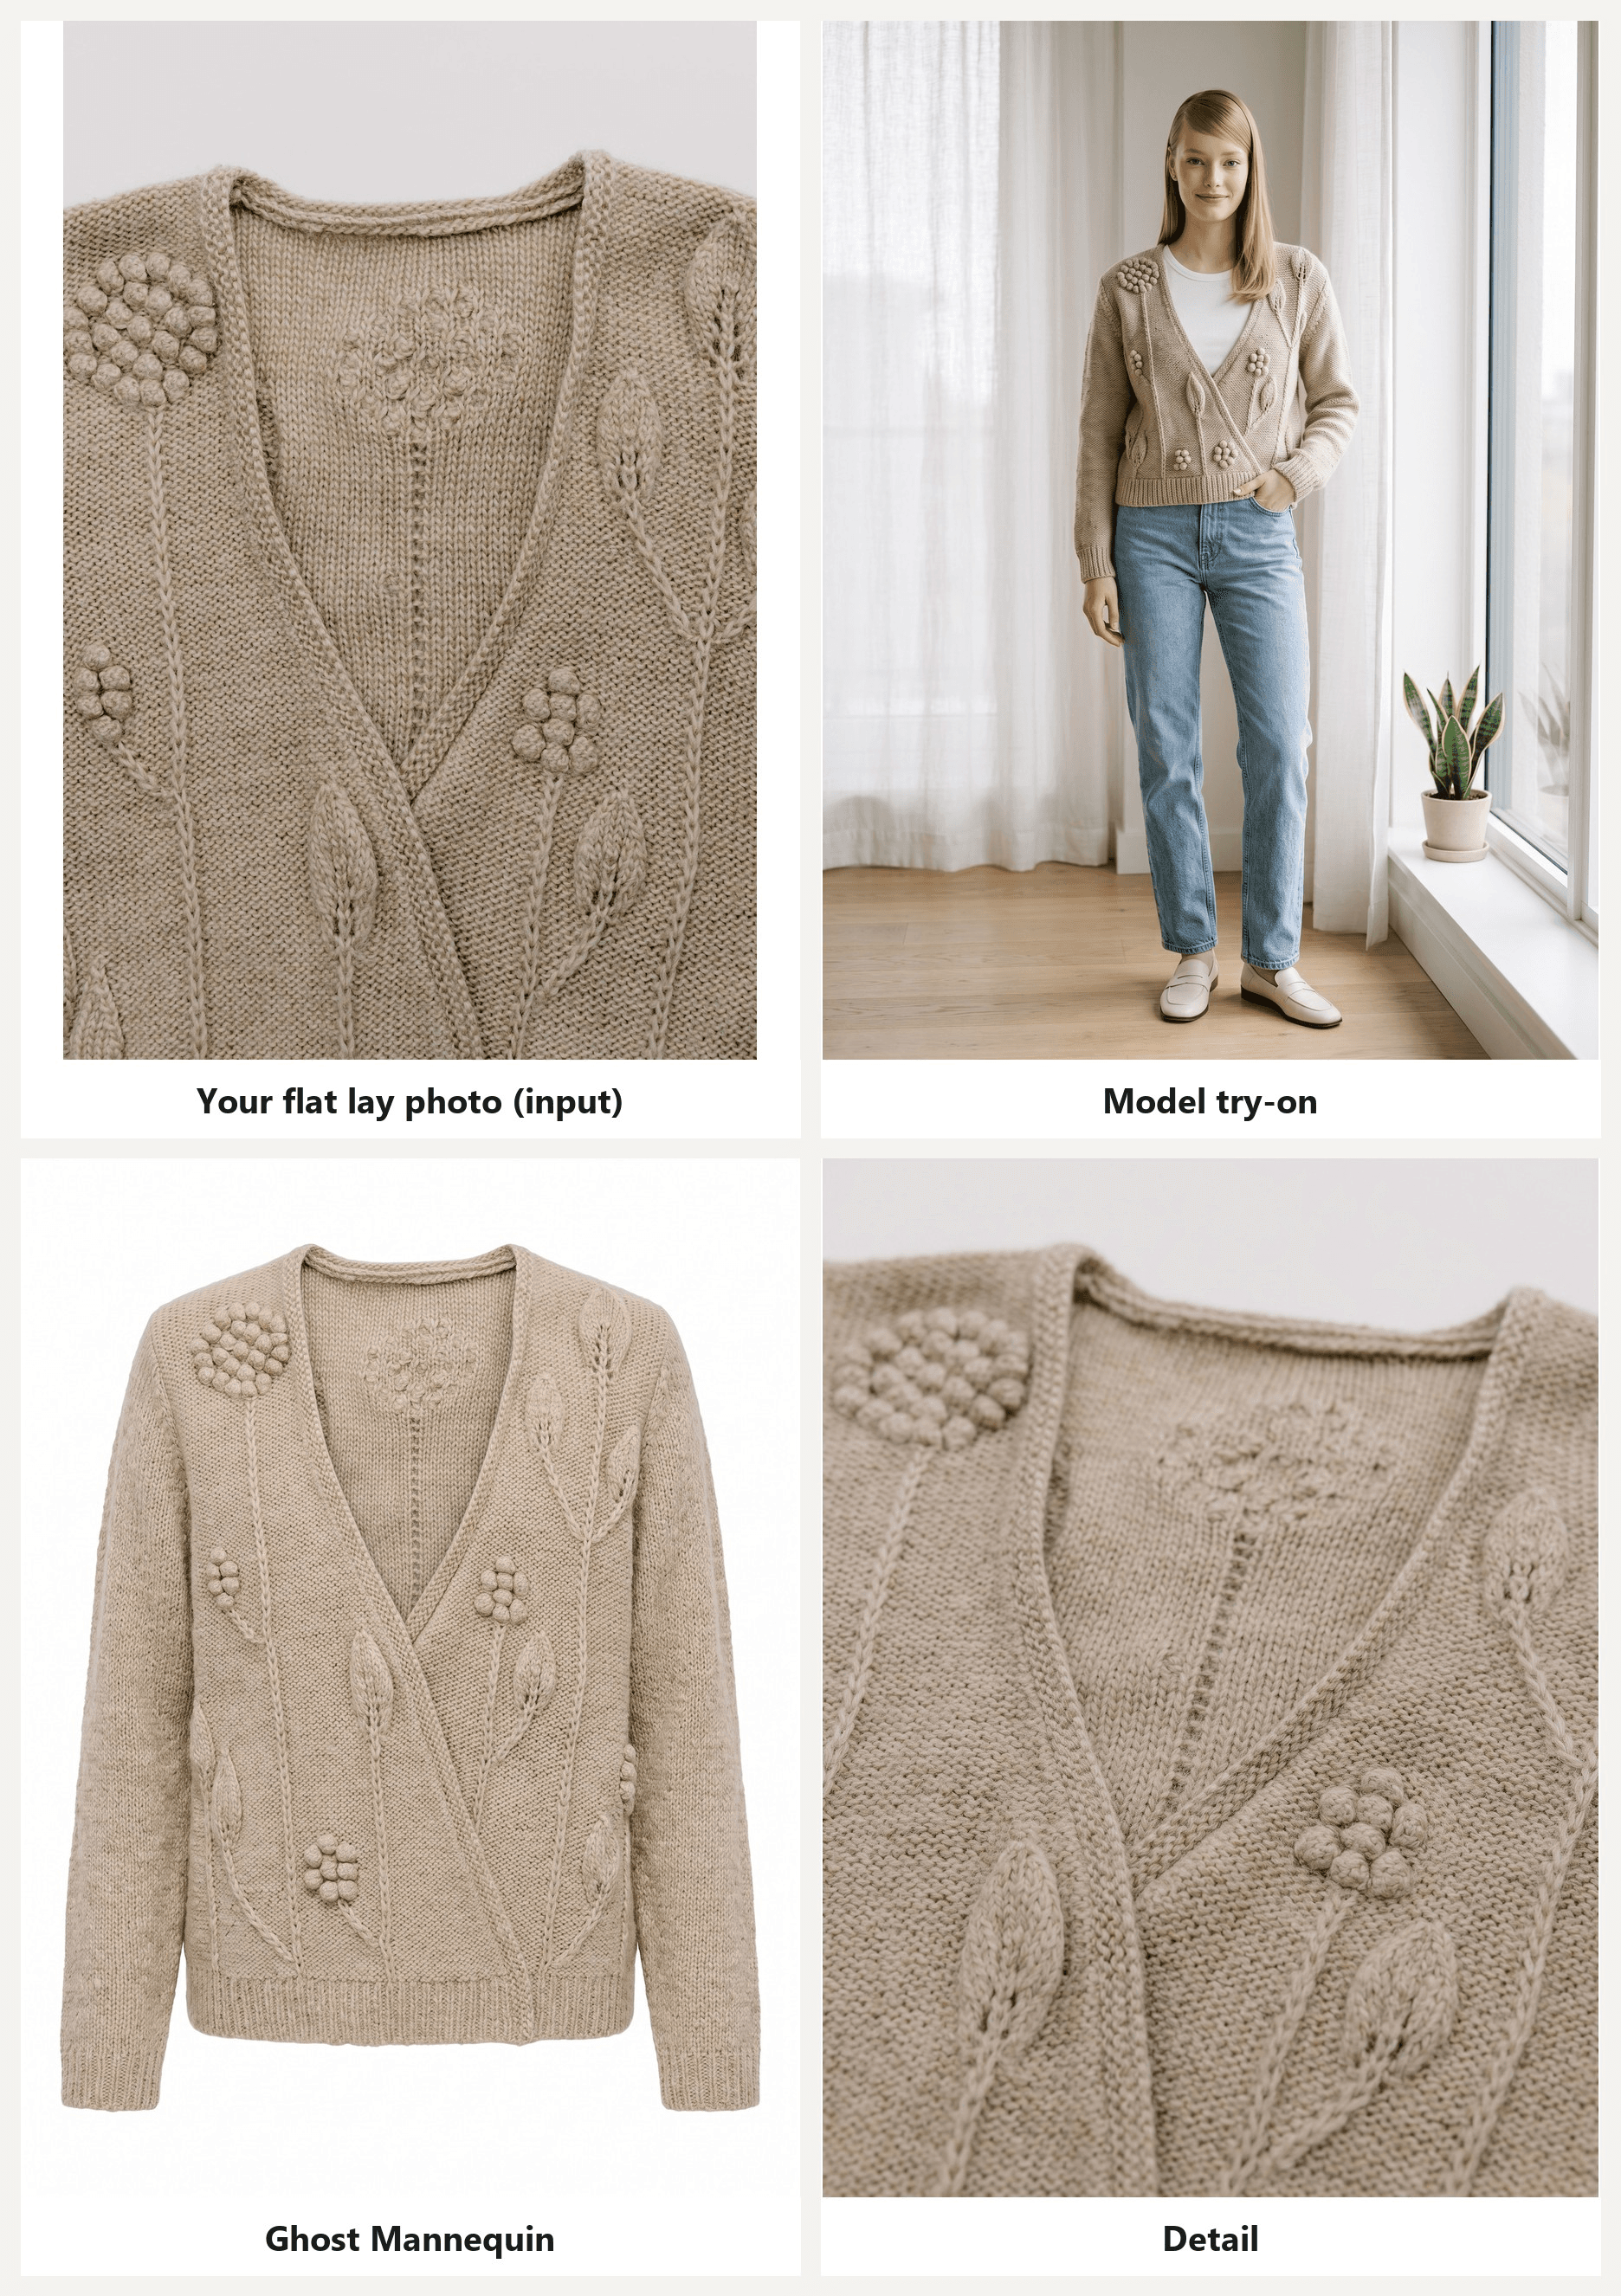
Each run took under three minutes, and the embroidered flowers, rib trim and wrap front all made it from the floor onto the model. The workflow takes a flat lay or a hanging shot up to 10MB, and if you leave the model slot empty it picks a model to suit the garment.
Four Steps From Upload to Model Try-On
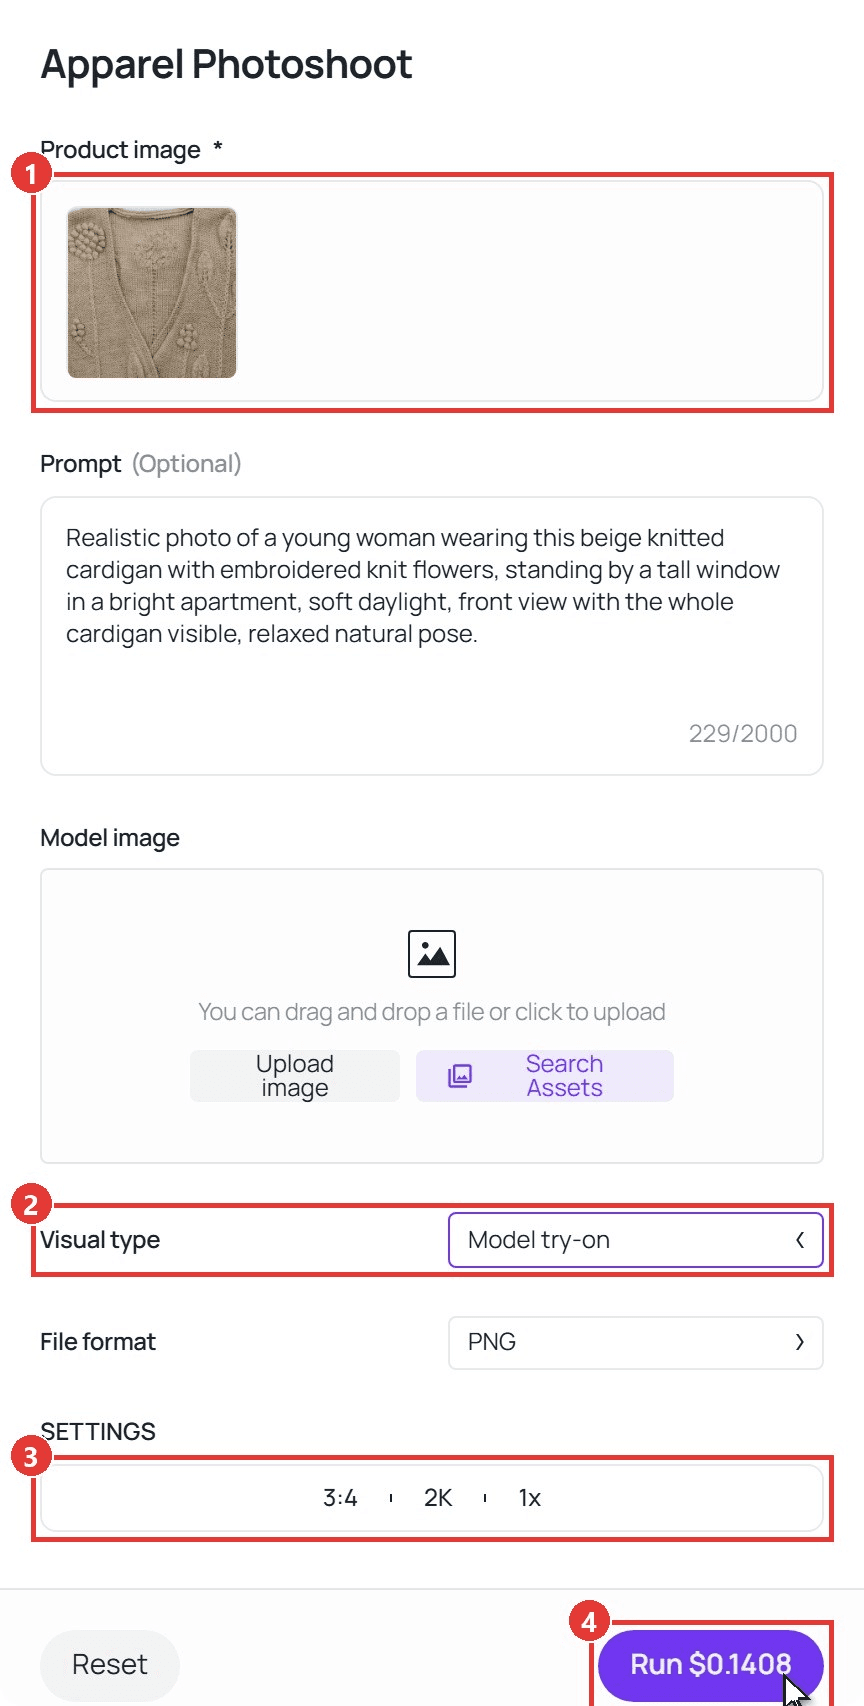
- Open the clothing photoshoot workflow and upload the flat lay as the Product image. Add a model photo in the second slot for the same face across the catalog.
- Pick a Visual type: Model try-on, Ghost Mannequin, Detail or Flat Lay. Describe the scene in the prompt box if you like.
- Open Settings and pick the ratio, resolution and image count; 3:4 at 2K suits listings.
- Press Run, wait a couple of minutes, and download the result from the Output panel. Change the visual type and run again for the next shot.
How to Set Up Flat Lay Clothing Photography at Home
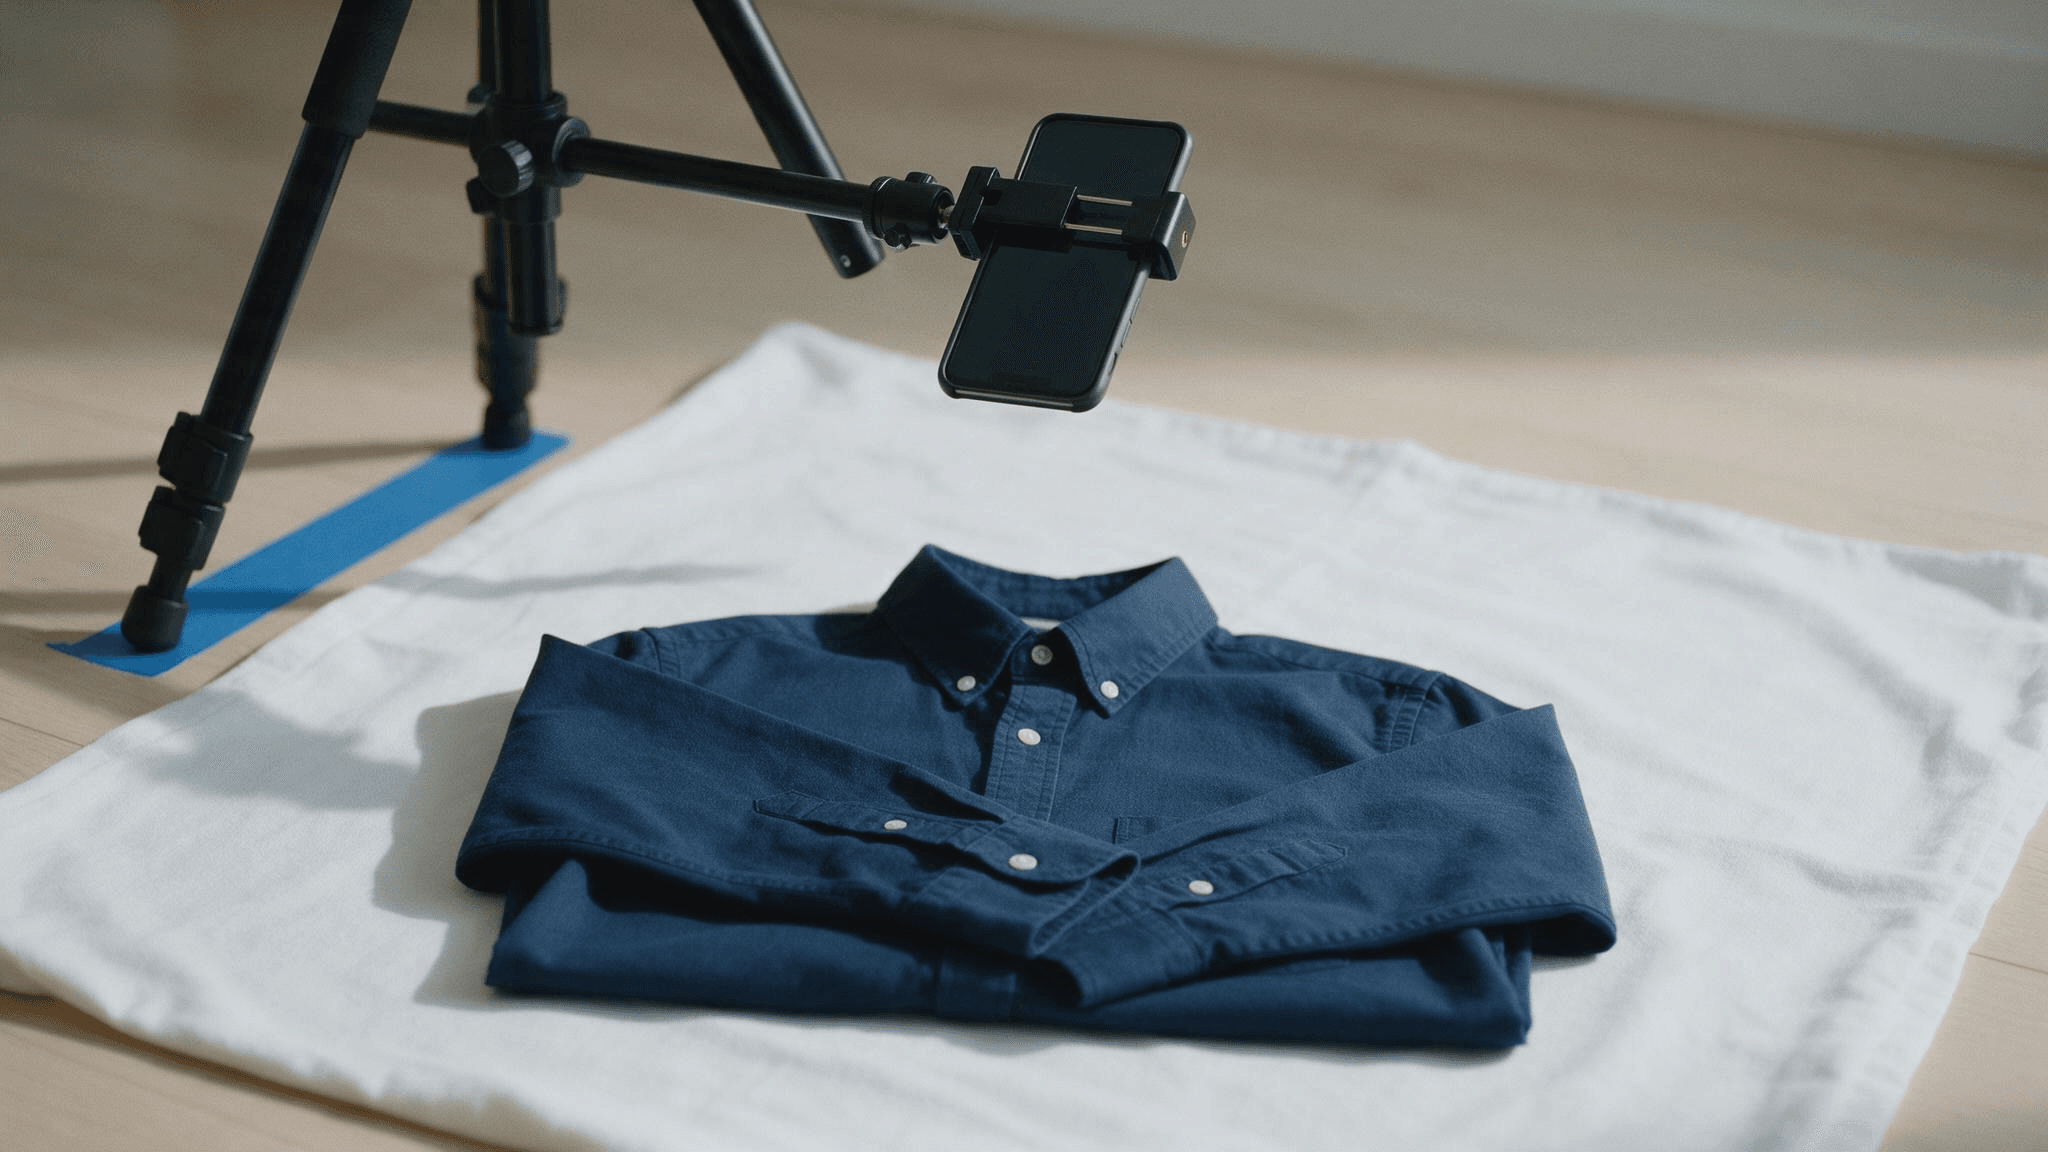
Everything the AI step does depends on the quality of this one photo, so get the floor right first. Tape a white sheet or poster board to the floor with painter's tape so it cannot creep, and iron the sheet first. A crease in the background reads as a crease in the garment once the image is thumbnail-sized on a phone. Leave at least a hand's width of clean background on every side so you can crop to a marketplace ratio later without clipping a cuff.
Keep the camera height the same for every garment in a batch. A strip of tape on the chair leg, or a mark on the tripod column, means the T-shirts and the sweaters in one collection all land at the same size on the page.
Clothing Photography Lighting From One Window
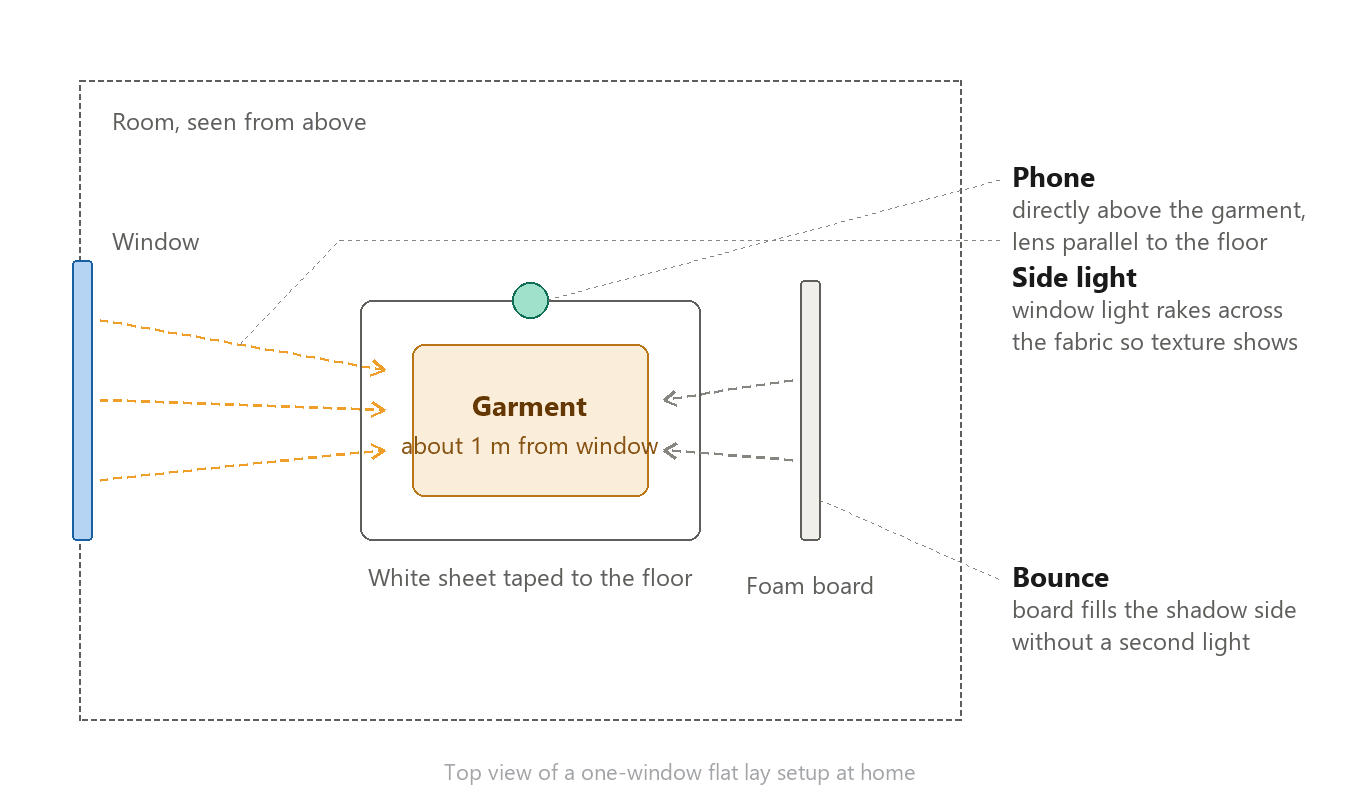
Clothing photography lighting at home comes from one window, and where the garment sits relative to it decides whether the fabric shows texture or reads as a flat swatch. Place the garment about a metre from the window with the light coming in from the side, so it rakes across the knit and picks out every stitch. Light from behind the camera flattens the fabric, and a ceiling light adds a yellow cast that turns a cream cardigan the colour of butter.
Prop a sheet of white foam board on the far side to bounce light back into the shadows. For setups with more than one light, see our guide to product photography lighting.
How to Shoot Clothing Product Photography From Directly Above
The rule for how to shoot clothing product photography is one word: parallel. The phone has to be level with the floor, or the hem ends up wider than the shoulders. Turn on the grid, and use the camera's level indicator if it has one; the crosshairs merge when the phone is flat.
Stand on a chair for a sweater, or use a tripod with a horizontal arm for anything longer than your reach. Keep the zoom at 1x or 2x, because the 0.5x ultra-wide bends the edges of the sheet. Tap to focus on the chest, lock the exposure so the white sheet does not fool the meter, and fire with the timer so your arm stays still. The settings behind those taps are in our guide to phone product photos.
Styling the Garment So It Photographs Flat
Styling is where most home flat lays fall apart, and none of it needs a stylist. Steam the garment while it is still on a hanger, then lay it down; an iron flattens knit stitches and leaves shine on dark fabric. Stuff the sleeves and the body with loose tissue paper so the garment keeps a little volume instead of reading as a deflated sack. Square the shoulders to the grid first and work down to the hem with flat palms; fingertips leave ridges.
Fold both sleeves the same way, straight down or bent at the elbow across the body, and keep that choice for every item in the collection. Tuck excess width under the garment and pin it from behind so the silhouette matches the size on the label. One accessory at most, and only if it sells the garment: a belt on a shirt dress earns its place, a coffee cup does not.
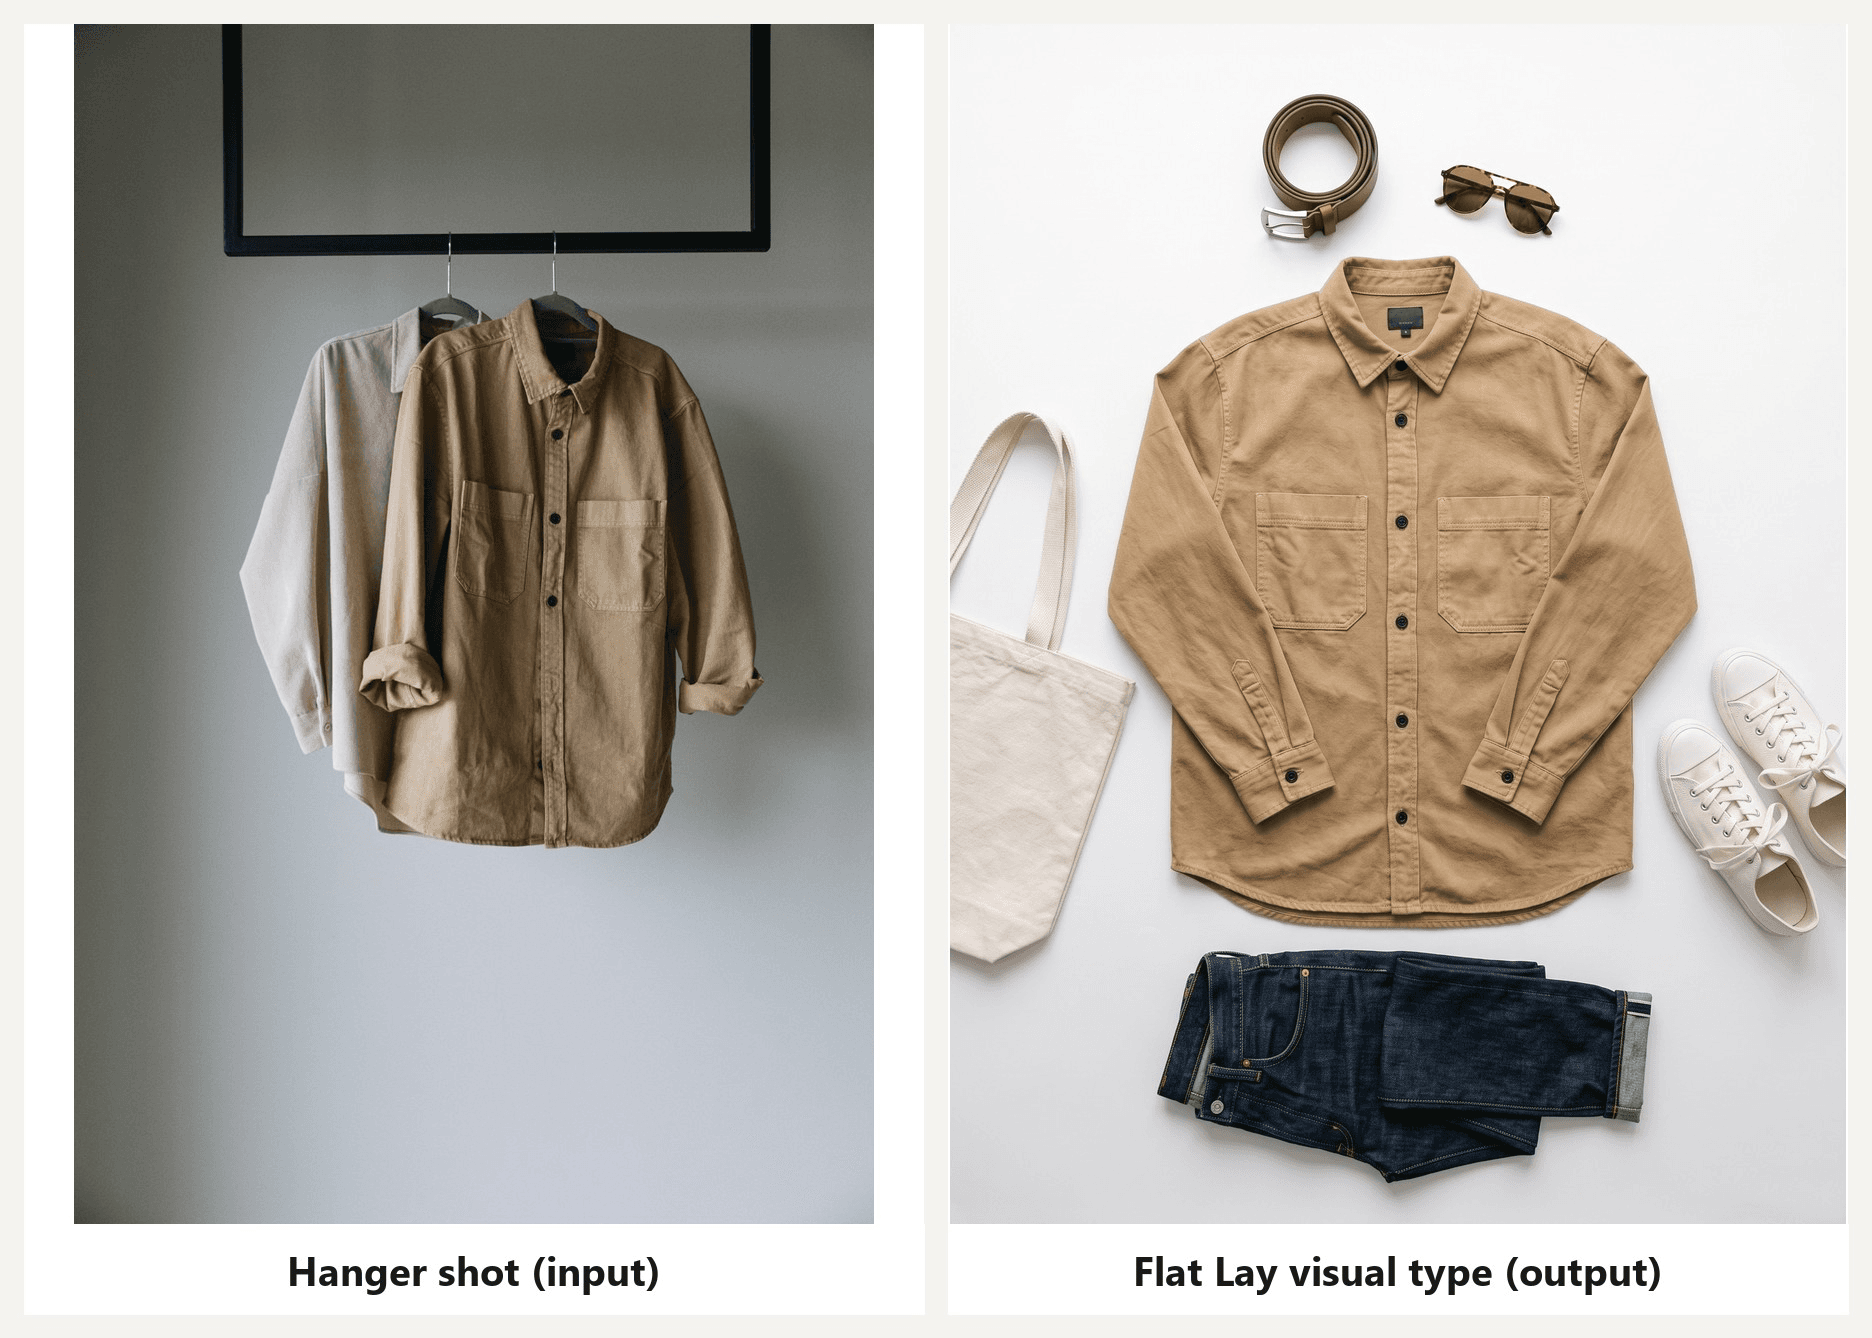
If all you have is a hanger shot, the Flat Lay visual type will lay it down for you. We fed it a shirt hanging on a rack, asked for a flat lay on white, and got the shirt flat, collar open and sleeves straight, with a belt, sunglasses, jeans and canvas sneakers styled around it. Our prompt said nothing about props, so the workflow treated the shot as an outfit flat lay rather than a lone garment.
How to Hang Clothes for Photography When Flat Doesn't Work
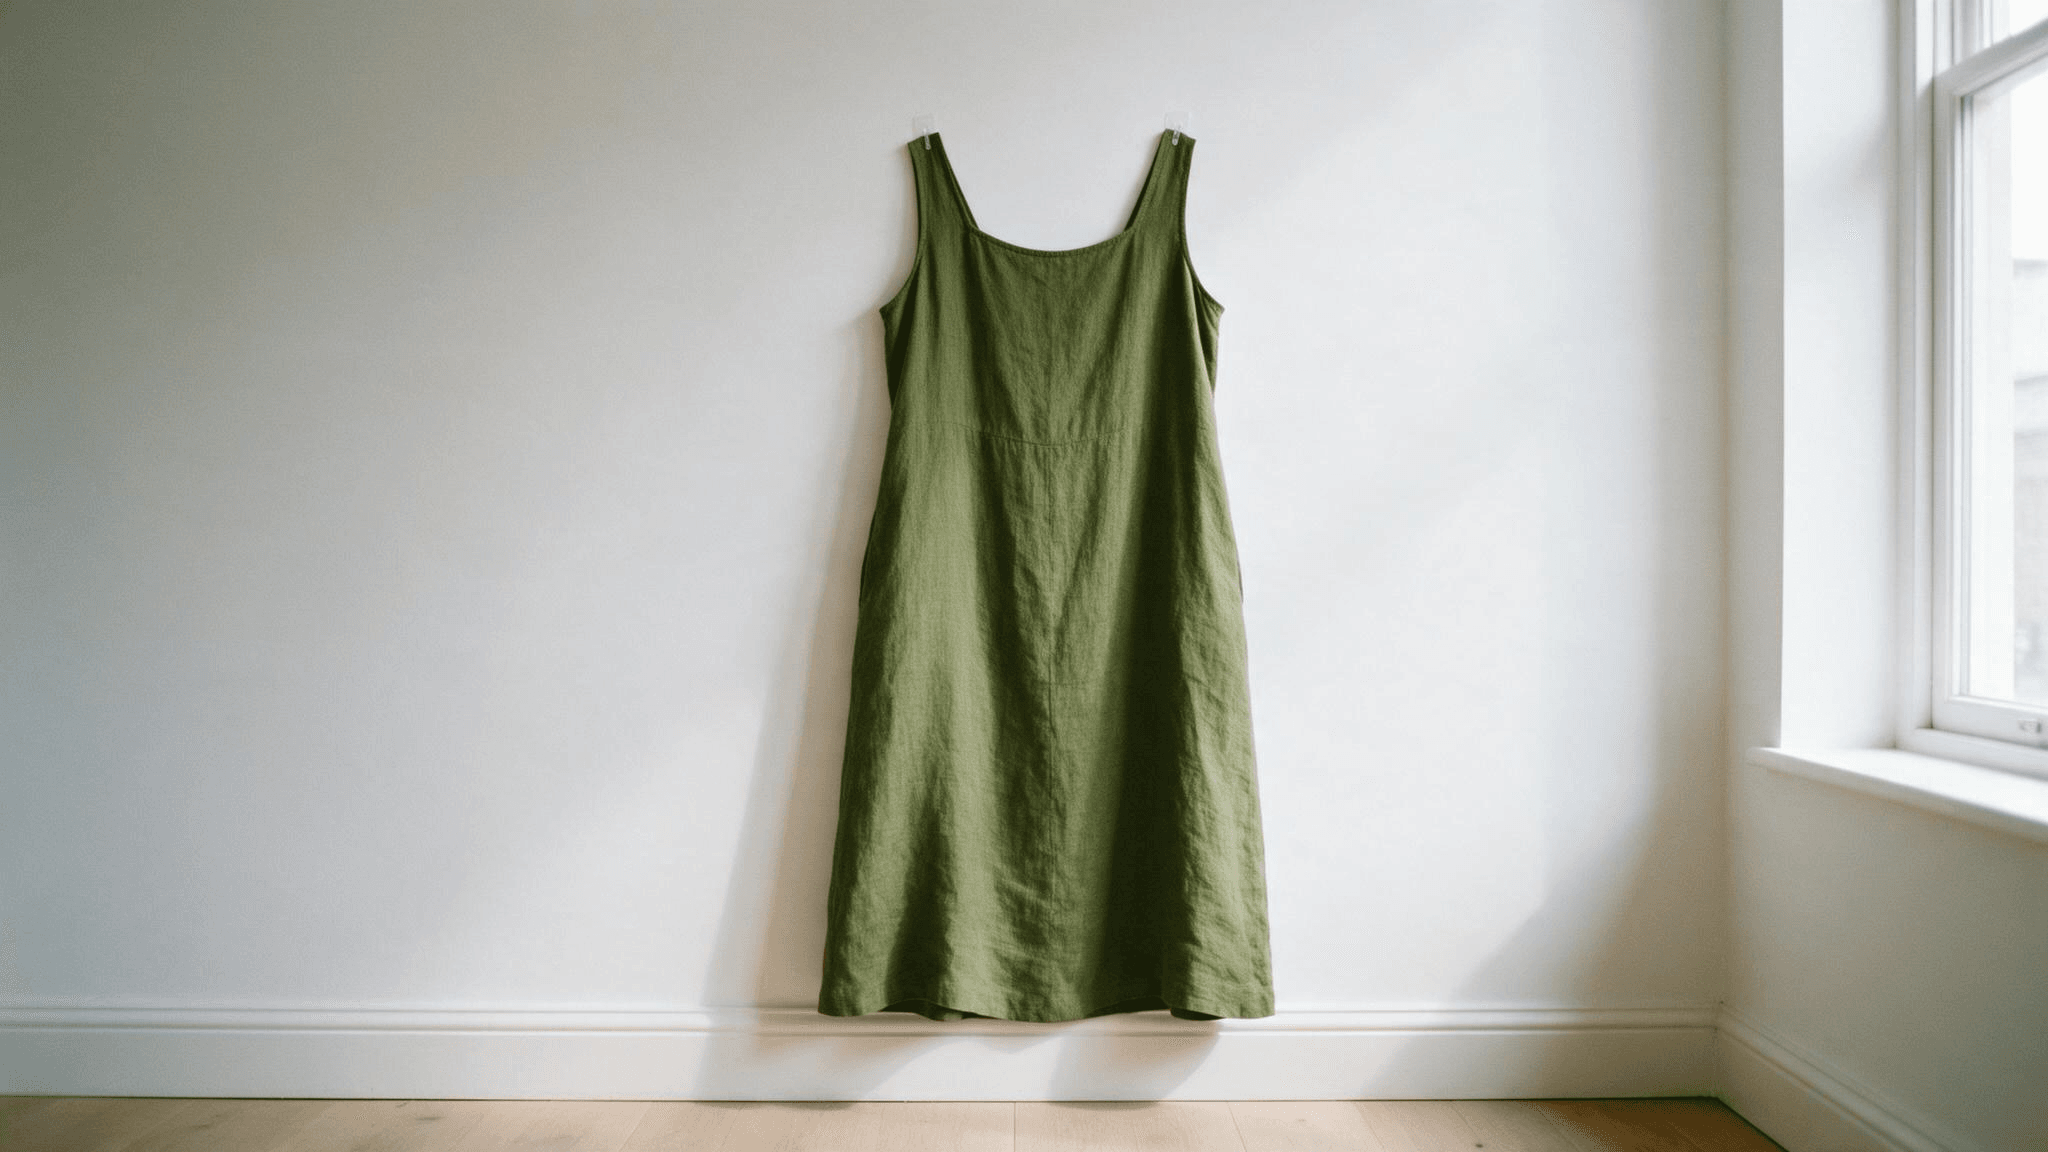
Long dresses, coats and pleats lose their drape on the floor, which is when you need to know how to hang clothes for photography. Use a white wall and hang the garment from two small removable hooks hidden behind the shoulders, or from a clear hanger if the neckline covers it. Shoot straight on from the garment's centre height, not from eye level, so the hem and the shoulders stay the same width.
One rule before a hanging shot becomes a main image: Amazon prohibits clothing main images that show a visible hanger, so keep the hanger hidden or use the shot as a secondary image.
When Mannequin Photography Beats a Flat Lay
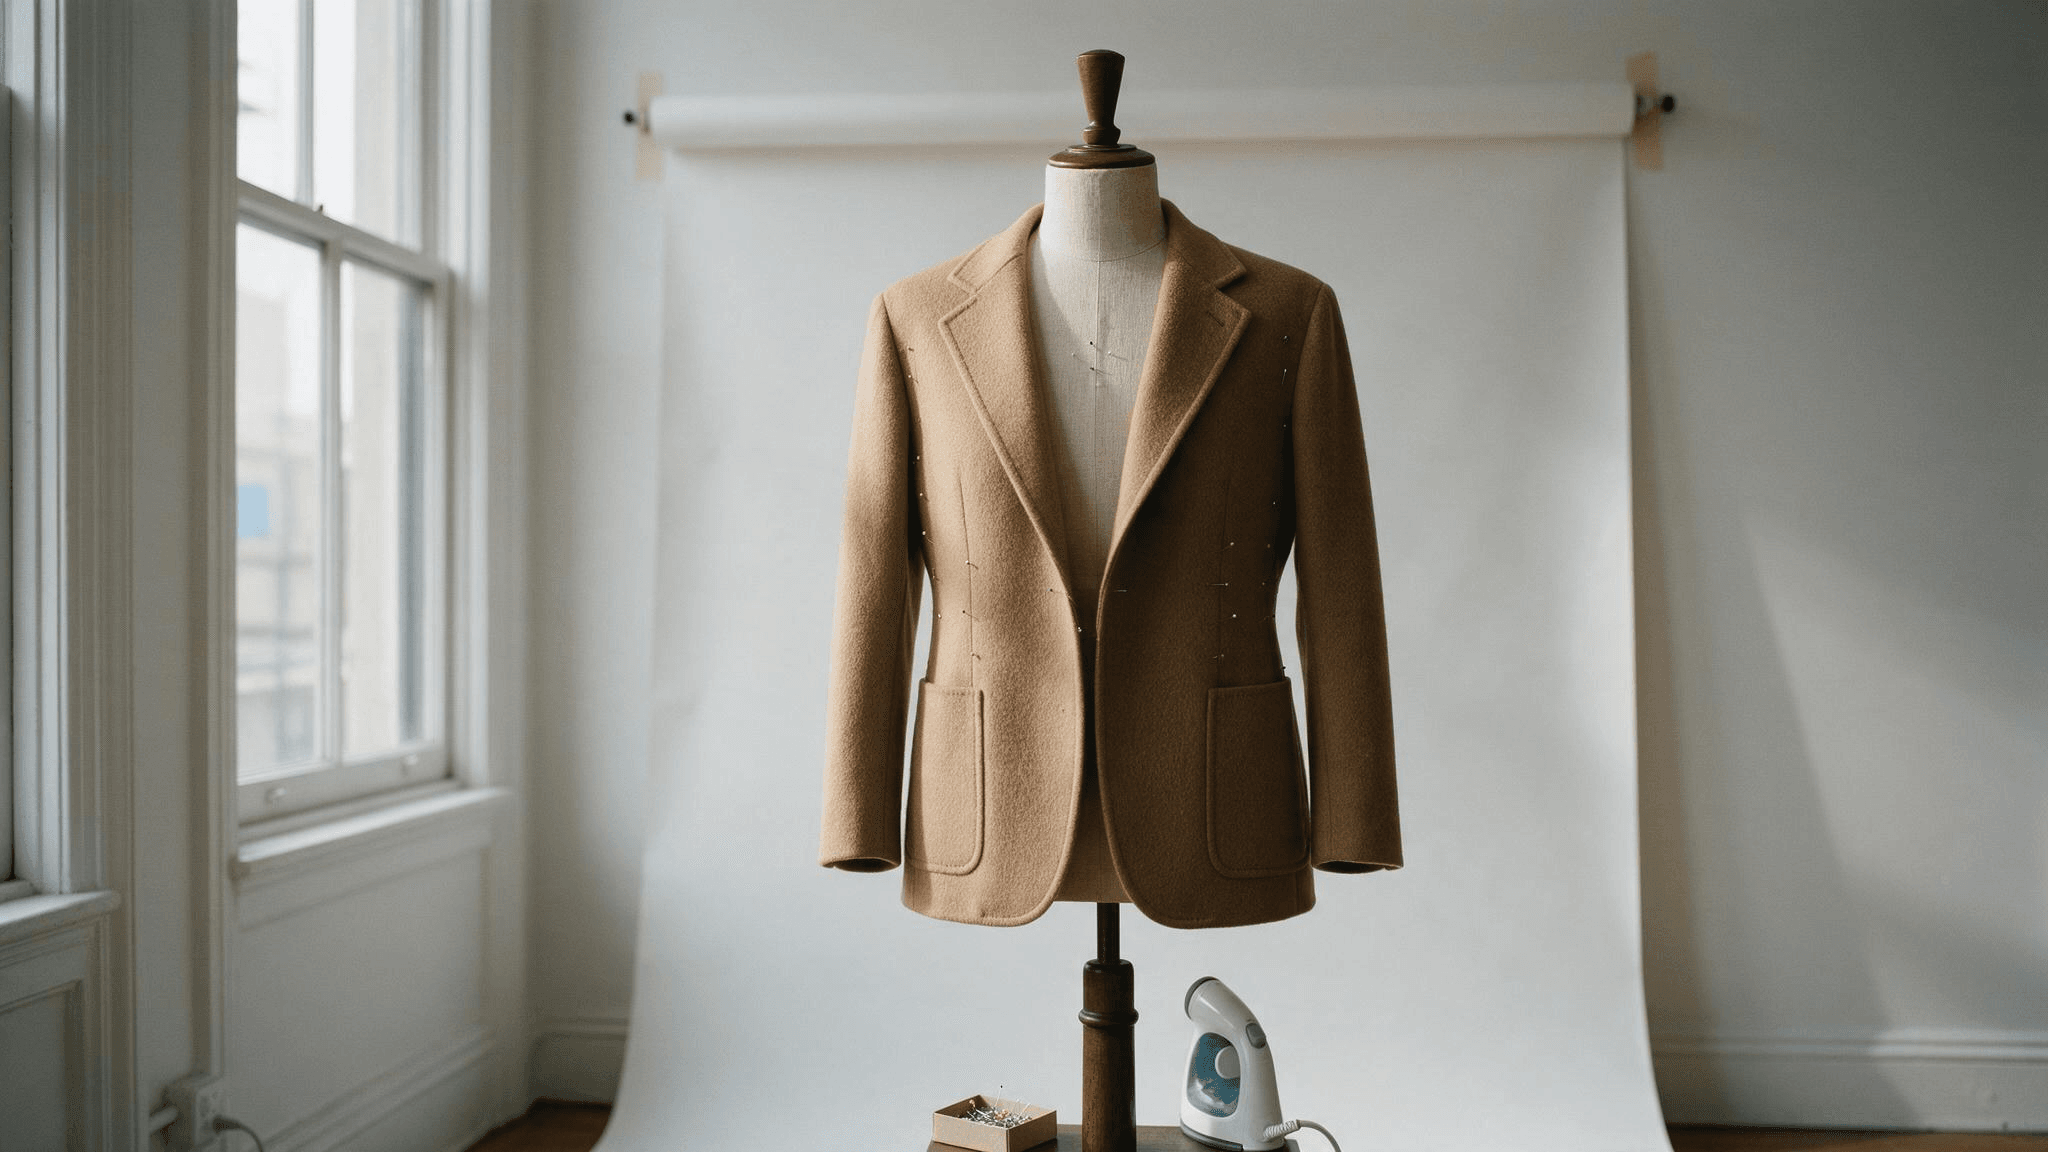
Mannequin photography earns its place when the garment has structure the floor would flatten: a tailored blazer, a dress with a fitted waist, a bag meant to stand on its own. A dress form holds the shape, the camera sees the garment the way it hangs on a body, and buyers get the fit information a flat lay withholds.
Marketplace rules decide the rest. Amazon's clothing image guidelines say main images must be photographed on a model, with two exceptions: children's and baby undergarments, leotards, swimwear and similar form-fitting items must be displayed without a model, and accessories must not be photographed on a model. Main images also need a pure white background, a frontal view, an aspect ratio close to 3:4 with the product filling 85% of the frame, and no folded products or visible tags.
| Where the image goes | What Amazon accepts | Shot type to use |
|---|---|---|
| Adult clothing, main image | A standing model, no mannequin or hanger visible | On-model |
| Children's and baby undergarments, leotards, swimwear, main image | Displayed without a model | Flat lay |
| Accessories, main image | Not photographed on a model | Flat lay |
| Any alternate image | Lifestyle, back view, detail and flat lay all allowed | Any of the four |
| Etsy and Shopify | No pose rule in Etsy's image requirements; a Shopify store sets its own | Whatever matches the rest of the shop |
The ghost mannequin sits between the two worlds. The garment is photographed on a form, then a second shot of the inside collar is blended in so the form disappears. The traditional route needs two photos and an editing session, which a separate guide will cover. The Ghost Mannequin visual type in Apparel Photoshoot produced the hollow cardigan in the grid above from the same flat lay in one run.
One more rule applies to the on-model route: a photorealistic AI-generated person on Amazon needs the contains-synthetic-performer keyword in the file's metadata, and our guide to Amazon image requirements shows where to add it.
How to Photograph Clothes on a Mannequin
Knowing how to photograph clothes on a mannequin starts with the size of the form. Pick one a size smaller than the garment and pin the excess at the back, so the front stays smooth and the seams sit where they would on a body. Steam the garment on the form rather than before, because dressing it adds wrinkles. Shoot straight on at chest height with the same window and the same white background you used on the floor, so both shot types sit together in one gallery.
FAQ
How do you do clothing photography at home without a model or a mannequin?
Shoot the garment as a flat lay by a window, then use that photo as the input for AI on-model and ghost mannequin images. The flat lay carries the colour, the print and the construction, and the AI step adds the body. On Amazon, the on-model output covers the standing-model rule for adult clothing main images.
How do you photograph clothes for selling online when you have dozens of items?
Shoot them in one session at one time of day so the light matches, steam everything before you start, and photograph a card with the SKU before each garment so the files sort themselves later. Then run the AI step once per garment; one run can return up to four images of the chosen type.
What background works best for flat lay clothing photos?
White for marketplaces, because Amazon requires it on main images and it keeps colours honest everywhere else. For social posts, a wood floor, pale linen or textured paper adds mood, as long as it stays plain enough to leave the garment the loudest thing in the frame.
How much does Apparel Photoshoot cost per image?
The Run button shows the price before you commit: $0.1008 for one image at 1K, $0.1408 at 2K and $0.1808 at 4K, and the figure does not change with the visual type or the aspect ratio. Four 2K images in one run come to $0.5008, so a full set of model, ghost mannequin, detail and flat lay shots for one garment at 2K costs about 56 cents across four runs, paid from your balance with no plan to choose.
Conclusion
A good flat lay comes down to a taped-down sheet, side light from one window, a phone held parallel to the floor and ten minutes of steaming and pinning before the first frame. Keep the camera height and the sleeve fold the same for every garment and the whole shop looks like one shoot. Save the mannequin for blazers and fitted dresses, hang the long pieces, and check the main-image rules before deciding which shot goes first.
What changed is what one good photo is worth. Upload it to Apparel Photoshoot and the same cardigan comes back on a model, as a ghost mannequin and as a close-up, in a few minutes, without a second shoot. That makes flat lay clothing photography at home the shoot to get right first, since every other listing image can now start from it.





