

The plate looked perfect for about forty seconds. Then the basil wilted, the sauce went dull, and the clip on the phone showed a brown blur under a kitchen bulb. Plenty of first food videos go wrong in that minute, and very little of it is the phone's fault.
This guide covers how to shoot a food video with the phone you already own: the settings worth changing, the angle each dish wants, one-window lighting, and how to catch the pour or the cut on the first try. It also covers the night the dish is already gone and only a photo is left, tested on a plate of spaghetti ragù. Start with the kit, because it is shorter than you think.
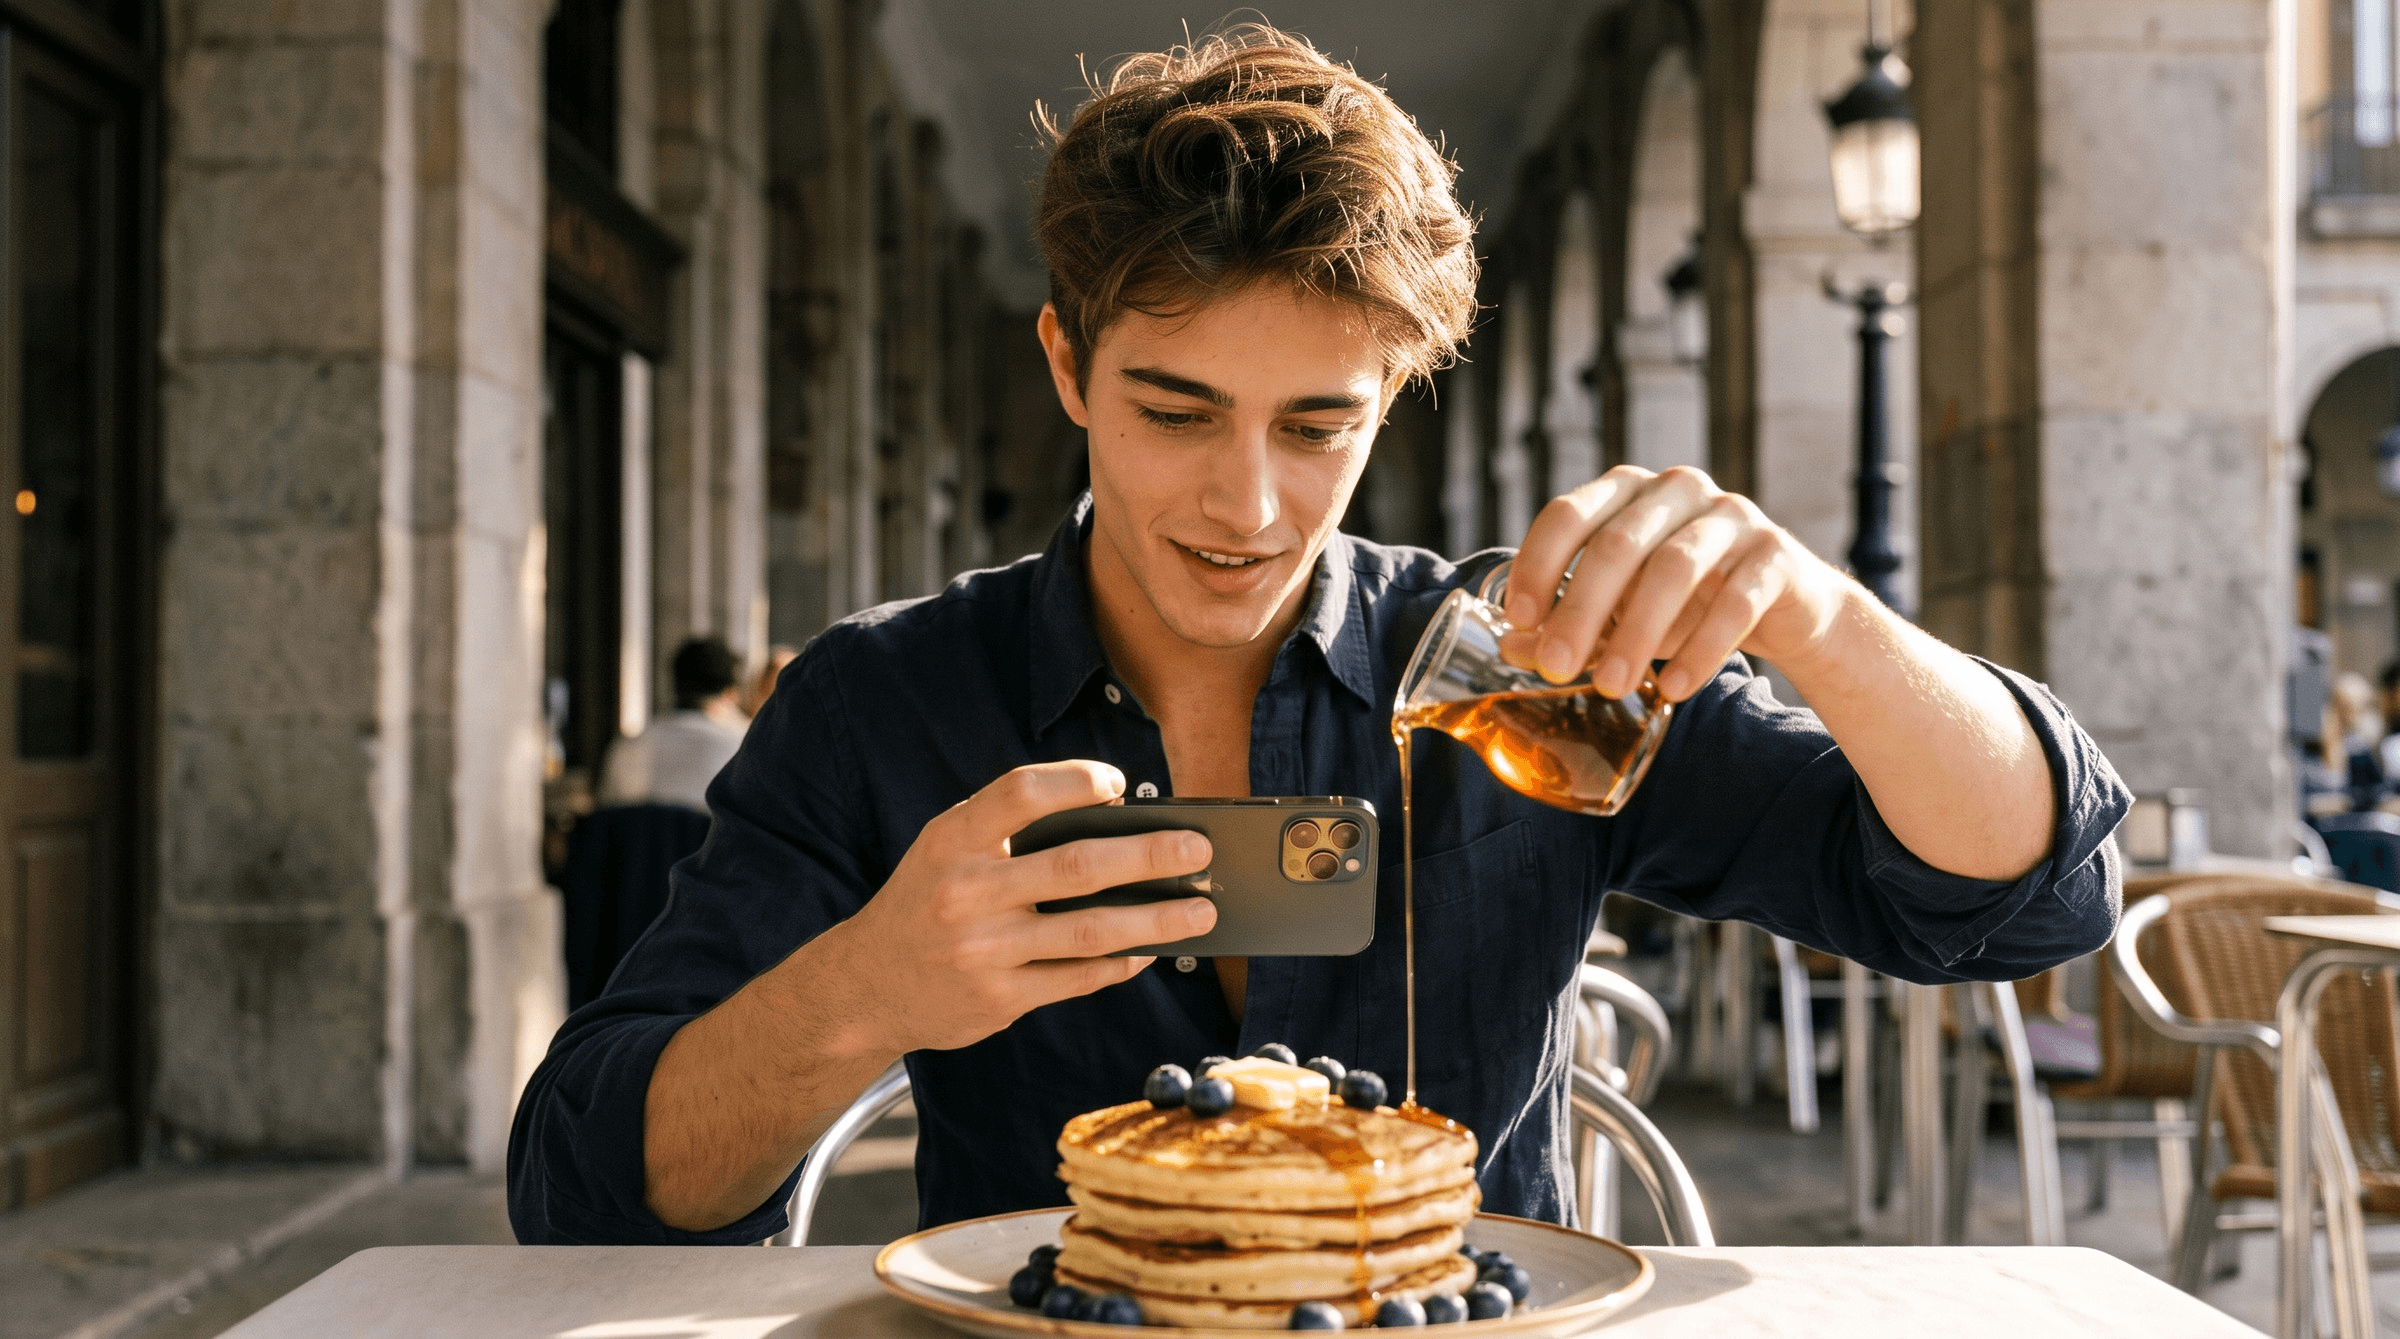
Key Takeaways
- A phone, one window and something steady to restiton cover most food videos, if exposure stays locked.
- Choose the angle by the dish: overhead for flat plates, 45 degrees for bowls, eye level for stacks.
- Film every pour or cut three times at 60 fps orhigherso it still looks smooth when slowed.
- Already have a dish photo? Food Motion turns it into a vertical reel with food sounds, no reshoot needed.
- Restaurants get a week of reels by batch-shooting each new dish in the quiet hours before dinner.
What You Need to Film Food Video on a Phone
You need three things. A phone made in the last few years, a window, and something that holds the phone still: a small clamp, a tripod, or a stack of cookbooks with the phone leaning against a mug. A gimbal and a ring light can wait.
The settings matter more than the gear. Food sits still and then moves fast, and the phone's automatic choices fight both. Change these before the first take:
| Setting | What to set | Why it matters for food |
|---|---|---|
| Frame rate | 30 fps for prep and talking, 60 fps for pours and cuts | Clips shot at 60 fps can be slowed to half speed and still look smooth |
| Focus and exposure | Touch and hold the dish until AE/AF Lock appears | Brightness stops jumping when a hand or a pan enters the frame |
| White balance | Turn on Lock White Balance | Sauce keeps the same color when a cloud passes or a cook opens the fridge |
| Auto FPS | Turn it off for clips you plan to slow down | In low light the phone can drop to 24 fps on its own, which makes slow motion stutter |
| Slo-mo | 1080p at 240 fps | Saved for one moment per dish, like an egg cracking or a knife going through crust |
| Grid | On | Plate rims and table edges stay level |
| Lens | Wipe it with a soft cloth | Kitchen steam and fingerprints leave a haze that softens every shot |
On an iPhone, the lock gesture is in Apple's guide to setting up your shot. Auto FPS and Lock White Balance sit under Settings > Camera > Record Video, and the Slo-mo rate under Record Slo-mo, as its page on video recording settings explains.
On Android phones, look for the same controls in the camera app's Pro or Video mode. The names change from brand to brand.
Turn One Dish Photo Into a Food Reel With Food Motion
Before you set any of that up, check whether you need to film at all. On a busy night a plate is usually off the pass within a minute or two, and often the only thing left of it is a photo. Food Motion on Atlas Cloud takes one photo of a dish or a drink and returns a short clip with motion and sound.
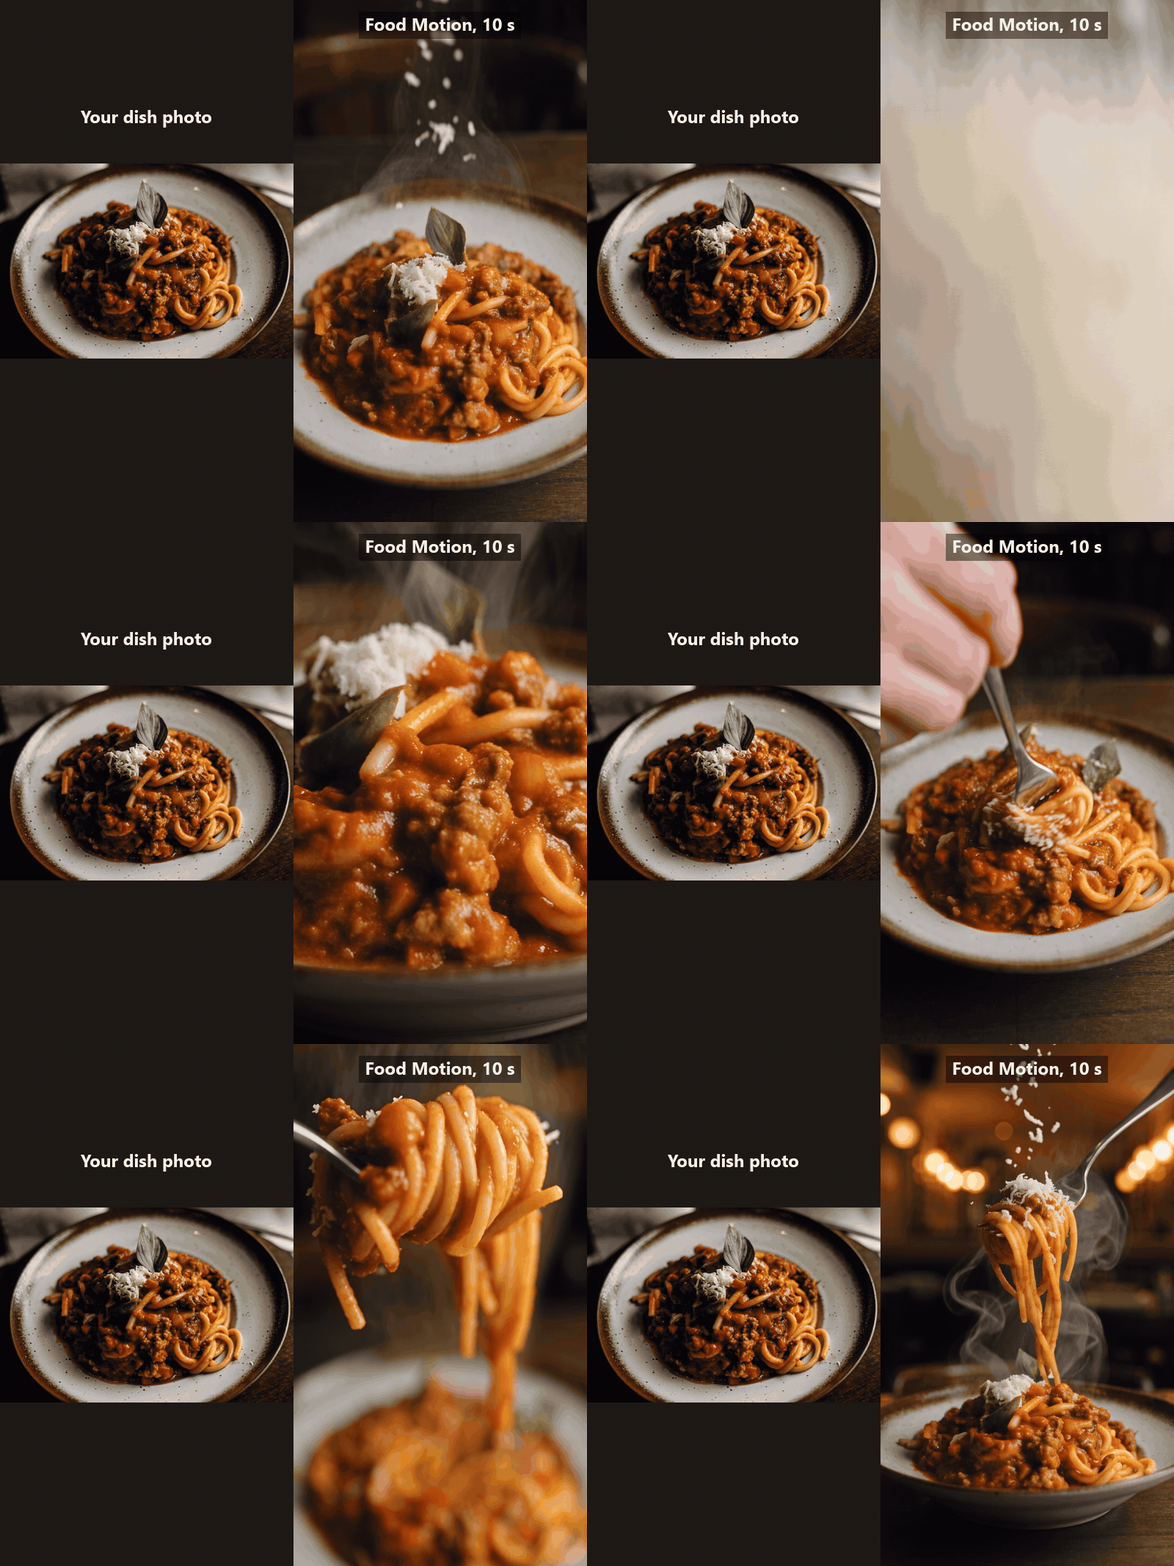
Input photo by Ahmad Salisu Jaafar on Pexels . The output was generated with Food Motion at 1080p and is shown here as a silent GIF; the original file has a sound track .
We gave it a stock photo of spaghetti ragù and asked for steam, a fork twirl and falling cheese. The 10-second clip runs from cheese drifting through steam to a forkful lifted under more cheese, and the plate and basil leaf still match the photo.
Reach for it when a dish is off the menu, when the kitchen has menu photos but no time to film, or to test which motion sells a dish before a real shoot. You can animate a dish photo after signing in.
Animate a Dish Photo in Four Steps
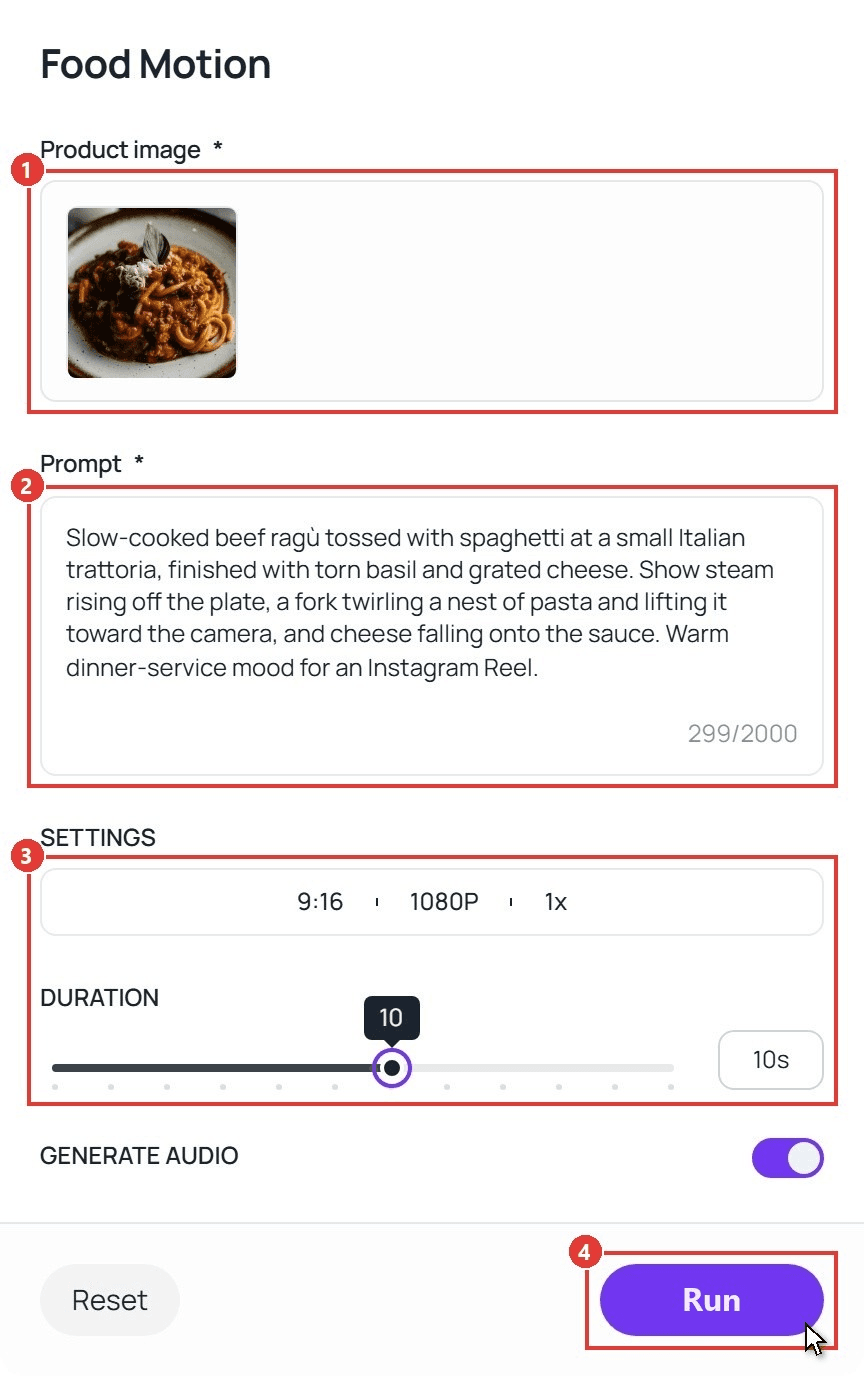
- Upload the photo. One image of food or a drink, up to 10 MB. The whole dish should be in frame and sharp, because the clip treats that plate as the one to keep.
- Describe the dish and the motion. Name the food, the setting, and two or three things that should move. The box takes up to 2,000 characters. This is the prompt from our test:
plaintext1Slow-cooked beef ragù tossed with spaghetti at a small Italian trattoria, finished with torn basil and grated cheese. Show steam rising off the plate, a fork twirling a nest of pasta and lifting it toward the camera, and cheese falling onto the sauce. Warm dinner-service mood for an Instagram Reel.
- Set the format and length. Pick 9:16 for Reels, TikTok and Shorts, or 16:9, 1:1, 3:4 and 4:3 for other placements. 720P is the default; our clip used 1080P, which renders a full 1080 by 1920 frame for a sharper phone screen. Length runs from 4 to 15 seconds. The 1x setting can go to 2x, which returns two different takes on the same photo. Leave Generate Audio on if you want sizzle and room sound in the file.
- Click Run. The finished clip appears in the Output panel, ready to download.
How to Shoot a Food Video at the Right Angle for Each Dish
When you do film, the angle decides what the viewer learns about the food. Pick the side of the dish that carries its story and put the phone there.
- Overhead suits anything flat or spread out: pizza, salads, a brunch table, latte art. Hold the phone parallel to the table and use the grid to keep it square.
- 45 degrees is how a diner sees a plate, so it fits bowls and dishes with some depth, like curries, pasta or a poke bowl.
- Eye level belongs to anything tall or layered: burgers, stacked pancakes, cakes, drinks in clear glass. The phone sits at plate height, often resting on the table itself.
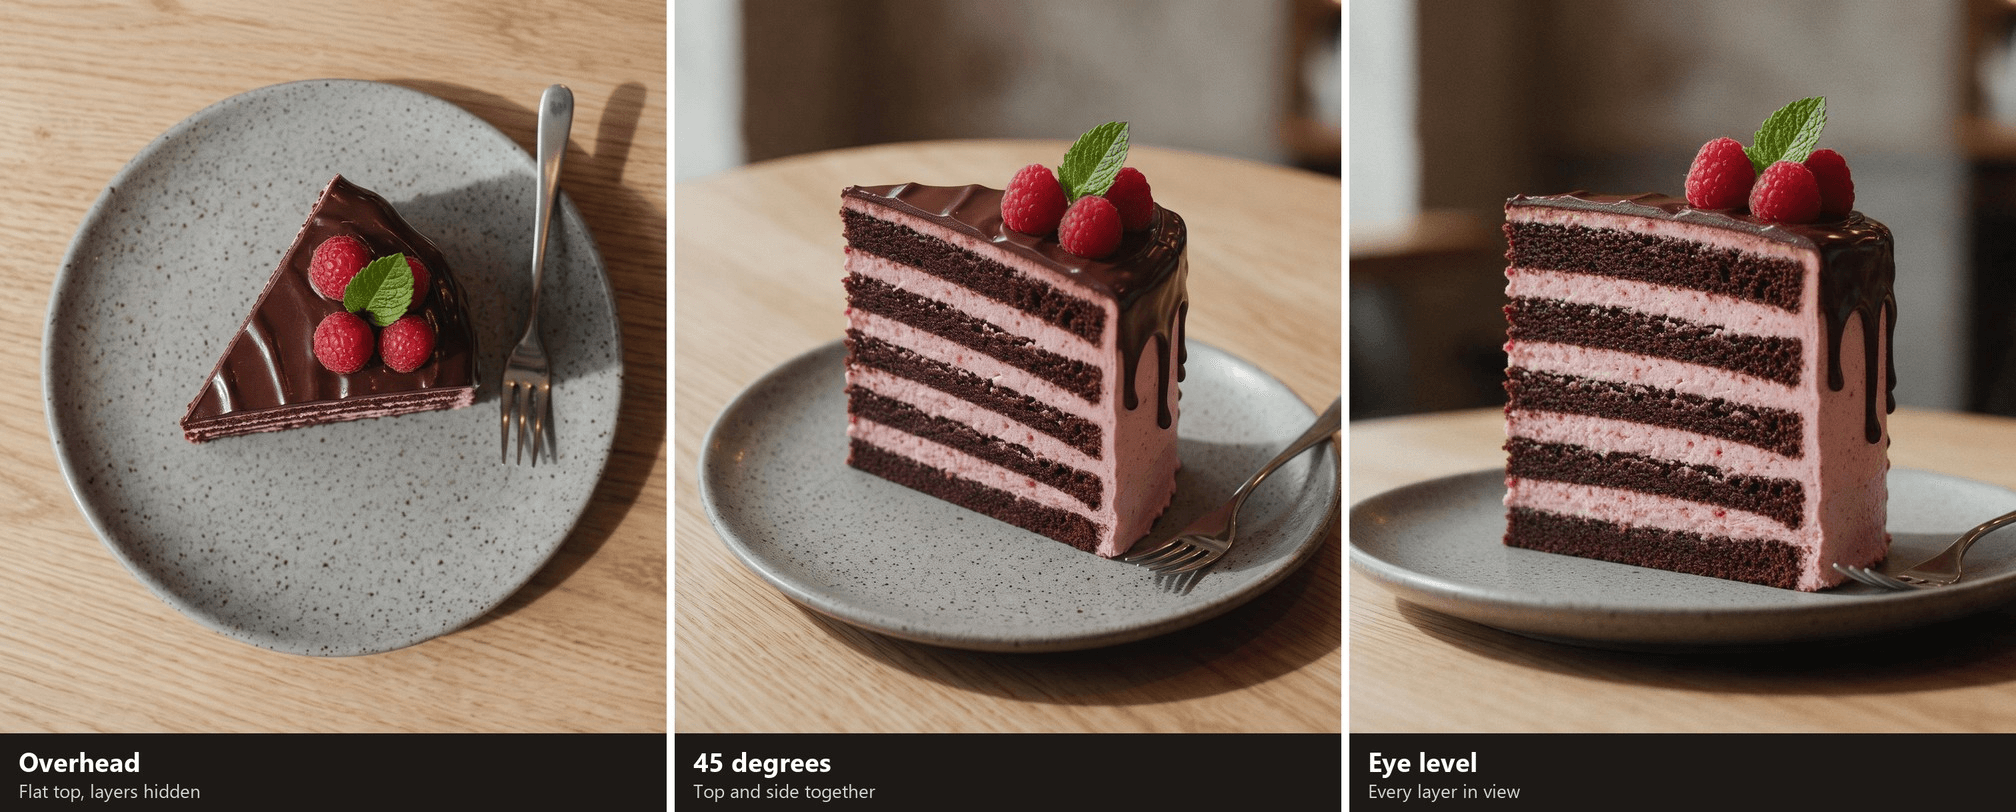
The cake makes the point. From above it is a brown triangle. At eye level the five layers of sponge are the whole reason to order it. Shoot every dish from two angles while it is fresh, and the edit gets cutaways for free.
Light the Dish With One Window
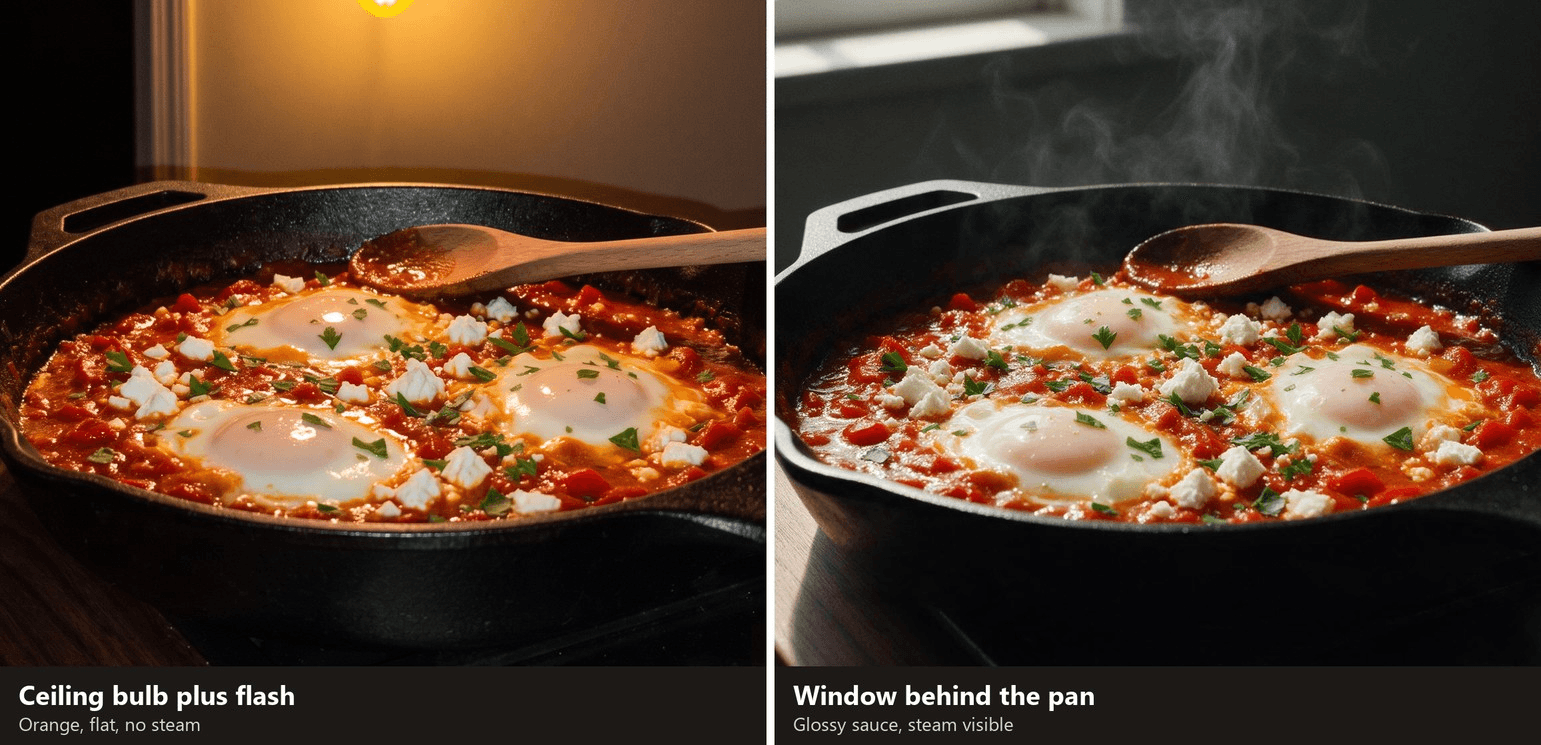
The angle is set. Now give the light a direction. Switch off the ceiling lights first, because a warm bulb mixed with daylight turns sauces orange on one side and blue on the other.
Then turn the dish so the window sits behind or beside it. Light from that direction rakes across the surface, so sauces shine, crumbs throw small shadows and steam shows up against the darker room. Light from the camera's side flattens everything. If the sun is hitting the table directly, tape baking paper over the glass to soften it. A white menu card held opposite the window lifts the shadow side. A black one deepens it for a moodier look.
No window in the kitchen? The one-, two- and three-light setups in our product photography lighting guide work for video too, as long as the lights don't flicker.
Film the Moment the Dish Moves
Good light makes a still dish look good. Movement is what makes someone stop scrolling: a pour, a cheese pull, a knife through crust, a lid coming off in a cloud of steam. Those moments last a second or two, so plan to catch them more than once.
Start recording two seconds before the action and stop two seconds after. Shoot each moment three times, which means having a second portion of sauce or a backup plate ready. Lock focus on the spot where the action lands, not on the hand doing it. And keep the motion in one part of the frame, so the viewer's eye knows where to go.
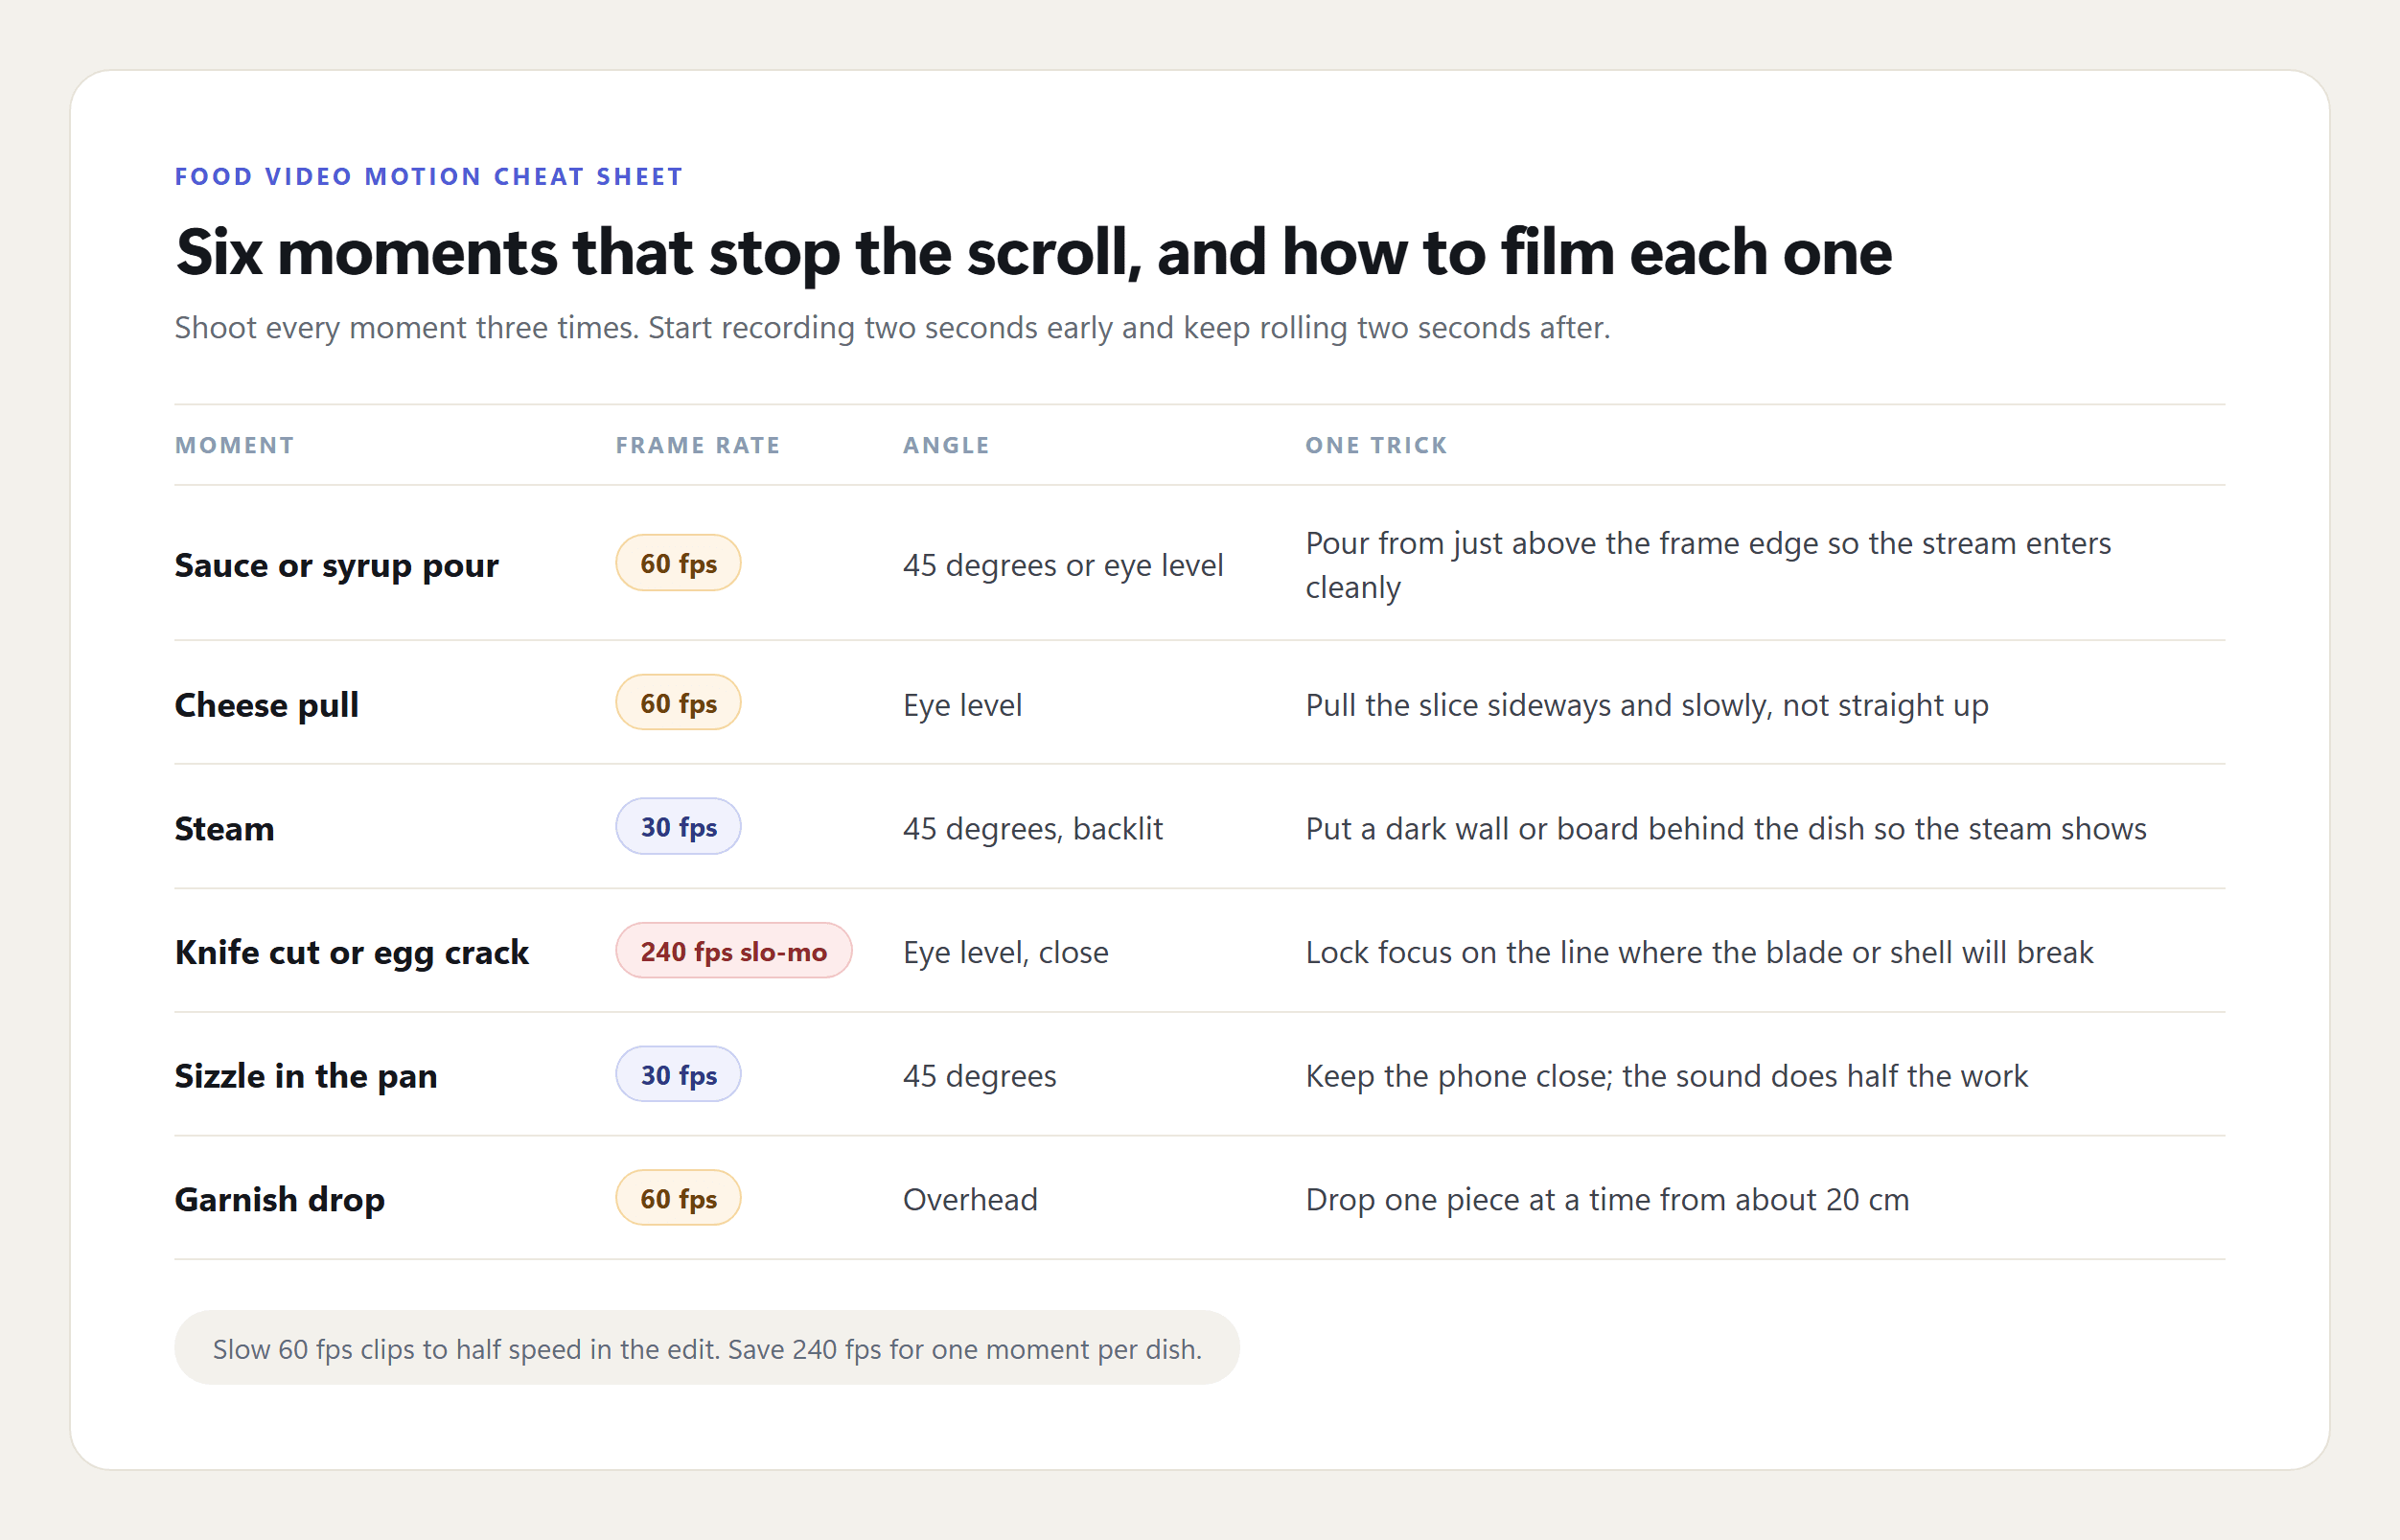
Steam deserves its own warning. It thins out within a few minutes of plating, so the hot dish goes in front of the camera first and everything else waits. If you'd rather generate steam and sizzle from a text description, our food video prompt guide covers the wording.
How to Make Cooking Videos People Watch to the End
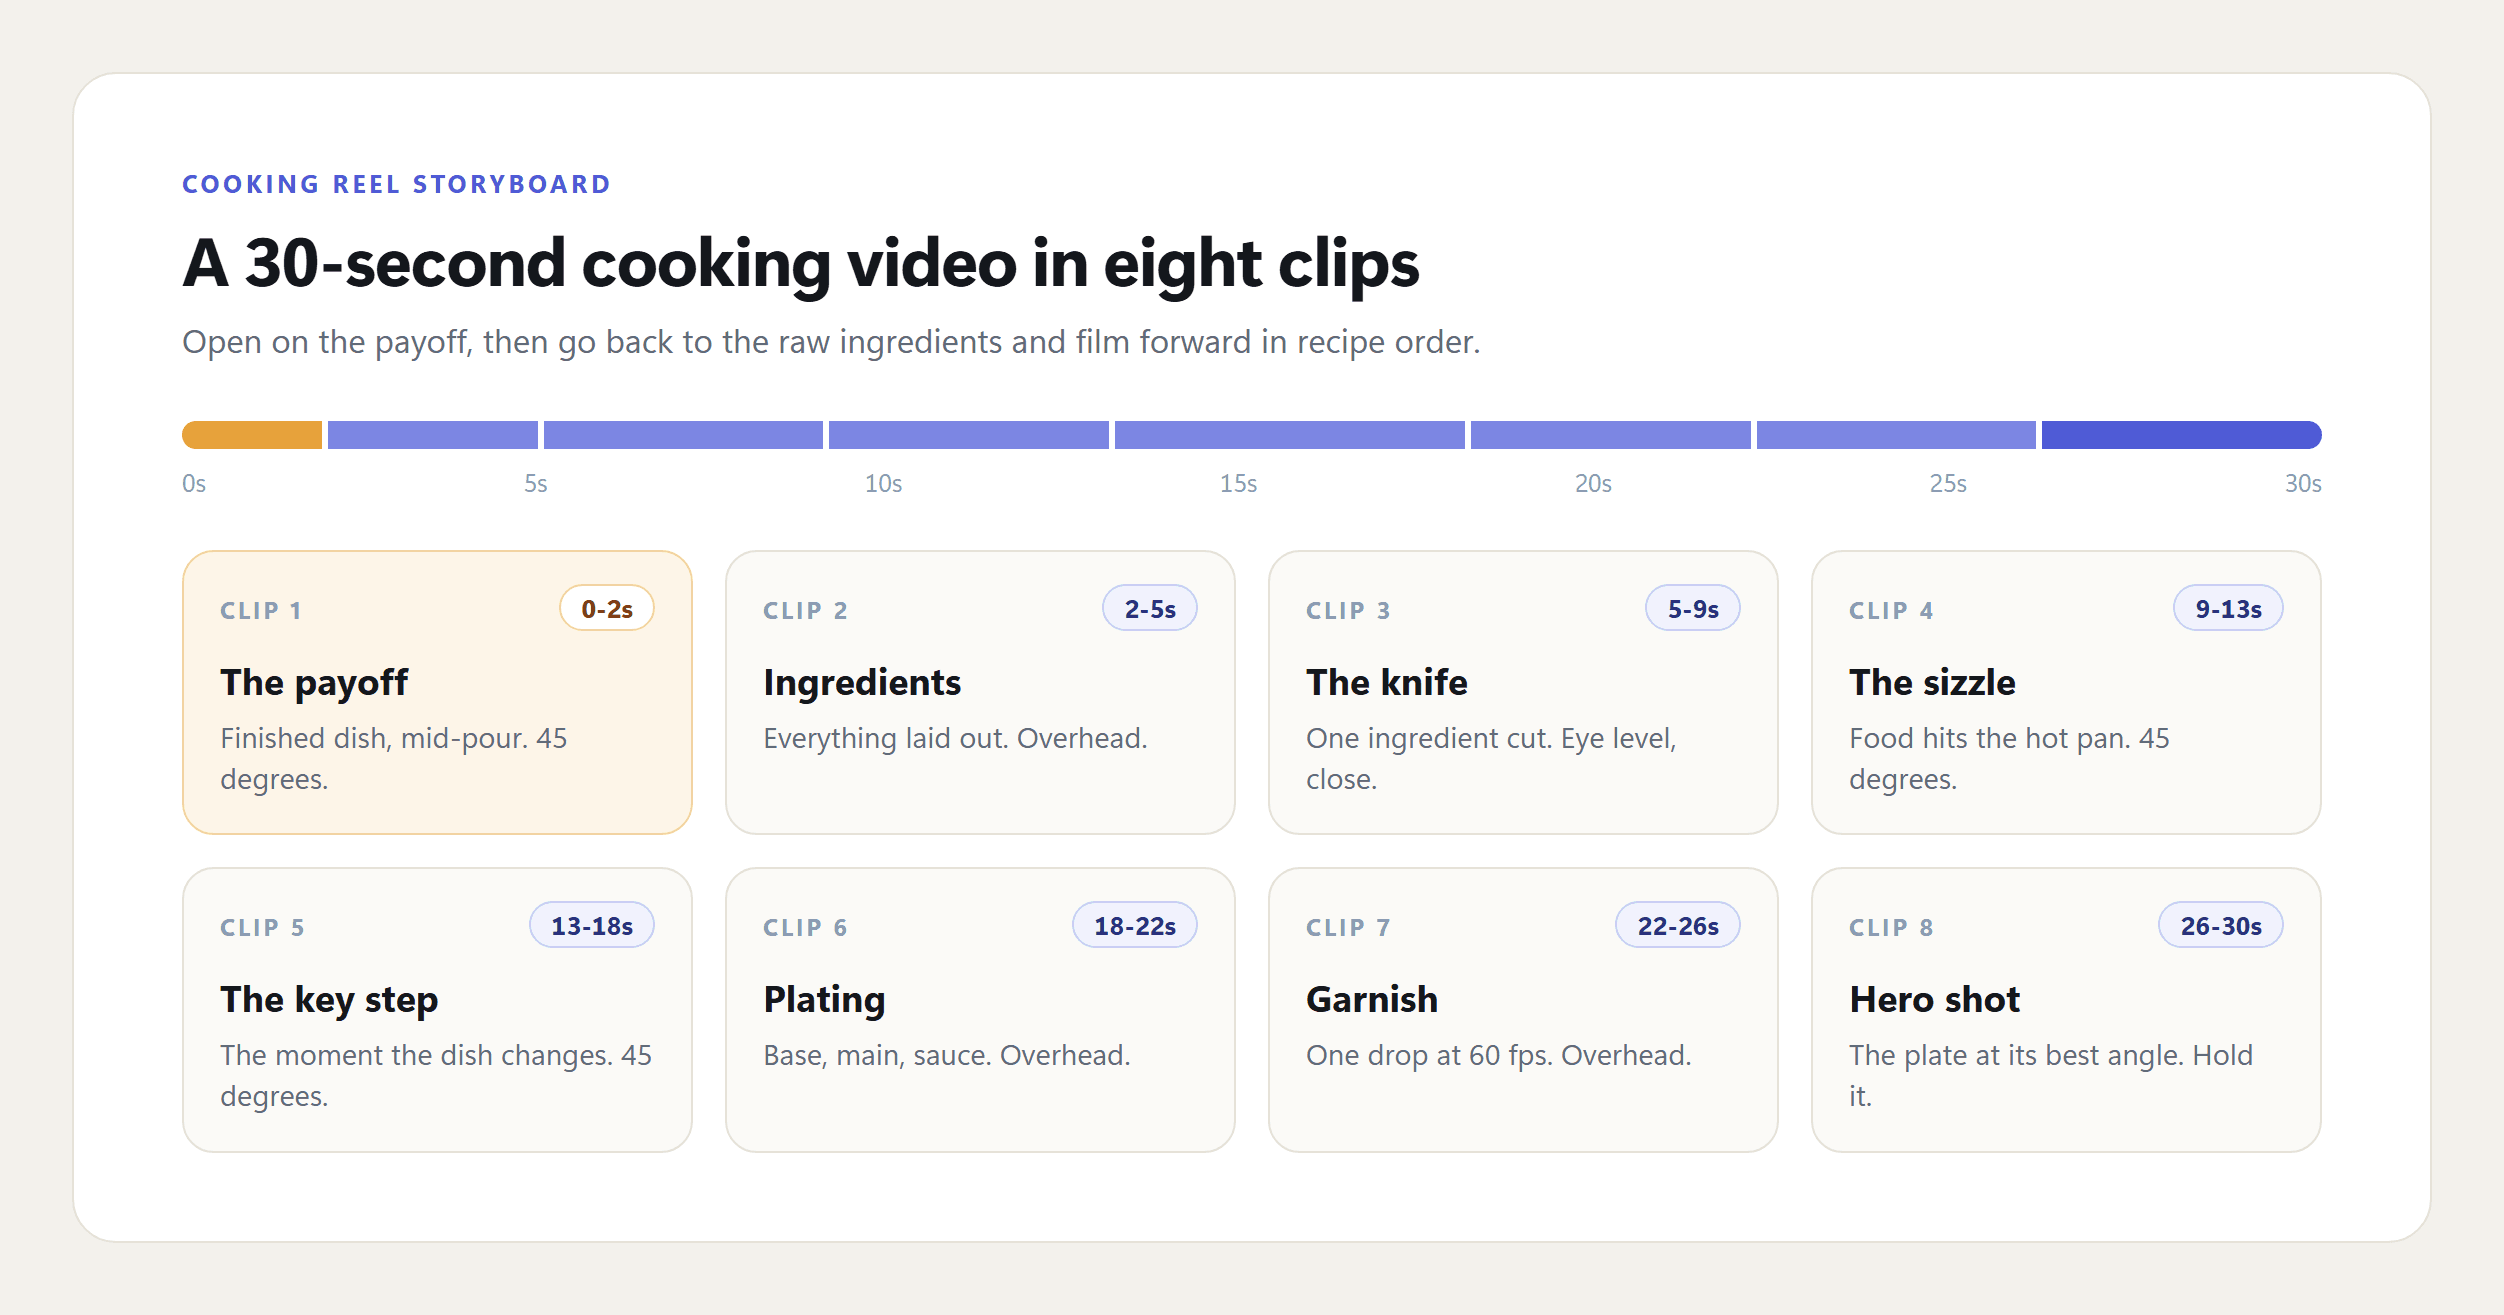
Single shots become a cooking video in the edit, and most of that work is getting the order right. Open on the payoff. The finished dish, mid-pour, goes in the first two seconds. Then rewind to the raw ingredients and walk forward.
For a 30-second reel, plan about eight clips of two to five seconds each. Film them in recipe order so hands, sleeves and the state of the pan match from shot to shot. A ring that appears and disappears between cuts is the kind of thing viewers notice.
Keep the real sound. A knife on a board and oil hitting a hot pan do more for a cooking video than a music bed, and you can still record a voiceover on top later. Cut each clip the moment its action finishes, because a pan that keeps sizzling after the point has been made is where people swipe away.
Restaurant Video Marketing Between Lunch and Dinner Service
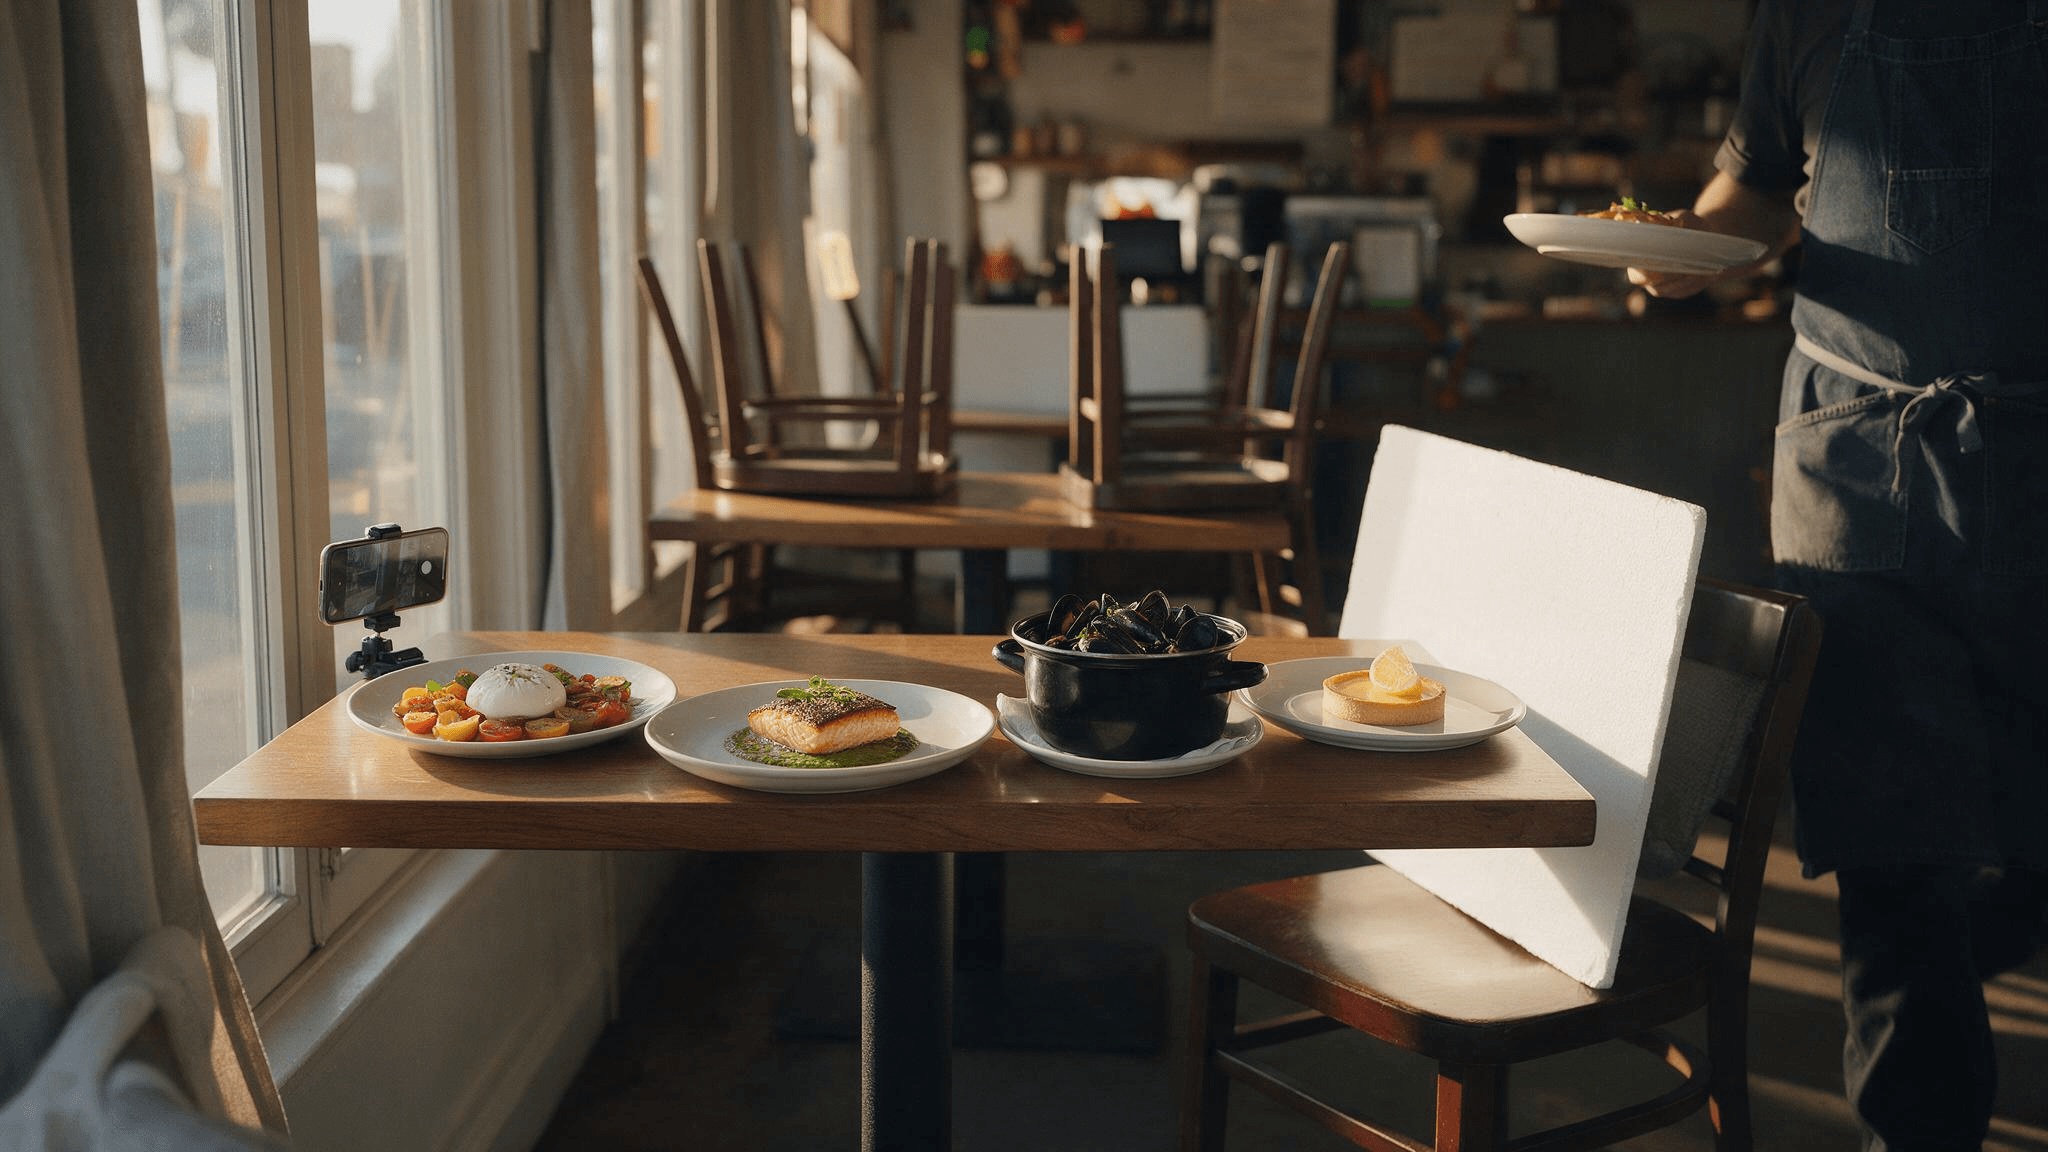
A home cook can shoot whenever the light is good. A restaurant gets one window: the quiet stretch after lunch, when the kitchen has time and the afternoon light is still strong. Restaurant video marketing works best when it is planned around that gap.
Batch the work. Plate each new dish twice, one to film and one as a stand-in for setting angles. Give every dish the full set in about ten minutes: overhead, 45 degrees, one motion shot and one close detail. Four dishes on a Tuesday afternoon fill a week of posts, and each post can rotate between the dish, the cook who makes it and a piece of prep that shows it is fresh.
Food Reel Ideas You Can Shoot This Week
Stuck on what to post? These food video ideas each take one dish and one short session:
- The first pour of the day. Espresso hitting milk, or the opening pour from a batch of cold brew. Cafés can post it every morning without it getting old.
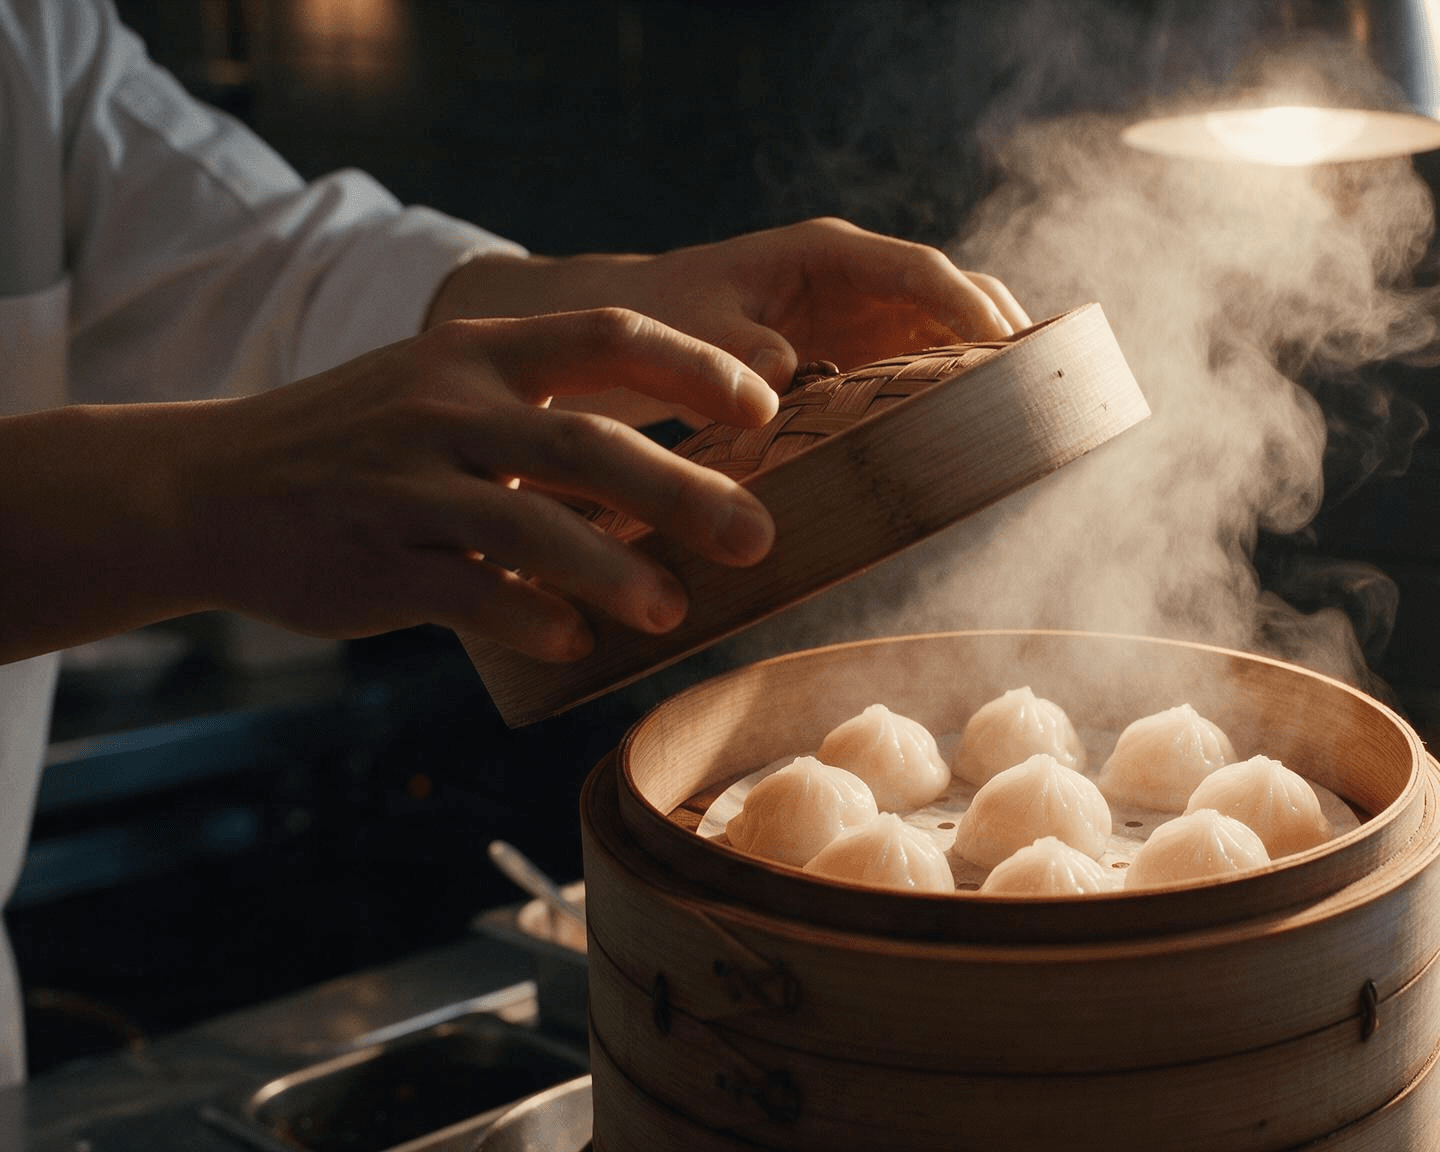
- The lid lift. A cloche, a pot lid or a bamboo steamer opening in a burst of steam. Built for restaurants with one signature dish.
- One ingredient, three dishes. A crate of tomatoes becomes a salad, a sauce and a tart. This one works for chefs who want to show range.
- Behind the pass. Plating in three cuts: the base, the main element, the garnish.
- Raw to plate in five seconds. A jump cut from the ingredients on the board to the finished dish in the same spot.
- The common mistake. Show a thing people get wrong, like crowding a pan, then the right way. A good fit for home cooks who teach.
- The order of the day. The view from a customer's seat as the plate arrives, shot at eye level.
- An old photo, moving. A favorite dish from the archive, animated with Food Motion, posted with a note that it is back on the menu.
FAQ
Do you need a gimbal to shoot food videos?
No. Most food shots are static, and a phone resting on a clamp or a tripod gives steadier footage than holding it by hand. A gimbal earns its place once you want slow push-ins toward the plate or a walk from the kitchen to the table, and that can wait until you have a few dozen videos posted.
How do you keep food looking fresh while filming?
Cook a hero portion and keep it slightly underdone, since vegetables and pasta keep cooking on the plate. A light brush of oil brings back shine on meat, a fine water spray revives salad leaves, and sauce goes on seconds before you press record.
How should I photograph the dish before uploading it to Food Motion?
Fit the whole plate in the frame, keep it sharp, and shoot it in soft, even light with no hands or cutlery covering the food. The upload limit is 10 MB, so a straight phone photo works. Our guide to phone product photos covers backgrounds and framing for the still.
How much does a 15-second Food Motion video cost?
At 720p, a 15-second clip costs $4.727 per run and a 10-second clip costs $3.212. The 1080p clip in this guide cost $6.145 for its 10 seconds. The price is a base fee plus a per-second rate, so a 6-second 720p loop for a menu screen comes in at about $2. Setting 2x doubles the price and gives you two different takes to choose between.
Conclusion
A good food video is mostly decided before you press record. Lock the exposure, put the window behind the plate, pick the angle that shows what makes the dish worth ordering, and give the one moment of movement three takes instead of one.
When the plate is already gone, a single photo can still become a reel. For everything you can cook again, the steps above are how to shoot a food video that looks like the dish tasted.





