API 调用与客户端接入
使用 Coding Plan API Key 直接调用接口,或接入 Claude Code、OpenClaw、Cursor、Codex 等主流 Coding 客户端。
通过 API 直接调用
Coding Plan 使用 独立的 API Key,与 Atlas Cloud 常规 API Key 互相独立。
- Base URL:
https://api.atlascloud.ai/v1 - API Key: 在 套餐管理 → 获取 API Key 中创建。

请求和响应格式与 OpenAI 兼容,完整示例见 Model APIs。
客户端配置
大多数 Coding 工具(OpenClaw、Hermes、OpenCode、Cursor、Copilot 等)使用 OpenAI 兼容协议,Base URL 为:
https://api.atlascloud.ai/v1Claude Code 使用 Anthropic Messages 协议,Base URL 为:
https://api.atlascloud.ai下面是常用工具的接入步骤。
Claude Code
配置环境变量
重要提示: 请将下方的
ANTHROPIC_AUTH_TOKEN替换为你在 Atlas Cloud 控制台获取的实际 API Key。
配置文件路径:
- Windows:
%USERPROFILE%\.claude\settings.json - macOS / Linux:
~/.claude/settings.json
修改 settings.json 如下,替换 API Key 和模型 ID:
{
  "env": {
    "ANTHROPIC_AUTH_TOKEN": "atlas-api-key",
    "ANTHROPIC_BASE_URL": "https://api.atlascloud.ai",
    "ANTHROPIC_MODEL": "zai-org/glm-5.1",
    "ANTHROPIC_DEFAULT_HAIKU_MODEL": "zai-org/glm-5.1",
    "ANTHROPIC_DEFAULT_SONNET_MODEL": "zai-org/glm-5.1",
    "CLAUDE_CODE_DISABLE_EXPERIMENTAL_BETAS": "1"
  }
}
OpenClaw
1. 通过 OpenClaw 引导向导配置
安装完成后,打开终端(SSH / CMD / Terminal),运行以下命令启动配置向导:
openclaw onboard依次选择 Yes → QuickStart → Custom Provider,然后:

- 输入 API Base URL:
https://api.atlascloud.ai/v1 - 粘贴 Atlas Cloud API Key。
- 粘贴模型 ID,协议选择 OpenAI-compatible。
- 验证连接,出现
Verification successful即成功。 - 自定义 Endpoint ID 和显示名称。
2. 或直接编辑配置文件
- macOS / Linux:
~/.claude/settings.json
{
  "baseUrl": "https://api.atlascloud.ai/v1",
  "apiKey": "your-atlas-key",
  "api": "openai-completions",
  "models": [
    {
      "id": "zai-org/glm-5.1",
      "name": "zai-org/glm-5.1",
      "contextWindow": 200000,
      "input": ["text"]
    }
  ]
}
Hermes
在 Hermes 中新增一个自定义的 OpenAI 兼容 Provider 即可接入 Atlas Cloud:
-
在 Provider 列表中选择 Custom endpoint (enter URL manually)。
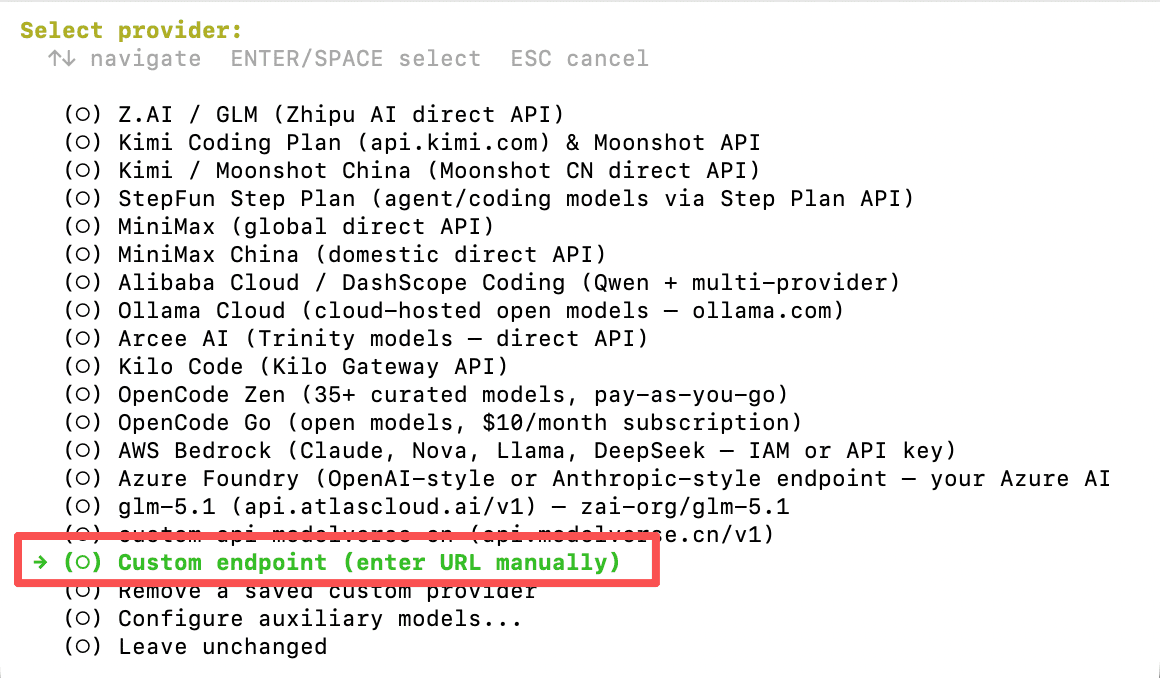
-
将 API base URL 填为
https://api.atlascloud.ai/v1,API key 粘贴 Coding Plan 的 API Key;验证通过后即可看到可用模型列表: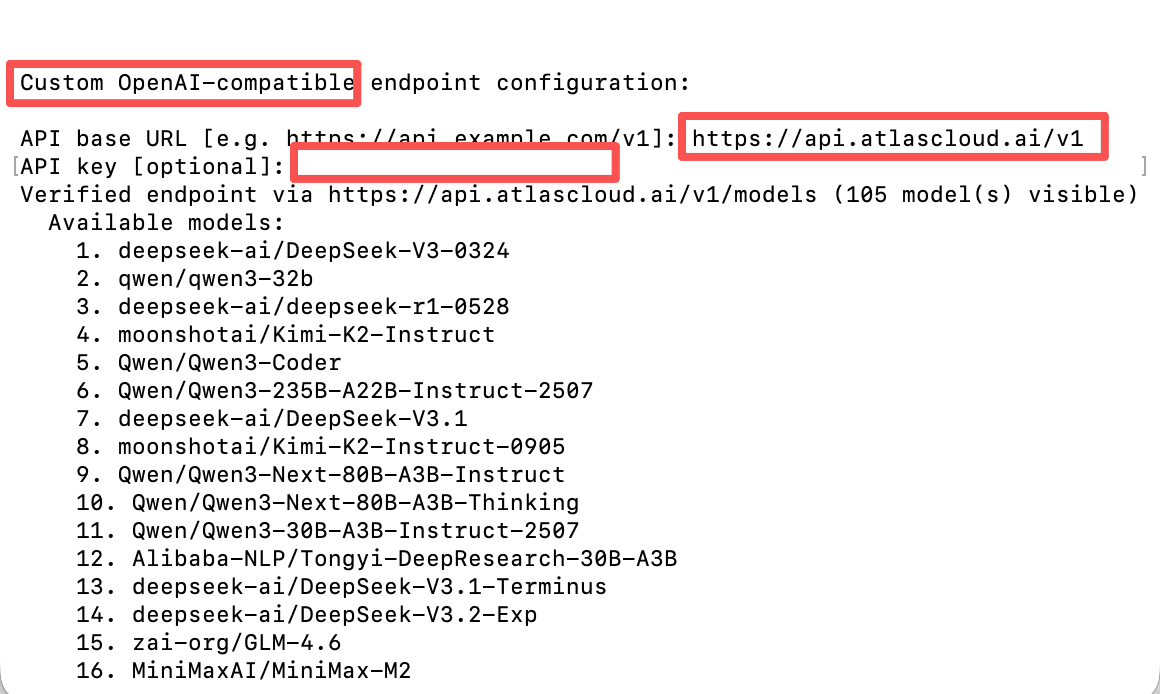
Trae
在 Trae 中新增一个自定义 OpenAI 兼容服务商,填入 Atlas Cloud 的 Base URL 和 Coding Plan API Key 即可。

Cursor
在 Cursor → Settings → Models 中新增自定义 OpenAI 兼容模型,Base URL 指向 https://api.atlascloud.ai/v1。

OpenCode
打开 OpenCode 配置文件 opencode.json:
- Linux:
~/.config/opencode/opencode.json - Windows:
%USERPROFILE%\.config\opencode\opencode.json
配置 Provider
{
  "$schema": "https://opencode.ai/config.json",
  "provider": {
    "atlascloud": {
      "npm": "@ai-sdk/openai-compatible",
      "name": "atlascloud",
      "options": {
        "baseURL": "https://api.atlascloud.ai/v1",
        "apiKey": "your-atlas-api-key"
      },
      "models": {
        "zai-org/glm-5.1": {
          "name": "glm-5.1"
        }
      }
    }
  }
}
Codex
1. 配置模型提供商
在 macOS / Linux 下创建并编辑 ~/.codex/config.toml:
model_provider = "atlas_coding_plan"
model = "zai-org/glm-5.1"

[model_providers.atlas_coding_plan]
name = "atlascloud"
base_url = "https://api.atlascloud.ai/v1"
wire_api = "chat"
requires_openai_auth = true
2. 配置 API Key
创建并编辑 ~/.codex/auth.json:
{
  "OPENAI_API_KEY": "atlas-api-key"
}
请将
atlas-api-key替换为你在 Atlas Cloud 控制台获取的实际 API Key。
3. 启动 Codex
codex跳过更新提示,即可开始使用。
