Você gera um headshot com IA, adiciona “hyper-realistic, 8k, masterpiece” e mesmo assim recebe aquele rosto plastificado e aerografado que grita “sintético”. Seja usando APIs premium ou avaliando ferramentas gratuitas de geração de headshots com IA, a arquitetura do modelo raramente é o problema—o excesso de prompts em busca da perfeição artificial é.
Para alcançar um fotorrealismo autêntico, você precisa trocar os jargões de qualidade pela linguagem fotográfica nativa de câmera. O realismo se constrói com imperfeições intencionais.
| Estratégia de prompt | Abordagem padrão (parece sintético) | Abordagem pro (realismo nativo de câmera) |
| Textura e pele | "smooth flawless skin, perfect face" | "visible pores, subtle skin texture, natural asymmetry" |
| Iluminação | "studio lighting, cinematic glow" | "diffused overcast daylight, soft window fill, natural shadows" |
| Óptica da câmera | "photorealistic, highly detailed, 8k" | "shot on 85mm f/1.8 lens, raw photograph, shallow depth of field" |
Os modelos de difusão processam metadados ópticos melhor do que adjetivos subjetivos. Especificar uma distância focal física (como uma lente fixa de 85mm) obriga o modelo a calcular a compressão óptica e a queda de foco realistas, em vez de aplicar um filtro digital chapado. Ao pedir restrições ópticas, iluminação natural e microimperfeições, seus resultados ultrapassam o vale da estranheza.
Principais conclusões
- Abandone os jargões de qualidade: palavras como "hyper-realistic" ou "8k" acionam filtros digitais superprocessados. O realismo vem da óptica da câmera, dos ângulos de iluminação e das microimperfeições da pele.
- Use óptica específica para cada estilo: ajuste a distância focal e a iluminação à profissão—85mm f/2.0 para fotos corporativas nítidas, luz ampla e difusa de janela para líderes criativos e 50mm na golden hour para thought leaders em ambientes externos.
- Adapte-se à arquitetura do modelo: ao rodar prompts em plataformas como a Atlas Cloud, use metadados ópticos brutos para modelos técnicos (Flux/Seedream) e contexto relacional para modelos de linguagem natural (GPT Image 2).
Por que a maioria dos headshots com IA parece sintética e como resolver isso
Você gera um avatar profissional e recebe apenas uma figura de cera com olhos sem vida, pele de porcelana e dentes ofuscantes. Esse efeito perturbador é conhecido como vale da estranheza.
Fotos de IA excessivamente suavizadas nascem de dois hábitos. Primeiro, palavras-chave de qualidade como “hyper-realistic” ou “masterpiece” empurram os modelos para médias idealizadas em vez da verdade fotográfica. Segundo, os prompts negativos mais comuns, que banem “blur” ou “noise”, eliminam justamente os microdetalhes que indicam pele real. A qualidade da imagem gerada por IA então desaba em superfícies plastificadas.
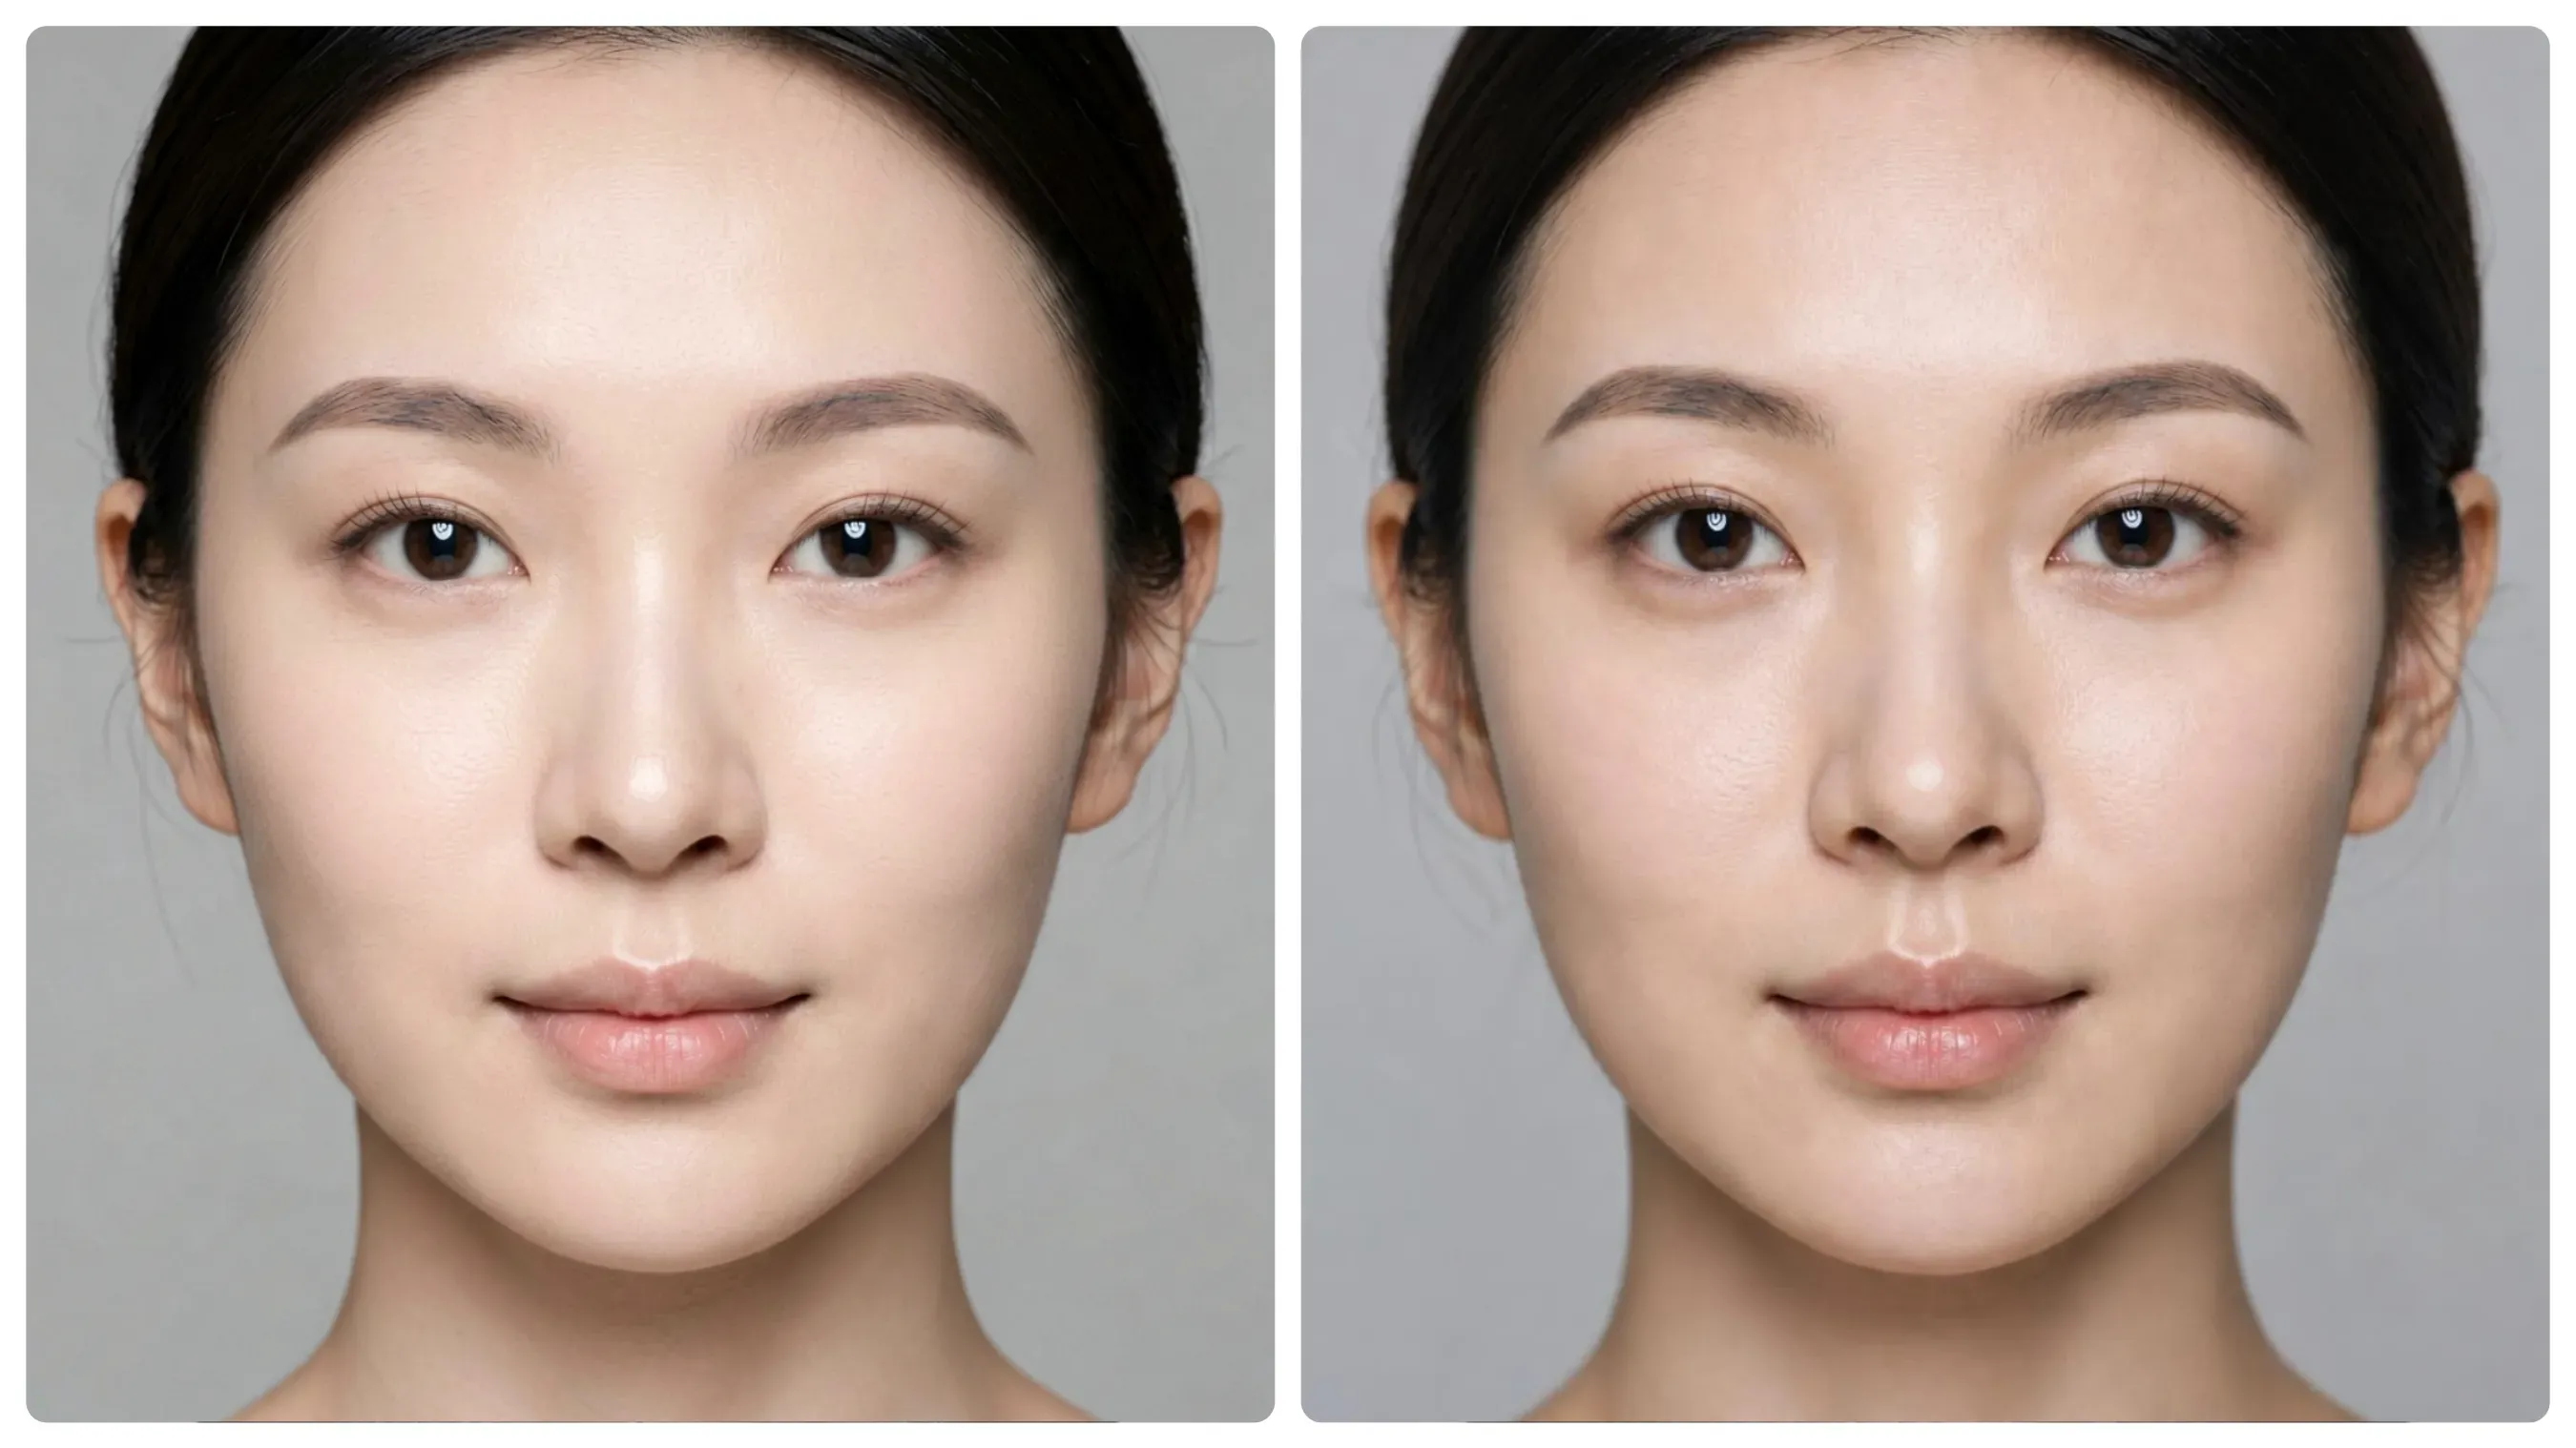
Comparação lado a lado com identidade consistente. À esquerda: o prompt padrão com jargões de qualidade produz uma pele chapada, supersuavizada e plastificada. À direita: o prompt com óptica nativa de câmera restaura os microporos naturais da pele, a queda de luz orgânica e os reflexos especulares realistas.
A causa raiz da pele sintética
- Lacunas de espalhamento subsuperficial: A pele humana é parcialmente translúcida. Quando os modelos não aprendem a óptica de transporte de luz 3D durante o treinamento, a pele é renderizada como um plástico opaco e refletor de luz, em vez de tecido orgânico.
- Prompts negativos restritivos demais: Cortar palavras como falhas ou rugas remove os detalhes finos necessários. O modelo reage adotando um visual excessivamente liso e filtrado.
A anatomia de um prompt de retrato de nível profissional
Você digita uma longa descrição de si mesmo de terno, clica em gerar e ainda recebe um rosto plastificado sob luzes de estúdio que nunca existiram. Adjetivos aleatórios falham porque deixam o modelo livre para inventar. A engenharia estruturada de prompts de retrato com IA resolve isso.
Divida cada solicitação em quatro módulos fixos: Sujeito, Ambiente, Configurações da câmera e Iluminação. Cada módulo restringe uma variável que o gerador, de outra forma, inventaria.
A fórmula modular
- Sujeito: idade, expressão, roupas e marcos faciais exatos
- Ambiente: distância e material do fundo
- Configurações da câmera: distância focal, abertura e comportamento do sensor
- Iluminação: direção, suavidade e temperatura de cor
Empilhe-os nessa ordem. Assim, o modelo trata o prompt como um briefing fotográfico, e não como uma lista de desejos criativos.
Modelo pronto para copiar e colar em prompts de imagens fotorrealistas com IA
plaintext1[Professional Subject Description], wearing [Clothing], [Specific Lighting Setup], shot on [Camera Model/Lens], [Photography Style], raw photo, highly detailed skin texture, 35mm film grain.
Exemplo:
plaintext140-year-old woman, slight closed-mouth smile, wearing charcoal blazer over white shirt, soft north-facing window light with gentle fall-off, shot on Canon EOS R5 with 85mm f/1.8 lens, commercial headshot style, raw photo, highly detailed skin texture, 35mm film grain.
Esse está entre os melhores prompts de headshot com IA porque substitui palavras vagas de qualidade por comportamento de câmera mensurável. Os concorrentes costumam parar em “adicione poros”. Raramente mostram como trocar apenas a distância focal muda a renderização da pele ou como o grão de filme disfarça a suavidade residual.
Vamos colocar isso em prática:
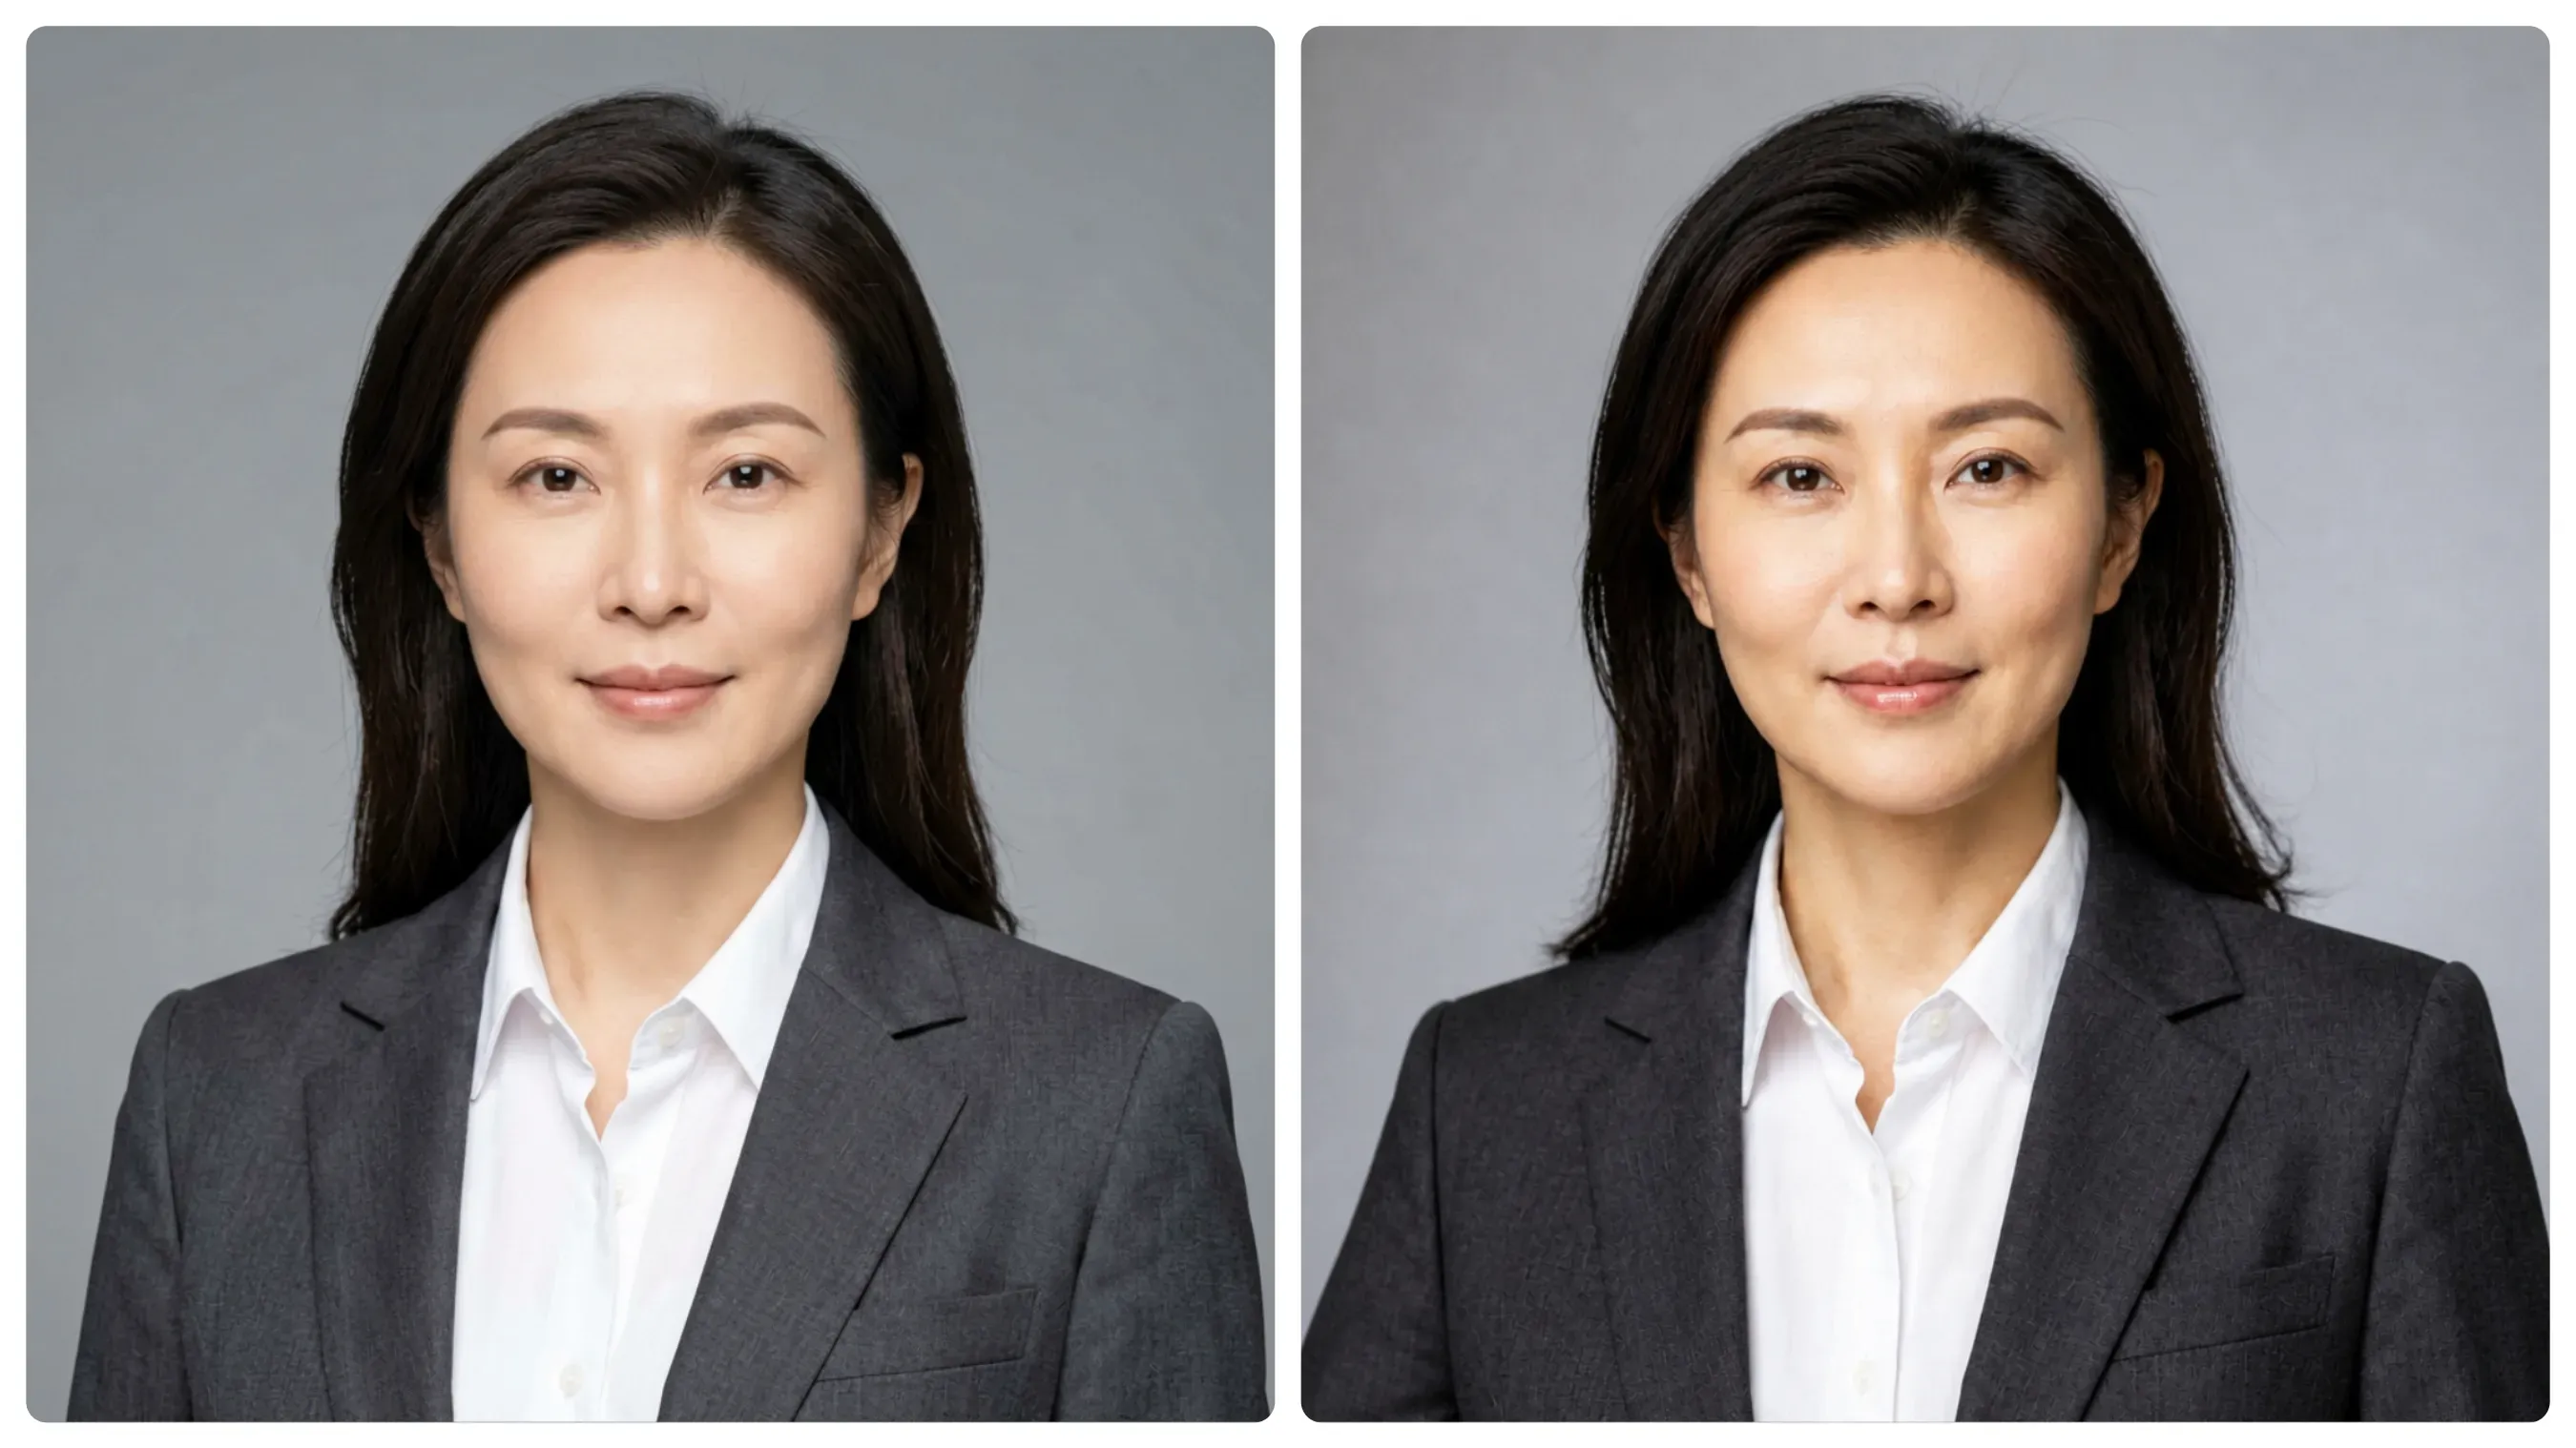
Comparação de headshots com identidade consistente. À esquerda: o prompt genérico gera uma pele lisa e plastificada com iluminação de estúdio chapada. À direita: os parâmetros ópticos nativos de câmera restauram microporos orgânicos, queda de luz direcional e uma dinâmica de cabelo realista.
Substituir jargões por parâmetros ópticos muda diretamente a forma como o modelo de difusão trata a pele e a luz. Em vez da pele cerosa e do flash frontal uniforme da imagem à esquerda, o prompt da direita cria uma luz de janela direcional com transições suaves de sombra. Ele também restaura a microtextura fina das bochechas e os fios de cabelo soltos, fazendo com que a pessoa pareça fotografada em locação, e não renderizada.
Adaptando a fórmula a diferentes climas profissionais
Um headshot corporativo nítido exige uma lógica óptica completamente diferente da de um retrato editorial para um fundador de tecnologia. Em vez de mudar a estrutura básica do seu prompt, ajuste o ambiente físico e a queda de luz ao tom do setor:
Corporativo e executivo
- Base visual: alto contraste estrutural, fundo com queda profunda, separação limpa em relação aos elementos arquitetônicos.
- Lógica de iluminação: luz direcional entre dura e suave, com uma sutil luz de cabelo/contorno para definir os ombros contra interiores escuros.
- Modelo de prompt:
[Subject], [confident/authoritative posture], wearing [tailored formal attire], set in [high-rise office/architectural interior] with softly blurred background, illuminated by [45-degree key light] and [discrete rim lighting], shot on [85mm f/2.0 lens], natural micro-pore detail, raw photo.
Para ver essa fórmula em ação, testamos em uma base de estúdio simples. Usando um único retrato com fundo branco como semente de ancoragem, rodamos a variação do prompt no ChatGPT Image 2 para trocar a roupa, o fundo e a física da câmera, mantendo travada a identidade da pessoa.
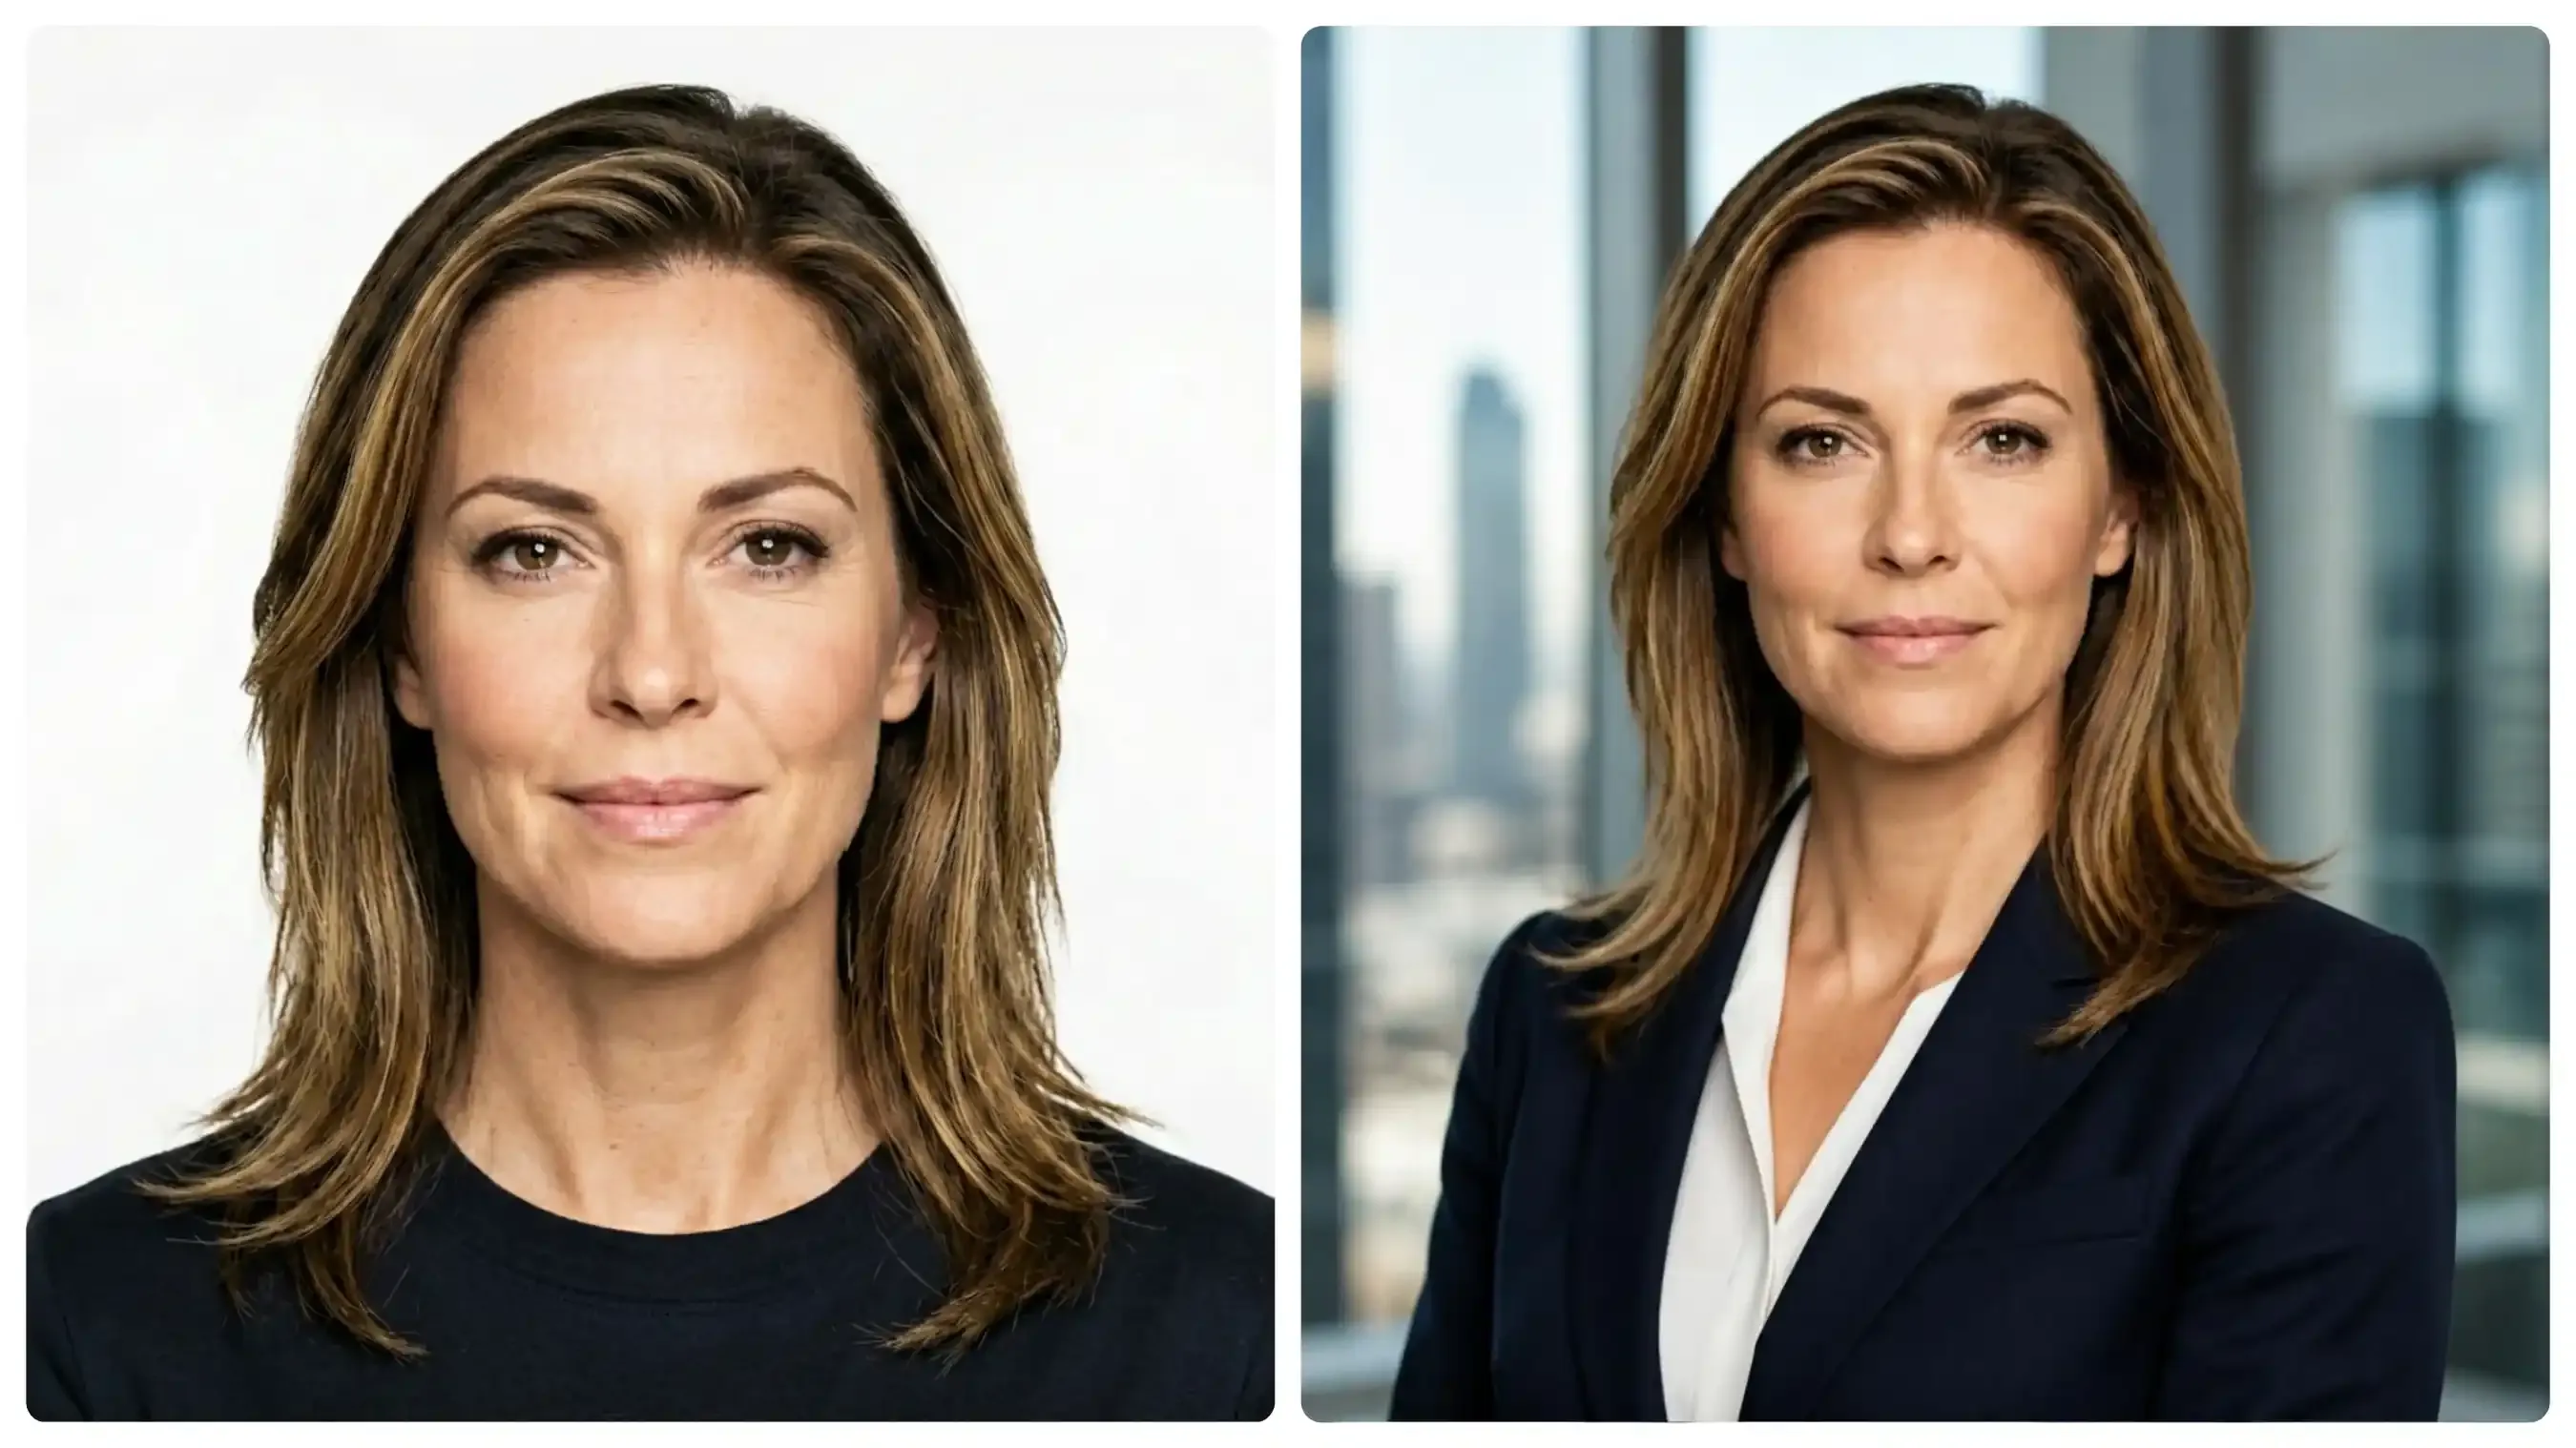
À esquerda: semente de ancoragem de estúdio simples, com luz frontal chapada. À direita: variação do prompt corporativo aplicando uma virada de postura de 15 graus, blazer azul-marinho, luz principal a 45 graus e um fundo de escritório desfocado.
Comparando os dois quadros, as mudanças físicas são evidentes. Girar levemente os ombros elimina a pose rígida, estilo foto de passaporte, da imagem original. A luz a 45 graus cria uma sombra natural ao longo da linha do maxilar, e o fundo de escritório desfocado dá ao blazer azul-marinho uma separação limpa, mantendo o rosto dela totalmente reconhecível.
Fundador e líder criativo
- Base visual: paletas de cores discretas, luz ambiente difusa e uniforme, texturas estruturais minimalistas (concreto, parede fosca).
- Lógica de iluminação: luz ampla de janela voltada para o norte, nenhuma sombra pesada, reflexos especulares de baixo contraste.
- Modelo de prompt:
[Subject], [approachable/relaxed expression], optional [minimalist eyewear/accessory], wearing [casual fine-knit or structured monochrome top], set against [seamless matte concrete or textured studio wall], illuminated by [broad diffused window daylight], shot on [85mm f/1.8 lens], authentic skin micro-texture, raw photo.
Em seguida, trocamos a iluminação corporativa de alto contraste por um setup de estúdio minimalista, mantendo a mesma foto de ancoragem simples para testar a estética de fundador:
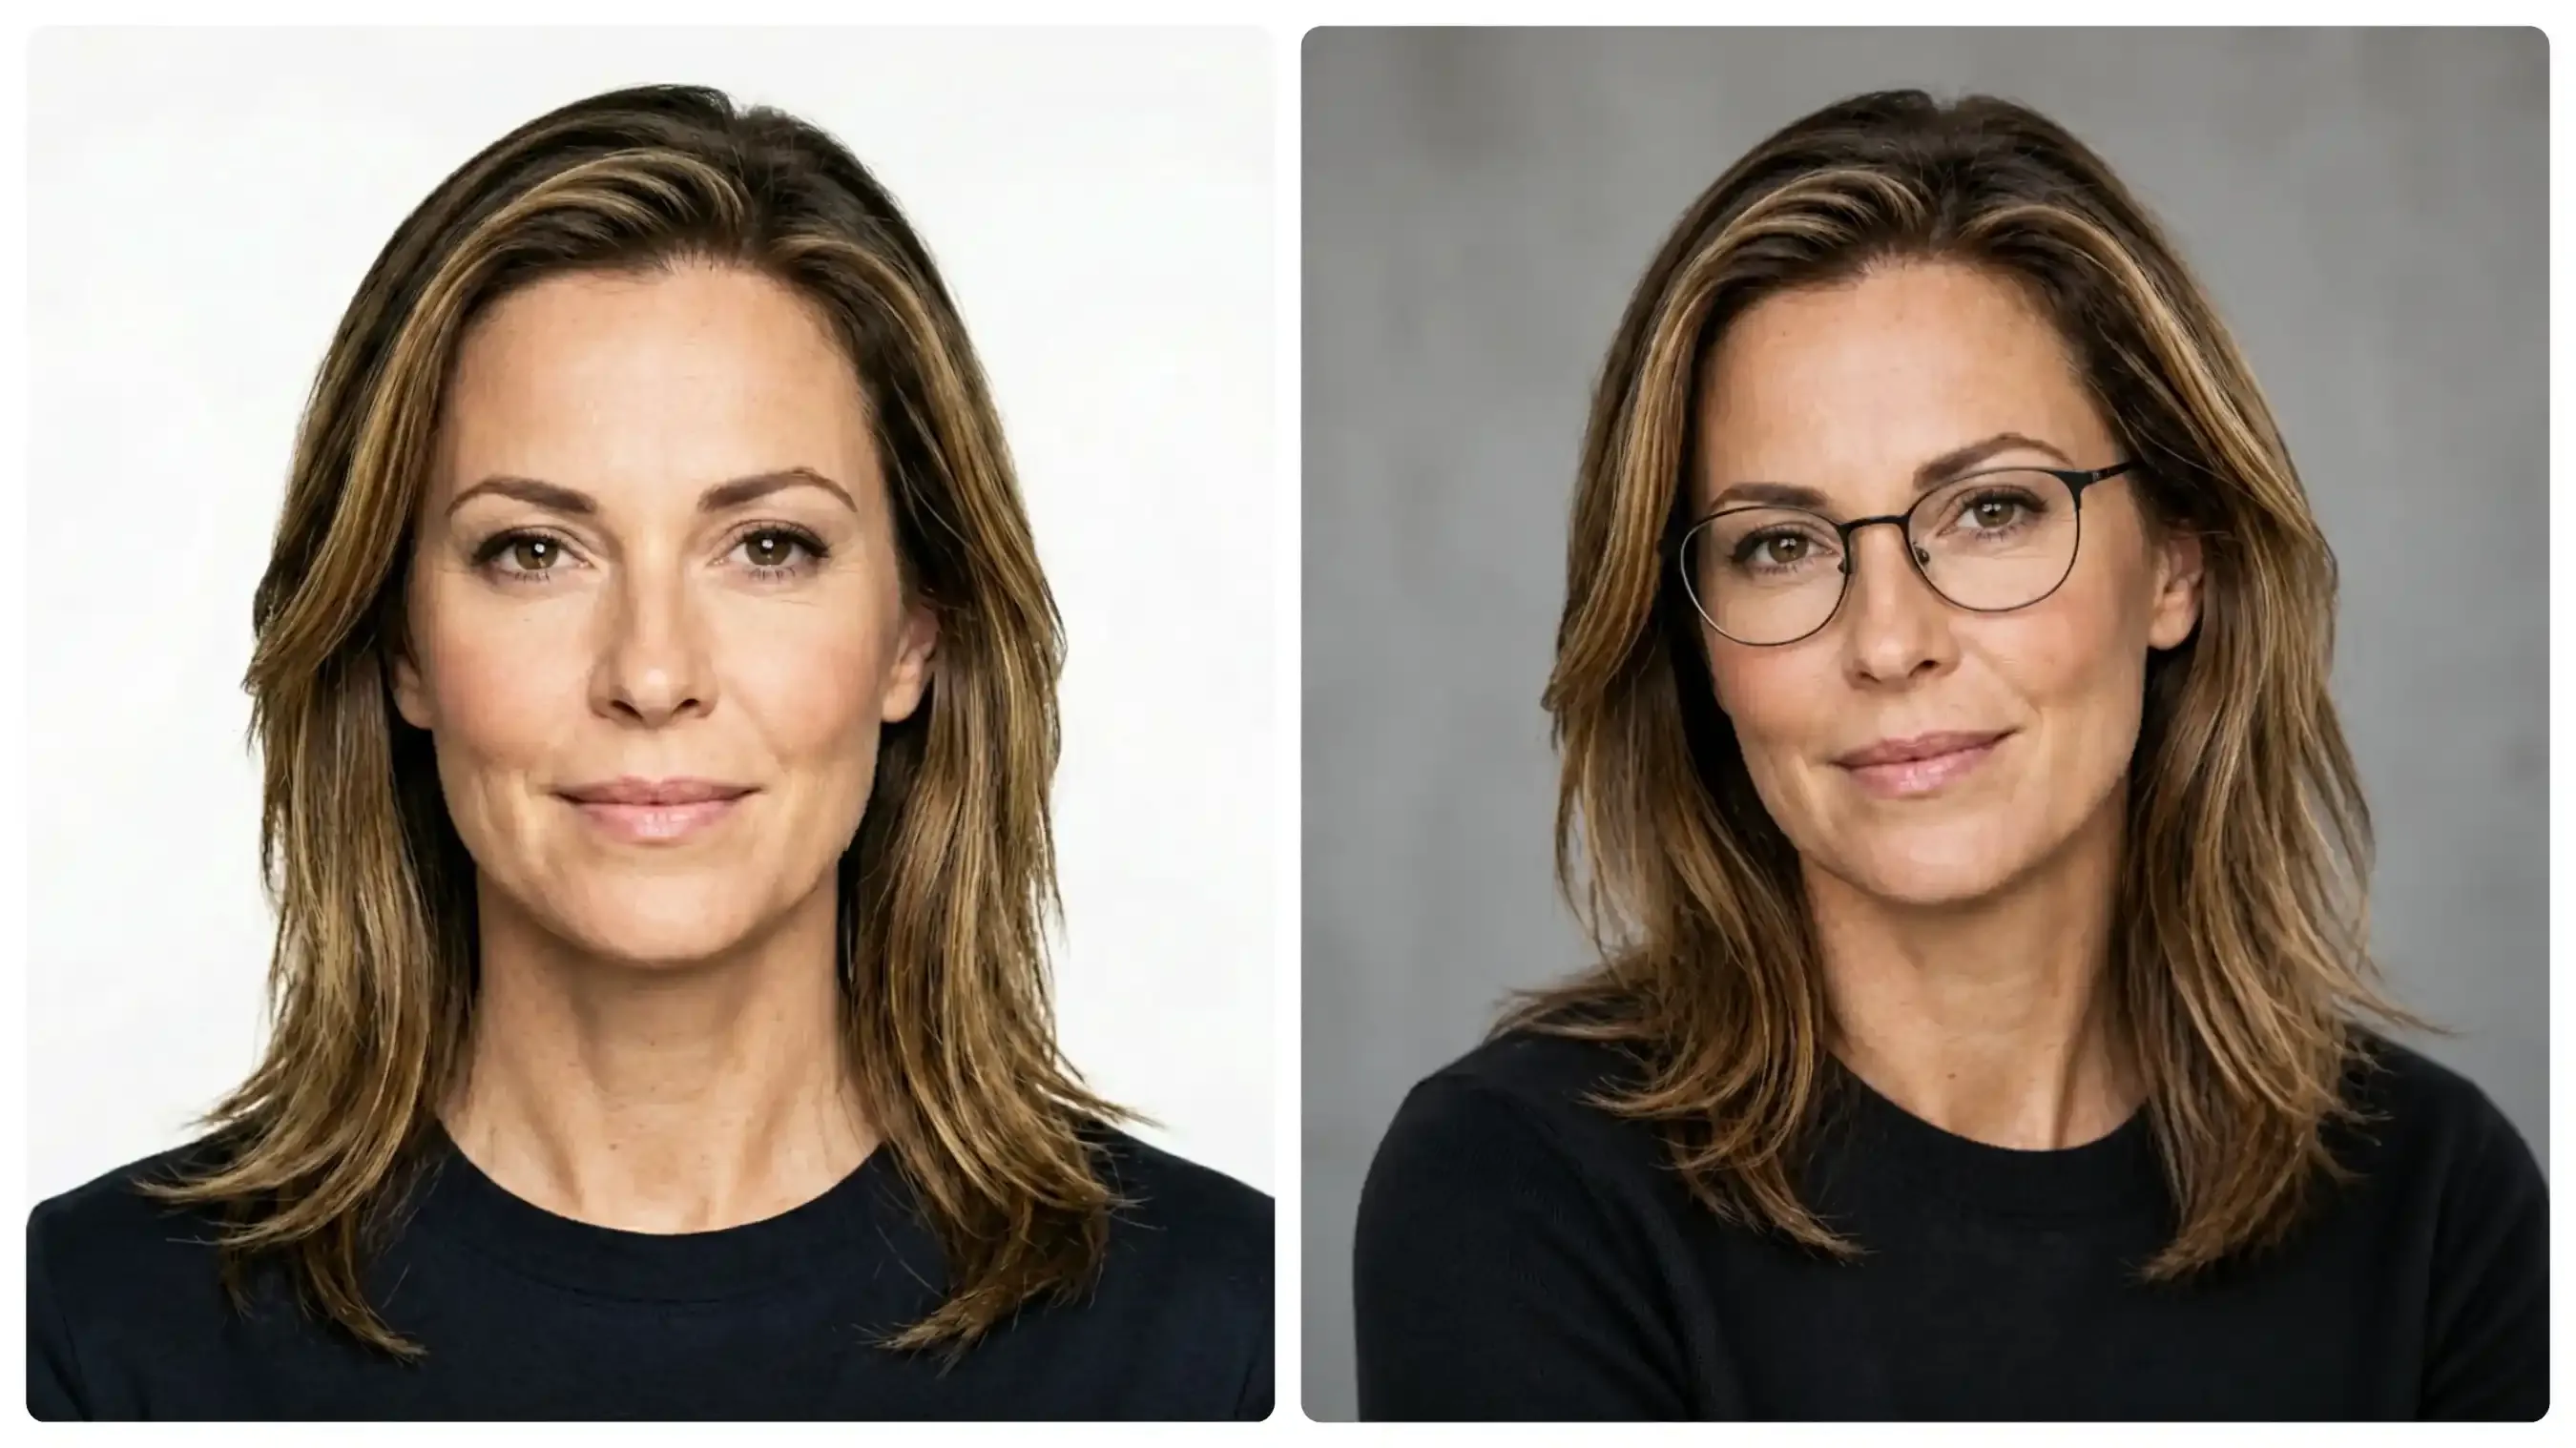
Adaptação da foto de ancoragem (à esquerda) em um retrato de fundador criativo (à direita), com uma malha fina preta de gola careca, óculos de armação metálica fina e luz suave de janela contra uma parede fosca.
A luz suave elimina o contraste duro sem apagar os traços dela. Os óculos de armação fina e a malha preta de gola careca dão personalidade ao visual, enquanto o fundo cinza uniforme mantém o foco no rosto.
Em locação e thought leader
- Base visual: campo de visão mais amplo, elementos contextuais do ambiente, realces direcionais quentes.
- Lógica de iluminação: contraluz natural externa (golden hour) equilibrada com um sutil preenchimento frontal; leve flare óptico.
- Modelo de prompt:
[Subject], [candid half-body framing], wearing [unstructured smart-casual jacket], set against [softly blurred urban street or architectural background], illuminated by [low-angle golden hour backlight] with [soft front fill light], shot on [50mm f/1.8 lens], natural eye catchlights, raw photo.
Por fim, testamos o prompt em ambiente externo, substituindo o fundo neutro por um cenário quente de rua urbana:
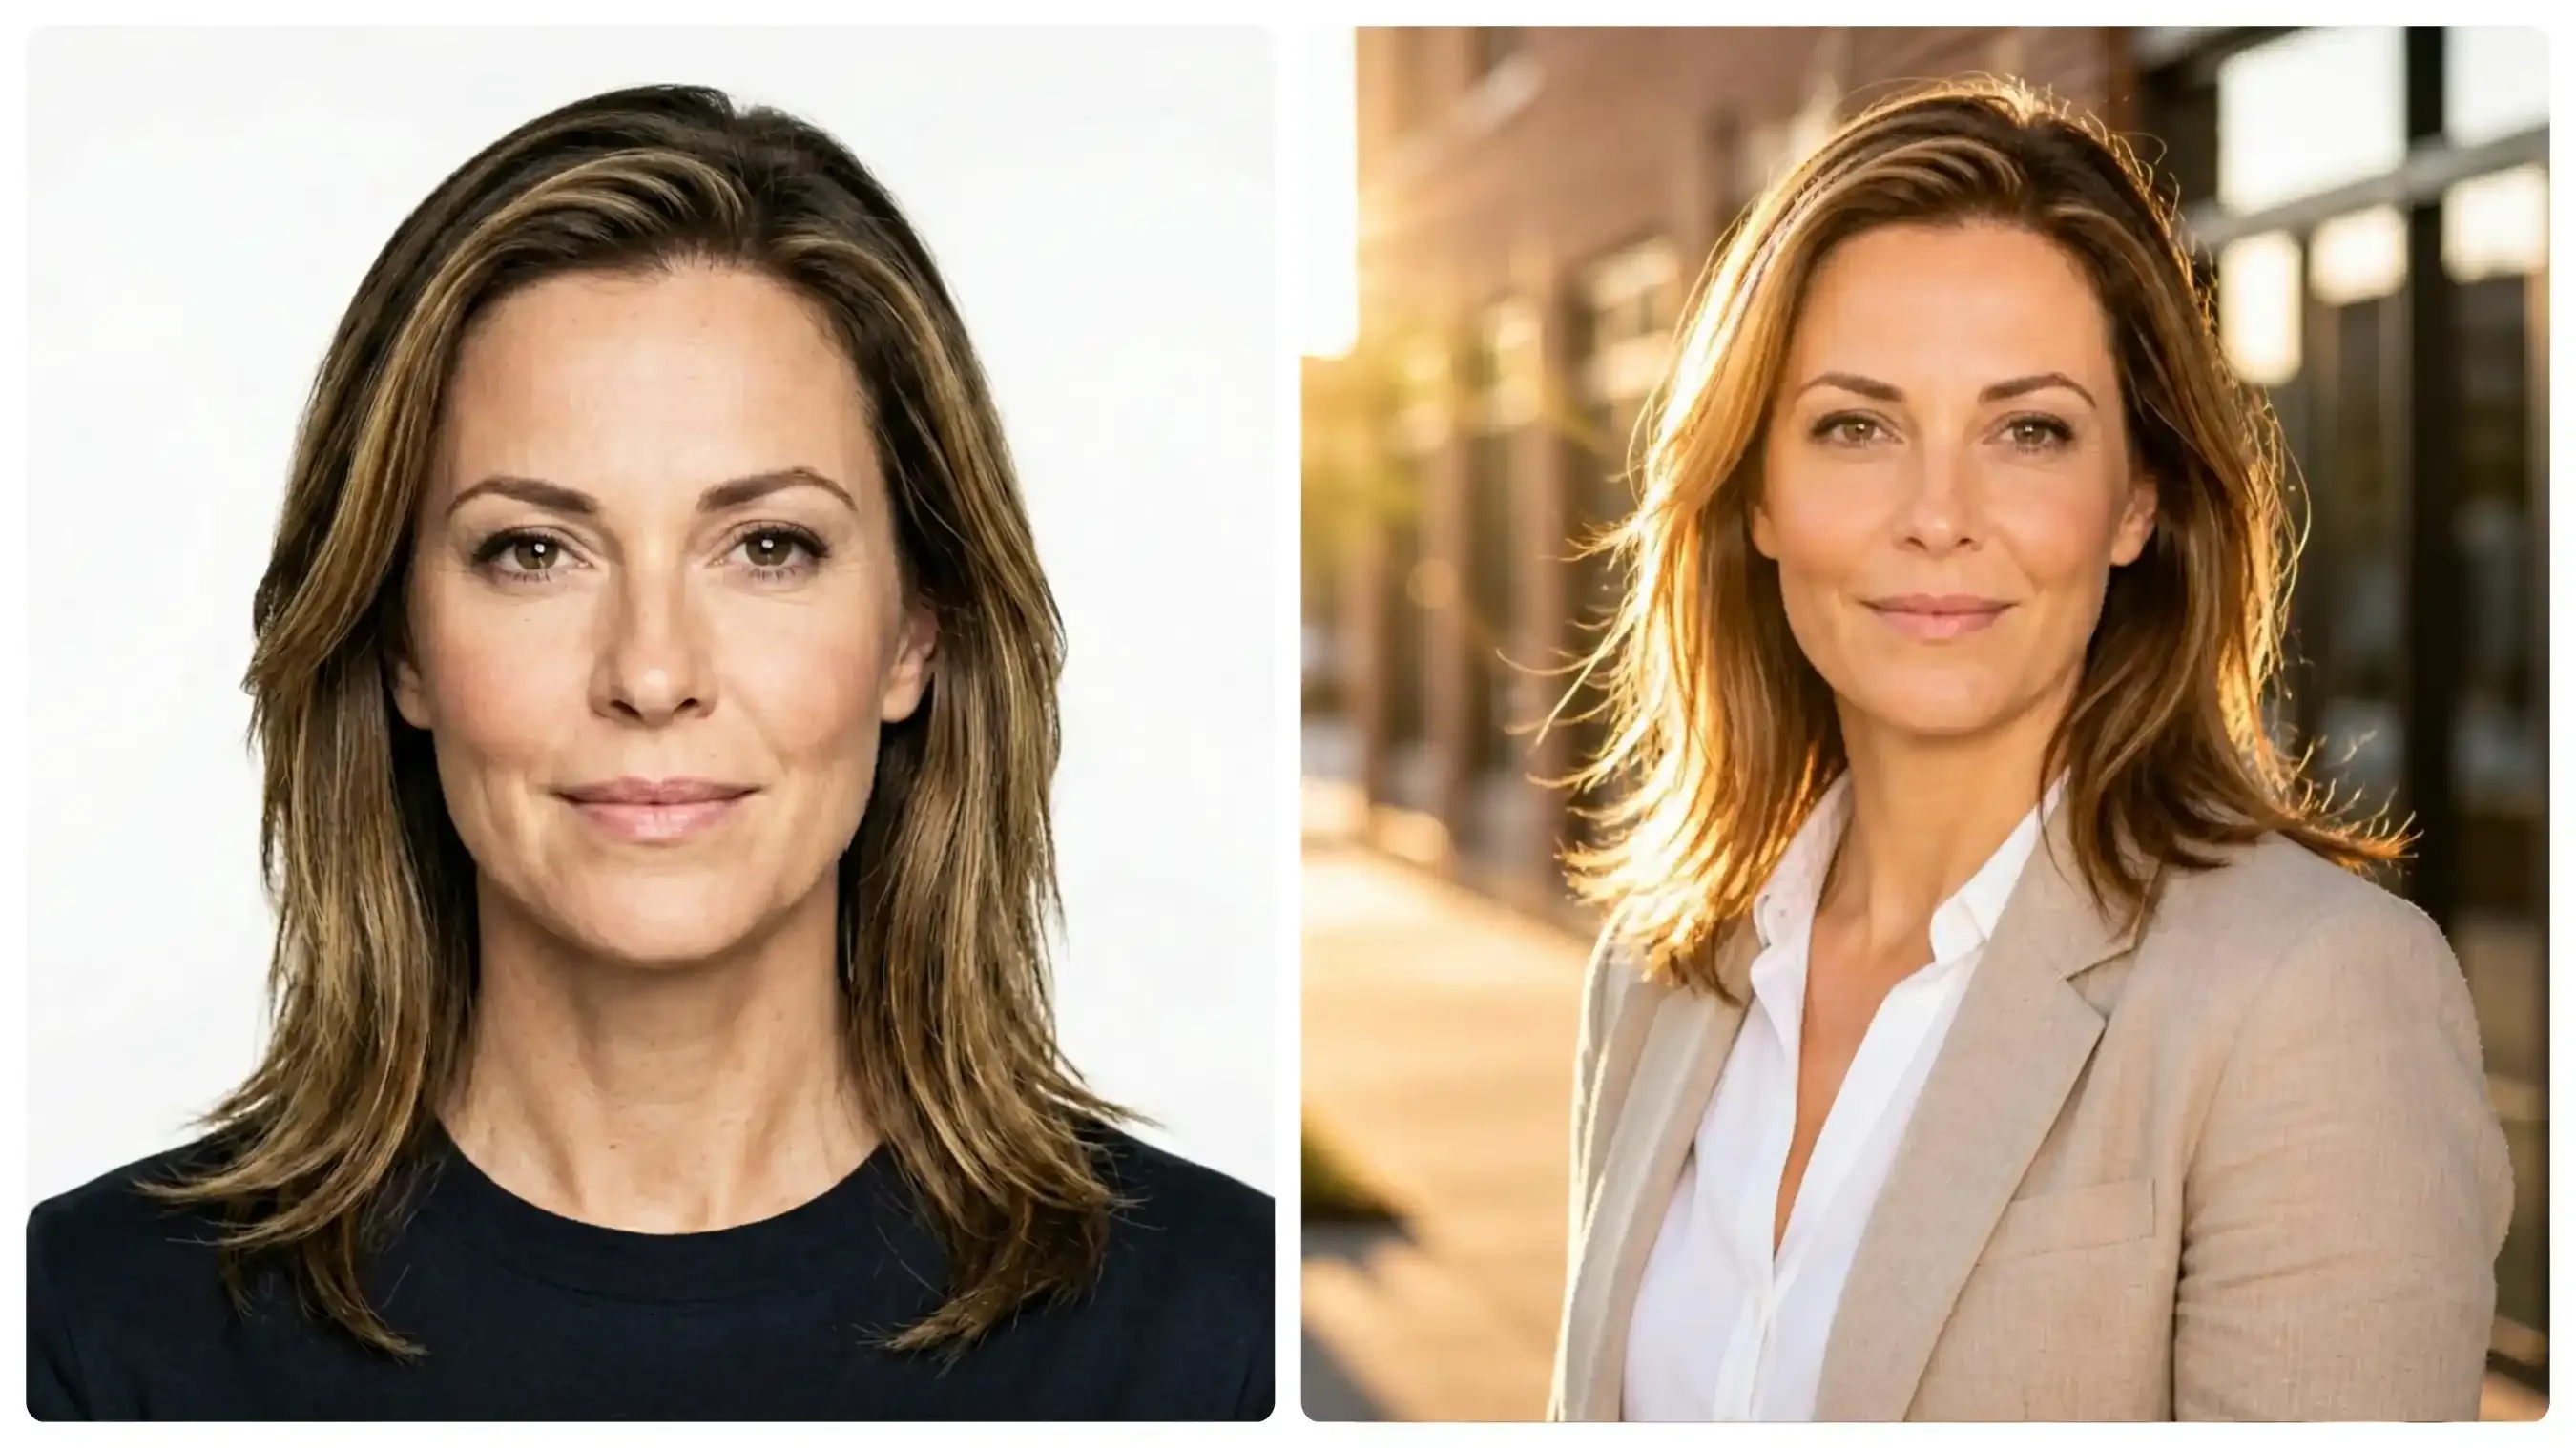
Transformação da foto básica de fundo branco (à esquerda) em um retrato externo (à direita), com um paletó de linho bege, enquadramento de lente 50mm e o sol quente do fim da tarde.
Fotografar com uma lente 50mm ao ar livre traz o fundo da rua sem poluir o enquadramento. O sol do fim da tarde ilumina a parte de trás do cabelo dela, e o blazer de linho bege sobre a camisa branca combina com um estilo claro de locação, mantendo o rosto nítido.
Modificadores técnicos para um comportamento autêntico de lente e profundidade
Você especifica “professional headshot” e ainda recebe um rosto que parece esticado ou achatado, porque o modelo inventa a própria distância focal. Palavras de estilo sozinhas nunca corrigem a perspectiva. Termos técnicos de fotografia, sim.
Modelos como Flux e Seedream tratam certas expressões de lente e abertura como sinais de referência, e não como linguagem decorativa. Inseri-las força um comportamento óptico consistente, em vez de uma geometria facial aleatória.
A melhor configuração de lente para retratos com IA
Duas distâncias focais produzem efeitos opostos no mesmo rosto:
| Lente | Efeito no rosto | Comportamento do fundo | Melhor uso |
| 85mm | Compressão leve, traços arredondados, proporções favorecedoras | Bokeh suave e cremoso | Clássico de cabeça e ombros |
| 35mm | Campo mais amplo, leve alongamento nas bordas se o sujeito estiver perto | Mais contexto de ambiente, menos isolamento | Retratos ambientais |
Um prompt com 85mm mantém natural a relação entre nariz e orelha. Um prompt com 35mm puxa o fundo para dentro do quadro e pode alargar sutilmente o rosto, a menos que você também controle a distância.
Profundidade de campo em IA e configurações fotográficas de f/stop
Combine a lente com um f-stop explícito.
f/1.8ouf/2.0cria uma profundidade de campo rasa na IA e um forte efeito bokeh, que suaviza as bordas do fundo.f/5.6ou maior mantém mais nítidos o rosto e o ambiente.
Exemplo de string que os modelos reconhecem:
plaintext1shot on 85mm lens at f/1.8, shallow depth of field, natural bokeh, subject isolation
Essa combinação reduz de forma consistente o visual de “tudo em foco” que marca muitos retratos sintéticos.
Pedir "imperfeição" no prompt para alcançar realismo de pele
Você gera um headshot limpo e a pele continua parecendo plástico polido sob as luzes de estúdio. O modelo filtrou cada poro e cada linha fina porque a maior parte dos dados de treinamento premia a suavidade. Rostos reais carregam ruído biológico. Você precisa forçar o modelo a devolvê-lo.
Refinamento da textura de pele em IA na prática
Prompts positivos sozinhos raramente restauram a textura. Combine-os com pistas biológicas explícitas:
- visible natural skin pores
- subtle under-eye texture
- mild freckles or uneven tone
- fine facial hair where appropriate
- soft specular highlights on skin oil
Esses termos afastam os traços faciais realistas na IA do acabamento de porcelana padrão.
Prompts negativos que corrigem a pele gerada por IA
Os prompts negativos funcionam como uma camada de restrição, forçando o modelo a se afastar dos padrões de "embelezamento" aprendidos em datasets sintéticos. Dê peso aos defeitos mais comuns para que o modelo os evite ativamente:
plaintext1(plastic skin:1.5), (airbrushed:1.4), (smooth porcelain:1.3), (waxy skin:1.3), (overly smooth:1.2)
Os pesos mais altos nos termos plastic e airbrushed produzem a correção mais forte nos modelos atuais. Pesos menores costumam deixar um brilho residual.
| Tipo de prompt | Frase de exemplo | Efeito na pele |
| Positivo | natural skin pores, subsurface detail | Adiciona microtextura |
| Positivo | slight skin imperfections, fine lines | Quebra a uniformidade |
| Negativo | (plastic skin:1.5) | Suprime o aspecto de cera |
| Negativo | (airbrushed:1.4) | Reduz o acabamento de filtro de beleza |
Combine os dois lados no mesmo prompt. Um sem o outro geralmente falha.
Dicas: O realismo verdadeiro exige abraçar a assimetria. Os modelos assumem por padrão uma simetria bilateral perfeita, que o olho humano reconhece na hora como artificial. Para contornar isso, inclua palavras-chave como slight asymmetrical facial expression ou uneven natural lighting.
Solucionando artefatos comuns em headshots com IA
Mesmo com um prompt estruturado e nativo de câmera, vieses individuais de cada modelo ainda podem causar erros visuais sutis. Em vez de gerar tudo do zero, use estes ajustes direcionados para depurar seus resultados.
Matriz de correção rápida para artefatos comuns
| Artefato e causa | Como corrigir (ajuste de prompt) |
| Pele de "figura de cera" (causa: o modelo recorre a médias de beleza) | Negativo: (plastic skin:1.4), (airbrushed:1.3); Positivo: subtle specular highlights, micro-pores |
| Olhos mortos / estrábicos (causa: falta de luz óptica ou de contexto de olhar) | Positivo: directional key light, natural iris details;Negativo: (crossed eyes:1.4), (asymmetrical irises:1.3) |
| Iluminação chapada, tipo CGI (causa: fonte de luz ambiente indefinida) | Especifique direção e queda de luz: soft window light from the left, gentle shadow fall-off |
| Traços excessivamente nítidos (causa: excesso de prompt para "8k/detailed") | Remova 8k / hyper-detailed; adicione mecânica óptica: shot on 85mm lens, organic film grain |
O método de depuração por "peso de prompt"
Quando um único elemento (como a textura da pele ou a iluminação) domina ou estraga o headshot, ajuste o peso desse token em vez de reescrever o prompt inteiro:
- Para reforçar texturas sutis: coloque a expressão-alvo entre parênteses com um leve aumento de peso:
(visible natural skin pores:1.2). - Para atenuar estilos dominantes: reduza o peso das palavras descritivas dominantes:
(studio lighting:0.8).
Dica pro: Altere apenas uma configuração por vez durante a depuração. Ajustar ao mesmo tempo a distância focal da lente e a iluminação impede você de descobrir qual correção funcionou.
Escolhendo o modelo certo para seus headshots na Atlas Cloud
Um prompt que gera um retrato corporativo limpo em um modelo pode virar um personagem 3D superprocessado em outro. Isso se resume a como cada arquitetura de imagem interpreta especificações técnicas versus linguagem natural.
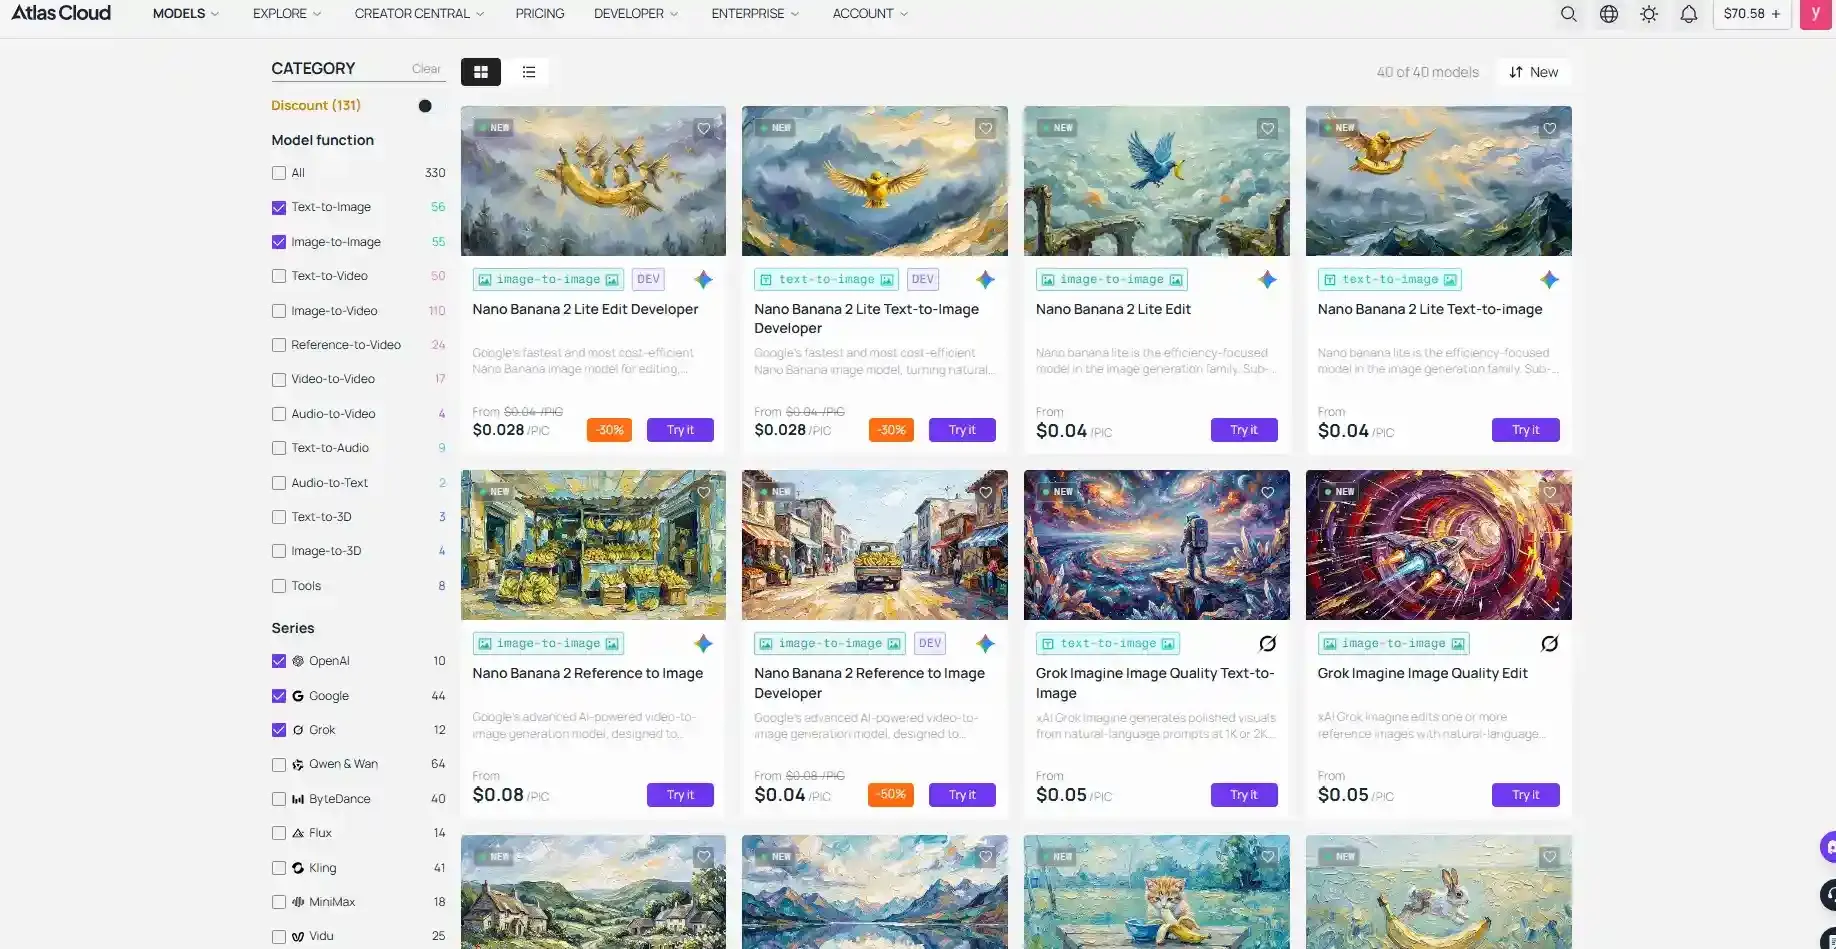
Ao gerar headshots pela Atlas Cloud, você tem acesso a vários modelos de base. Para obter resultados consistentes sem desperdiçar créditos de API em tentativa e erro, adapte sua estratégia de prompt ao modelo específico que escolher:
- Para precisão técnica (Flux / Seedream na Atlas Cloud):
Esses modelos tratam as especificações de câmera como restrições físicas rígidas. Concentre-se fortemente em tokens fotográficos explícitos (85mm f/2.0, luz principal a 45 graus, distância focal) e evite adjetivos descritivos vagos.
- Para raciocínio sobre cenas naturais (GPT Image 2 via Atlas Cloud):
Essa arquitetura é excelente em entender relações espaciais e contexto ambiental. Escreva cenas naturais e descritivas ("a professional seated near floor-to-ceiling windows with soft daylight") em vez de apenas empilhar metadados ópticos.
- Para renderizações rápidas de perfil (Nano Banana 2 na Atlas Cloud):
Ideal para fotos corporativas limpas, com um único sujeito. Construir um fluxo eficaz de gerador gratuito de headshots com IA para o LinkedIn exige manter os prompts concisos e focados no objeto, sem sobrecarregar os parâmetros de iluminação.
Além do prompt: refinamentos essenciais de fluxo de trabalho
Você acerta o prompt perfeito, gera um ótimo headshot e ainda percebe bordas suaves demais, olhos desalinhados ou textura plastificada residual em resolução máxima. A engenharia de prompt tem um teto. A etapa final é um pós-processamento deliberado.
Pós-processamento de headshots com IA que realmente funciona
Duas técnicas fecham a lacuna que resta entre uma boa geração e uma imagem profissional utilizável: upscaling e in-painting.
- O upscaling restaura a resolução localizada que as saídas brutas do modelo deixam borrada. Passe as imagens por um upscaler focado em estrutura facial, com configurações conservadoras de realce de detalhe. Isso devolve poros de pele limpos e dá nitidez aos detalhes finos sem distorcer a simetria do rosto.
- O in-painting de retratos com IA lida com defeitos localizados. Mascare a área problemática e regenere apenas aquela região, travando o restante do rosto. Esse é o principal método de correção de traços faciais em IA.
Como corrigir olhos distorcidos em imagens geradas por IA
Use ferramentas de in-painting para mascarar especificamente a área ocular e regenere com um prompt curto e direcionado, como “natural eye shape, realistic iris detail, matching catchlights”. Mantenha o restante do rosto mascarado para que a identidade e a iluminação permaneçam consistentes. Várias passagens curtas costumam superar uma única regeneração agressiva.
| Etapa | Foco da ferramenta | Resultado típico |
| Upscale | Recuperação de detalhes faciais | Poros mais nítidos, bordas mais limpas |
| In-painting nos olhos | Regeneração local | Formato e simetria corrigidos |
| In-painting na pele | Passagem de textura | Menos suavidade residual |
Melhor preservação da identidade: faça primeiro o upscale, para a fidelidade geral, e depois o in-painting direcionado para os defeitos restantes. Publique sequências lado a lado que mostrem a mesma imagem antes e depois de cada etapa, incluindo a máscara exata e o prompt secundário usados. Esses dados práticos de fluxo de trabalho preenchem uma lacuna clara de conteúdo e fortalecem a autoridade temática.
Construindo seu fluxo de trabalho fotorrealista: o plano final
Conseguir headshots realistas com IA exige mais do que um prompt de sorte. É preciso um processo técnico cuidadoso, passo a passo, que conecta a óptica real de câmera a um trabalho de edição inteligente.
Para manter a consistência em todo o seu fluxo de produção, siga esta sequência mestre de execução:
- Monte o briefing: construa seu prompt inicial com o framework de 4 módulos nativo de câmera (Sujeito, Ambiente, Óptica, Iluminação). Substitua todos os jargões subjetivos de qualidade por distâncias focais e fontes de luz precisas.
- Isole e depure: se o modelo introduzir artefatos sintéticos (pele cerosa, olhos distorcidos ou iluminação chapada), ajuste os pesos de tokens individuais ou troque as especificações ópticas antes de rodar o prompt inteiro novamente.
- Recupere o microdetalhe: passe o resultado final por um upscaler dedicado e com consciência de estrutura para restaurar a microtextura em nível de poro perdida na geração base.
- In-painting direcionado: mascare os casos limítrofes restantes—especificamente a simetria da íris e os catchlights—e regenere localmente usando strings de restrição curtas e altamente focadas.
Substituir enfeites descritivos por óptica de câmera explícita é o que transforma gerações digitais chapadas em fotografias autênticas.





